Author: hello@wash-o-rama.com

  • How Long Do Shocks Last

    How Long Do Shocks Last

    You can expect your shocks to last between 50,000 and 100,000 miles, though this varies with your vehicle type, driving style, and maintenance.

    Rough terrain, heavy loads, and aggressive driving wear shocks faster, while regular inspections help catch issues early. Different vehicles, like trucks or luxury cars, affect shock longevity due to their design and usage.

    If you want to understand how to spot wear signs, extend shock life, and select replacements, keep exploring these key insights.

    Key Takeaways

    • Shocks typically last between 50,000 to 100,000 miles depending on quality and usage conditions.
    • Gas-charged shocks may offer slightly better durability compared to standard hydraulic shocks.
    • Rough terrain, heavy loads, and aggressive driving significantly reduce shock lifespan.
    • Regular inspections for leaks, uneven tire wear, and excessive bouncing help identify worn shocks early.
    • Proper installation and maintenance extend shock life and improve vehicle stability and comfort.

    How Long Do Shocks Typically Last?

    While the lifespan of shocks can vary based on driving conditions and vehicle type, they typically last between 50,000 and 100,000 miles. You should understand that the shock lifespan depends on factors like shock design, materials, and manufacturing quality.

    On average, the average durability of standard hydraulic shocks aligns with this range, providing consistent performance and ride comfort. Gas-charged shocks may offer improved durability but still fall within similar mileage parameters.

    Monitoring shock lifespan involves regular inspections for leaks, diminished damping, and uneven tire wear. By adhering to manufacturer recommendations and maintenance schedules, you can maximize shock lifespan and guarantee ideal vehicle handling.

    What Makes Shocks Wear Out Faster? (Includes Driving Habits)

    Understanding the typical lifespan of shocks sets the stage for recognizing factors that accelerate their wear. Your driving conditions greatly impact shock durability; rough roads and frequent potholes cause faster deterioration.

    Exceeding your vehicle’s recommended load capacity stresses shocks, leading to premature failure. Aggressive driving, such as rapid acceleration and hard braking, also contributes to quicker wear.

    Factor Effect on Shock Wear
    Rough terrain Increases shock wear rate
    Overloading Exceeds load capacity, strains shocks
    High-speed driving Amplifies impact forces
    Frequent stops/starts Causes rapid shock cycling
    Poor maintenance Leads to corrosion and leaks

    How Does Vehicle Type Affect Shock Lifespan?

    Because different vehicles face varying demands, the type of vehicle you drive directly influences how long your shocks will last.

    For instance, SUVs prioritize durability to handle off-road conditions, which means their shocks are often built to endure heavier impacts but may still wear faster due to rough terrain exposure.

    Trucks experience increased stress on shocks because of truck weight and frequent cargo loads, accelerating wear.

    Sports cars emphasize performance and precise handling, so their shocks are tuned for responsiveness but may have shorter lifespans due to stiffer suspensions and aggressive driving.

    Luxury vehicles focus on comfort, using shocks designed to absorb minor vibrations and maintain smooth rides, potentially extending shock lifespan under normal conditions.

    Understanding your vehicle type helps you anticipate shock maintenance needs accurately.

    Signs Your Shocks Need Replacing

    If you notice uneven tire wear, it’s a clear sign your shocks aren’t distributing weight properly.

    You might also feel excessive vehicle bouncing, indicating worn shock absorbers.

    Additionally, longer braking distances can result from reduced shock performance, compromising your safety.

    Uneven Tire Wear

    When your shocks start to wear out, you’ll often notice uneven tire wear as an early warning sign. Worn shocks fail to maintain consistent tire contact with the road, causing irregular tread wear patterns.

    This uneven wear can mimic tire alignment issues but stems from compromised shock absorption, leading to excessive bouncing and poor traction.

    After shock installation, it’s essential to check and correct tire alignment to prevent accelerated tire degradation.

    Ignoring uneven tire wear not only reduces tire lifespan but also impacts vehicle handling and safety.

    Regularly inspect your tires for signs of cupping, scalloping, or patchy wear, which indicate your shocks may no longer be performing effectively.

    Addressing shock wear promptly guarantees ideal tire performance and vehicle stability.

    Excessive Vehicle Bouncing

    One of the most noticeable signs that your shocks need replacing is excessive vehicle bouncing. When shocks wear out, they lose their ability to dampen the suspension’s oscillations, resulting in pronounced bouncing symptoms after hitting bumps or uneven surfaces.

    You’ll feel your vehicle continue to oscillate vertically longer than usual, which directly affects ride comfort and stability. This excessive bouncing compromises your control, especially during cornering or abrupt maneuvers, increasing safety risks.

    If you notice that your car’s body bounces multiple times after a single bump or that the ride feels unusually harsh or floaty, it’s a clear indicator that your shocks are no longer functioning properly.

    Replacing worn shocks restores ideal damping, improving ride comfort and vehicle handling.

    Longer Braking Distance

    Although worn shocks might not seem directly related to braking, they greatly increase your vehicle’s stopping distance. When shocks degrade, they reduce tire contact with the road, impairing braking performance and raising significant safety concerns.

    You might notice your car taking longer to stop, especially on wet or uneven surfaces.

    Shock Condition Effect on Braking Distance
    New Ideal stopping distance
    Moderately Worn Increased by 10-15%
    Severely Worn Increased by 25% or more

    This table illustrates how braking distance worsens as shocks wear out. Maintaining your shocks in good condition guarantees better brake efficiency and reduces risks during emergency stops. Don’t ignore longer braking distances; it’s a clear sign your shocks need replacing.

    How To Extend The Life Of Your Shocks

    Regularly inspecting and maintaining your shocks can greatly extend their lifespan. Effective shock maintenance involves checking for leaks, worn mounts, and uneven tire wear.

    Regular inspections and maintenance, like checking for leaks and worn mounts, significantly prolong shock lifespan.

    Additionally, adopting proper driving techniques plays an essential role in preserving shock integrity.

    To maximize shock longevity, focus on these key practices:

    • Avoid aggressive driving behaviors such as rapid acceleration, hard braking, and sharp turns that stress shock absorbers.
    • Regularly inspect suspension components for damage or wear and replace parts promptly.
    • Maintain proper tire pressure to reduce unnecessary strain on shocks and suspension.

    What To Expect When Replacing Shock Absorbers

    You’ll notice signs like excessive bouncing or uneven tire wear indicating worn shocks.

    The replacement process involves safely lifting the vehicle, removing the old shocks, and installing new ones with proper torque specifications.

    After replacement, you’ll need to monitor alignment and suspension components to guarantee peak performance and longevity.

    Signs Of Worn Shocks

    Anyone driving with worn shocks will notice distinct changes in vehicle handling and comfort. Reduced shock performance leads to compromised stability, making your ride less controlled and more unpredictable.

    Paying attention to these signs helps you prioritize shock maintenance before issues worsen.

    Key indicators include:

    • Excessive bouncing after bumps, revealing weakened damping capacity
    • Unusual noises like clunking or rattling, indicating internal component wear
    • Uneven tire wear from inconsistent road contact and suspension response

    Recognizing these symptoms early guarantees you address shock absorber deterioration promptly, maintaining peak vehicle dynamics and safety.

    Ignoring them can escalate damage, increasing repair costs and reducing ride quality.

    Regular inspections focused on these signs are essential for sustaining shock performance and prolonging component life.

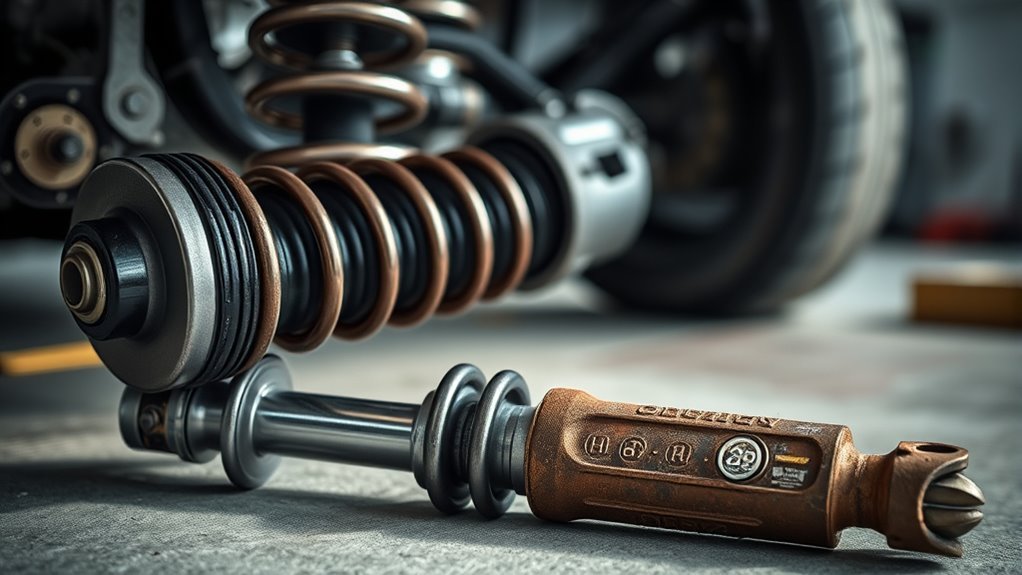
    Replacement Process Overview

    Identifying worn shocks is only the first step; understanding what happens during their replacement prepares you for the repair process ahead. When replacing shock absorbers, technicians first assess the specific shock absorber types installed, whether hydraulic, gas-charged, or coilover designs, as each requires distinct installation techniques.

    The process begins by safely lifting the vehicle and removing the wheels to access the shocks. Next, mounting bolts and brackets are carefully detached, preventing any damage to suspension components.

    The new shocks are then aligned precisely, following manufacturer torque specifications to guarantee maximum performance and longevity. After installation, all fasteners are double-checked for security.

    Knowing these steps helps you anticipate the technical aspects involved and guarantees you receive a thorough, professional replacement tailored to your vehicle’s shock absorber configuration.

    Post-Replacement Maintenance Tips

    After replacing your shock absorbers, maintaining peak performance requires specific attention to several key factors.

    Conduct a thorough post replacement inspection to verify correct installation and identify any immediate issues such as leaks or loose mounts.

    Incorporate routine maintenance to extend shock lifespan and guarantee consistent vehicle handling.

    Focus on these critical areas:

    • Monitor shock absorber seals and bushings for wear or damage during regular inspections.
    • Check tire condition and alignment, as improper settings can accelerate shock wear.
    • Maintain correct vehicle load and avoid excessive weight that stresses shocks beyond design limits.

    Tips For Choosing The Right Replacement Shocks

    Although selecting the right replacement shocks can seem straightforward, understanding your vehicle’s specifications and driving conditions is essential for peak performance.

    Begin by identifying the appropriate shock absorber types: monotube, twin-tube, or gas-charged. Each is designed for specific handling characteristics and load capacities.

    Consult your owner’s manual or manufacturer guidelines to match shocks with your vehicle model. Consider your typical terrain and driving style; off-road or heavy-load conditions require more robust shocks.

    Additionally, prioritize quality brands with proven durability.

    When ready for installation, follow shock installation tips precisely: verify correct orientation, torque specifications, and secure mounting points to avoid premature wear or failure.

    Proper selection combined with meticulous installation guarantees maximum ride comfort, vehicle stability, and shock longevity.

    Frequently Asked Questions

    Can Worn Shocks Affect My Vehicle’s Braking Distance?

    Yes, worn shocks degrade your vehicle’s braking performance by reducing tire contact with the road.

    Regular shock maintenance guarantees ideal stability and shorter braking distances, enhancing overall safety during sudden stops or emergency maneuvers.

    Are Shock Absorbers Covered Under Vehicle Warranties?

    Shock absorbers may be covered under your vehicle’s warranty, depending on the manufacturer and warranty terms. Check your warranty coverage details, as shock lifespan varies.

    Some warranties exclude wear items like shocks after a certain mileage or time.

    How Do Shocks Impact Fuel Efficiency?

    Ever wonder how shock performance affects your ride’s fuel economy? Poor shocks increase rolling resistance and tire wear, forcing your engine to work harder.

    Maintaining quality shocks guarantees smoother rides and peak fuel efficiency, saving you money.

    Can I Replace Shocks Myself or Need a Mechanic?

    You can tackle a DIY replacement if you have the right tools and knowledge, but shock maintenance demands precision. If you’re unsure about alignment or torque specs, it’s safer to hire a mechanic to avoid costly errors.

    Do Shocks Affect Tire Wear Patterns?

    Think of shocks as the guardians of your tire’s health; when worn, they disrupt tire alignment, causing uneven wear patterns. Keep an eye on wear indicators. They reveal if shocks need replacement to protect your tires effectively.

    Conclusion

    Now that you know how shocks wear down and what affects their lifespan, you might wonder—how soon will yours need replacing? Ignoring signs can lead to costly damage and compromised safety.

    But don’t worry, with the right care and timely checks, you can extend their life considerably.

    Ready to dive deeper into choosing the perfect shocks for your ride? Stay tuned, because understanding how long do shocks last could transform your driving experience.

  • What Kind of Oil Filter for 2006 Honda Crv

    What Kind of Oil Filter for 2006 Honda Crv

    For your 2006 Honda CR-V, choosing the right kind of oil filter is essential for optimal engine performance and longevity. You’ll want an oil filter that matches Honda’s OEM part number 15400-PLM-A02 or a high-quality aftermarket equivalent designed specifically for this engine.

    Look for filters with strong filtration media, a reliable anti-drain back valve, and a durable gasket to guarantee proper sealing and engine protection. Using the correct size and type prevents leaks and improves engine longevity.

    Keep your CR-V running smoothly by understanding filter options and maintenance details ahead. Selecting the proper oil filter ensures your engine stays clean and well-protected.

    Key Takeaways

    • The 2006 Honda CR-V commonly uses the Honda OEM oil filter part number 15400-PLM-A02 or equivalent aftermarket filters.
    • Ensure the oil filter matches the engine’s thread size and sealing diameter to prevent leaks and ensure proper fit.
    • Choose filters with synthetic media and a strong anti-drain back valve for improved filtration and durability.
    • Replace the oil filter every 7,500 miles or at least once a year to maintain engine health and performance.
    • Purchase from trusted sources like Honda dealerships, AutoZone, or reputable online retailers for quality and compatibility.

    Which Oil Filter Fits a 2006 Honda CR-V?

    Which oil filter fits a 2006 Honda CR-V? To guarantee peak engine protection, you need an oil filter that meets exact oil filter compatibility specifications.

    The 2006 Honda CR-V typically requires a filter with a specific thread size and sealing diameter, commonly the Honda OEM part number 15400-PLM-A02 or equivalent aftermarket filters.

    When conducting a filter performance comparison, prioritize filters that provide efficient particle retention, high dirt-holding capacity, and consistent oil flow rates.

    Filters from reputable brands like Fram, Bosch, or Purolator often match OEM standards, but always verify their compatibility with your vehicle’s engine model.

    Confirming precise oil filter compatibility prevents leaks and maintains engine longevity, so choosing a filter designed specifically for the 2006 CR-V is essential.

    Features to Look For in a Quality Oil Filter

    When selecting an oil filter for your 2006 Honda CR-V, you should focus on key features that guarantee ideal engine protection and performance.

    Prioritize filtration efficiency to make certain the filter captures the smallest contaminants, preventing engine wear and maintaining peak oil cleanliness.

    Look for a filter with robust filter durability, capable of withstanding high pressure and temperature fluctuations without structural failure.

    The filter’s construction material plays a critical role. Synthetic media often offers superior dirt-trapping capabilities and longer service intervals.

    Additionally, check for a strong anti-drain back valve to prevent dry starts and a durable gasket to maintain a secure seal under varying conditions.

    These features collectively make certain your CR-V’s engine runs smoothly and remains protected over time.

    OEM vs Aftermarket Oil Filters: What’s Best for Your CR-V?

    Understanding the key features of a quality oil filter sets the foundation for deciding between OEM and aftermarket options for your 2006 Honda CR-V.

    OEM advantages include guaranteed compatibility and adherence to Honda’s engineering specifications, ensuring ideal filtration and engine protection.

    OEM filters typically use high-grade media and precise construction, reducing the risk of leaks or premature failure.

    Aftermarket options, however, can offer comparable performance at a lower cost, with some brands employing advanced synthetic media or enhanced sealing technology.

    When selecting aftermarket filters, verify that they meet or exceed industry standards like API or ILSAC certifications.

    Ultimately, choosing between OEM and aftermarket depends on your budget, performance expectations, and willingness to research product quality to maintain your CR-V’s engine longevity.

    How Often to Change Your 2006 CR-V’s Oil Filter

    You should change your 2006 CR-V’s oil filter every 7,500 miles or with each oil change to maintain ideal engine performance.

    Pay attention to signs like decreased fuel efficiency or unusual engine noises, which may indicate the filter is clogged.

    Regular replacement prevents contaminants from circulating and protects your engine from damage.

    Honda recommends changing the oil filter in your 2006 CR-V every 7,500 miles or at least once a year, whichever comes first. This interval guarantees maximum engine performance and longevity by maintaining the oil’s cleanliness.

    Different oil filter types, such as conventional, synthetic blend, and high-efficiency filters, offer varying filtration capabilities, but all require timely replacement to deliver their benefits. Frequent changes prevent contaminants from circulating, reducing engine wear and maintaining oil pressure.

    Even if you use advanced oil filter types with enhanced durability, sticking to Honda’s recommended intervals maximizes protective benefits. Skipping or delaying oil filter changes compromises the engine’s health and can lead to costly repairs.

    Signs to Replace

    Regularly replacing the oil filter according to recommended intervals helps maintain engine health, but certain signs can indicate the need for an earlier change. The oil filter lifespan for your 2006 Honda CR-V typically aligns with oil changes, yet monitoring maintenance indicators is vital.

    If you notice decreased engine performance, unusual noises, or dirty oil during checks, these are clear signs to replace the filter promptly. Ignoring these can reduce engine efficiency and longevity.

    Maintenance Indicator What It Means for Your CR-V
    Dirty or dark oil Filter clogged, restricts flow
    Engine noise or rough idling Oil circulation issues
    Decreased fuel efficiency Filter no longer traps contaminants

    Stay vigilant to protect your engine’s performance and lifespan.

    How to Replace the Oil Filter on a 2006 CR-V

    Begin by confirming the engine is cool and the vehicle is securely elevated using jack stands or ramps.

    To replace the oil filter on your 2006 CR-V, gather the appropriate oil filter types and installation tools.

    Follow these steps:

    Drain the engine oil by removing the drain plug.

    Locate and remove the old oil filter using an oil filter wrench.

    Prepare the new filter by applying a light coat of fresh oil to its gasket.

    Install the new oil filter by hand, tightening it according to manufacturer specifications.

    Reinstall the drain plug and refill the engine with the specified oil grade.

    Using the correct oil filter types and proper installation tools guarantees a secure fit and prevents leaks, maintaining peak engine performance.

    Common Oil Filter Mistakes to Avoid for Your CR-V

    When replacing the oil filter on your 2006 CR-V, avoid using an incorrect filter size, as it can cause leaks or poor filtration.

    Make sure you follow proper installation techniques, including tightening to the specified torque and lubricating the gasket.

    Overlooking these details can compromise engine performance and longevity.

    Incorrect Filter Size

    Although selecting an oil filter for your 2006 Honda CR-V might seem straightforward, choosing an incorrect filter size can cause serious engine issues.

    Using an incorrect filter compromises filter compatibility, leading to poor sealing, oil leaks, or inadequate filtration.

    To avoid these problems, make sure the filter matches OEM specifications exactly. Here’s what you should watch for:

    • Verify thread size and diameter for proper fit
    • Confirm gasket dimensions to prevent leaks
    • Check filter media quality for effective filtration
    • Avoid aftermarket filters not tested for your model
    • Cross-reference part numbers with trusted sources

    Paying attention to these details guarantees ideal engine protection and performance.

    Using the right filter size maintains oil pressure and prevents contaminants from damaging crucial engine components.

    Improper Installation Techniques

    Selecting the correct oil filter size for your 2006 Honda CR-V is only part of the process; improper installation can equally jeopardize engine performance. One common installation error is failing to lubricate the oil filter gasket with fresh engine oil before mounting. This step guarantees a proper seal and prevents leaks.

    Another frequent mistake is overtightening the oil filter. Excessive torque can damage the gasket or housing, leading to oil leaks or difficulty during removal. Conversely, under-tightening risks loosening during operation. Always hand-tighten the oil filter according to manufacturer specifications, typically ¾ to 1 turn after gasket contact.

    Additionally, avoid cross-threading the filter by aligning it carefully before screwing it on. These precise installation practices help maintain ideal oil pressure and engine protection in your CR-V.

    Where to Buy Reliable Oil Filters for Your CR-V

    Where can you find reliable oil filters that meet the specifications of your 2006 Honda CR-V?

    You’ll want to focus on sources that offer genuine or high-quality aftermarket filters designed for your vehicle’s requirements.

    Consider these options:

    Best online retailers like Amazon or RockAuto provide extensive selections and customer reviews.

    Local auto parts stores such as AutoZone or NAPA often stock OEM and equivalent filters, ensuring immediate availability.

    Honda dealerships guarantee OEM parts tailored precisely for your CR-V.

    Specialty automotive shops may offer expert advice and premium brands.

    Trusted online forums or communities can guide you to reputable sellers with proven track records.

    Tips for Choosing the Best Oil Filter Brand for Your 2006 CR-V

    How do you determine the best oil filter brand for your 2006 Honda CR-V? Start by prioritizing filter compatibility to guarantee the filter matches your engine’s specifications.

    Check that the oil filter brands you consider provide precise dimensions and filtration ratings approved for Honda models.

    Look for brands that use high-quality filter media offering superior particle retention and flow rates to maintain engine performance.

    Also, review manufacturer certifications, such as OEM approval or industry standards compliance, which reflect reliability.

    Consider durability factors like anti-drainback valves and corrosion-resistant materials.

    Finally, read user and expert reviews focusing on long-term performance and ease of installation.

    Frequently Asked Questions

    Can I Use Synthetic Oil With My 2006 Honda CR-V?

    Yes, you can use synthetic oil with your 2006 Honda CR-V. Synthetic benefits include improved engine protection and oil compatibility with Honda’s specifications.

    This enhances performance and longevity while reducing wear and deposit buildup under various driving conditions.

    Think of oil viscosity as your engine’s lifeblood. For your 2006 Honda CR-V, use 5W-20 synthetic oil to optimize engine performance, ensuring smooth operation and protection across temperature variations.

    How Do I Know if My Oil Filter Is Clogged?

    You’ll know your oil filter is clogged if oil change indicators light up or your engine runs rough.

    Regular oil filter maintenance, like checking pressure and flow during an oil change, prevents clogging and engine damage.

    Can I Change the Oil Filter Myself Without Professional Help?

    You can tackle DIY maintenance like a skilled mechanic by changing your oil filter yourself. With proper tools and a well-executed oil change, you’ll guarantee peak engine performance while saving time and money efficiently.

    What Are the Signs of a Failing Oil Filter in My CR-V?

    You’ll notice signs of blockage like reduced engine performance, unusual noises, or oil pressure drops. Regularly replacing your oil filter guarantees peak oil filtration, preserving engine health and maximizing the oil filter benefits your CR-V relies on.

    Conclusion

    Choosing the right oil filter for your 2006 Honda CR-V means ensuring fit, quality, and reliability. You want a filter that protects your engine, maintains oil flow, and withstands pressure. Opt for OEM or trusted aftermarket brands to get the best results.

    Change the filter regularly and avoid common installation mistakes. Proper maintenance helps keep your engine running smoothly and efficiently. This simple step can prevent costly repairs down the road.

    By doing this, you’ll extend your engine’s life, improve performance, and drive with confidence. Stay informed, stay precise, and keep your CR-V running smoothly with the right kind of oil filter for your 2006 Honda CR-V.

  • How to Dispose of Oil Filter

    How to Dispose of Oil Filter

    To dispose of an oil filter properly, start by draining it. Puncture the dome end and let the oil drain into a pan for at least 12 hours to remove any residual oil.

    After draining, store the oil filter in a sealed, labeled container. Keep it in a cool, ventilated area to prevent any leaks or spills.

    Next, take the drained filter to a local recycling center or a designated drop-off site. If no such facilities are available in your area, contact hazardous waste facilities for proper guidance.

    Following these steps helps prevent environmental contamination and ensures compliance with regulations. Explore additional methods to reduce waste effectively.

    Key Takeaways

    • Drain oil filters completely by puncturing the dome end and allowing at least 12 hours of drainage to minimize hazardous waste.
    • Store drained oil filters in sealed, labeled, leak-proof containers away from sunlight and heat until disposal.
    • Take used oil filters to local recycling centers or automotive service drop-off points that accept them for proper processing.
    • Avoid improper disposal like landfilling or trashing to prevent environmental contamination and comply with regulations.
    • Consider switching to reusable or eco-friendly oil filters to reduce hazardous waste and support sustainable automotive practices.

    Why Does Proper Oil Filter Disposal Matter?

    Although oil filters may seem like simple car maintenance components, disposing of them properly is crucial because they contain hazardous waste that can contaminate the environment.

    You must comply with oil filter regulations designed to prevent soil and water pollution from residual oil and heavy metals trapped inside.

    Proper disposal guarantees these contaminants don’t enter ecosystems, protecting public health.

    Proper disposal prevents contaminants from harming ecosystems and safeguards public health.

    Additionally, you benefit from recycling by recovering valuable metals like steel and aluminum, reducing the demand for raw materials and conserving energy.

    Following established procedures aligns with environmental laws and promotes sustainability.

    How to Safely Drain Oil Filters for Disposal

    You’ll need to puncture the oil filter’s dome end to allow complete drainage of residual oil.

    Position the filter over a drip pan to capture all oil and prevent spills.

    Always wear protective gloves and work in a well-ventilated area to minimize environmental hazards.

    Proper Oil Draining Techniques

    Several key steps guarantee you safely drain oil filters before disposal.

    First, use approved oil extraction methods such as a suction pump or gravity draining. Attach the pump securely to the filter’s base, affirming no leaks.

    Position the filter over a container to catch the oil. Let it drain for at least 12 hours to maximize oil removal. Avoid shaking or squeezing the filter, which can cause spills.

    Once drained, use filter maintenance tips like puncturing the filter’s dome with a sharp tool to release trapped oil. Keep the workspace clean and wear gloves to prevent contamination.

    Following these procedures guarantees you extract as much oil as possible, preparing the filter for proper recycling or disposal, and minimizing environmental hazards.

    Environmental Safety Precautions

    When draining oil filters for disposal, prioritize environmental safety by working in well-ventilated areas and using drip trays to capture any residual oil.

    Begin by puncturing the filter’s base to allow complete drainage for at least 12 hours.

    Follow local oil filter regulations to guarantee compliance with hazardous waste management protocols.

    Avoid spilling oil onto surfaces; immediately clean any spills using absorbent materials.

    Store drained filters in sealed, labeled containers to prevent contamination.

    Coordinate with authorized waste management facilities for proper disposal or recycling.

    Document your procedures to demonstrate adherence to environmental guidelines.

    How to Store Oil Filters Before Disposal

    Although oil filters contain residual oil, you can store them safely by draining all excess fluid before containment.

    Begin by puncturing the filter’s dome end and allowing it to drain for at least 12 hours into a suitable container.

    Start by puncturing the filter’s dome end and drain it for a minimum of 12 hours.

    Once drained, place the filter in a sealable, leak-proof container designed for oil filter storage. Use containers labeled specifically for temporary containment to prevent leaks and contamination.

    Store the container in a cool, well-ventilated area away from direct sunlight and ignition sources. Ascertain the storage area has secondary containment measures in case of spills.

    Label the container clearly with contents and date. Regularly inspect the storage setup for leaks or damage.

    Proper oil filter storage minimizes environmental risks and prepares filters for compliant disposal or recycling.

    Where to Recycle or Drop Off Oil Filters

    You can recycle or drop off used oil filters at local recycling centers equipped to handle automotive waste.

    Many automotive service locations also accept oil filters for proper disposal as part of their environmental compliance programs.

    Check with these facilities beforehand to confirm their acceptance policies and any preparation requirements.

    Local Recycling Centers

    Since oil filters contain residual oil and metal components, you must dispose of them at designated local recycling centers equipped to handle hazardous automotive waste.

    To find appropriate local recycling filter locations, start by contacting your municipal waste management or using online databases specific to automotive parts.

    When preparing to drop off your oil filter, follow these procedural steps:

    • Drain the oil filter completely to minimize hazardous fluid leakage.
    • Store filters in a sealed container to prevent contamination during transport.
    • Confirm center hours and accepted materials beforehand to guarantee compliance.

    Local recycling centers specialize in separating metal from hazardous oil residues, guaranteeing environmentally safe processing.

    By adhering to these precise guidelines, you contribute to reducing hazardous waste risks and support resource recovery.

    Always prioritize certified and authorized local recycling centers for disposal compliance.

    Automotive Service Locations

    When disposing of oil filters, automotive service locations often provide convenient drop-off points that comply with environmental regulations. You can bring your used oil filters to automotive shops or service centers where trained personnel handle proper recycling or disposal.

    Before dropping off, make sure the filter is drained of excess oil to prevent leaks. Contact local automotive shops or service centers to confirm they accept used oil filters and inquire about any specific preparation requirements.

    These facilities typically collect filters in designated containers to comply with hazardous waste protocols. Using automotive service locations for disposal guarantees that oil filters are processed responsibly, reducing environmental contamination risks.

    Always follow the service center’s guidelines to maintain safety and regulatory compliance during drop-off.

    What to Do If No Local Recycling Is Available

    Although local recycling options may be unavailable, you can still manage oil filter disposal safely by following specific procedures designed to minimize environmental impact.

    First, drain the oil filter thoroughly by puncturing and draining it for at least 12 hours to remove residual oil.

    Then, explore alternative disposal methods such as contacting hazardous waste facilities or automotive shops that accept used filters.

    If no direct options exist, consider oil filter alternatives like reusable filters or advanced synthetic filters with extended life spans, reducing disposal frequency.

    Always store used filters in sealed, leak-proof containers to prevent contamination.

    Key steps include:

    • Fully drain residual oil to avoid leaks
    • Use certified hazardous waste collection points
    • Opt for oil filter alternatives to reduce waste volume

    This approach guarantees compliance with environmental safety standards despite lacking local recycling.

    Common Oil Filter Disposal Mistakes

    Why do some oil filter disposals fail to meet environmental standards? Often, it’s due to improper handling of different oil filter types and neglecting recycling regulations. You must drain filters thoroughly and separate components per local rules to comply.

    Common Mistake Consequence
    Not draining oil filters Oil contamination in waste
    Mixing filter types Difficult recycling process
    Ignoring local recycling rules Fines and environmental damage
    Disposing in regular trash Increased landfill pollution
    Improper storage before disposal Risk of leaks and spills

    Avoid these errors by understanding your oil filter type and following mandated procedures precisely to guarantee proper disposal and environmental safety.

    How Reusable or Eco-Friendly Oil Filters Can Reduce Waste

    Proper disposal of traditional oil filters presents challenges that reusable or eco-friendly alternatives can effectively address.

    When you switch to reusable filters made from eco-friendly materials, you considerably reduce the volume of hazardous waste generated.

    These filters allow for multiple uses after proper cleaning, minimizing landfill contributions. They also use biodegradable or recyclable components, facilitating safer disposal.

    Additionally, they reduce demand for raw materials, lowering environmental impact.

    Frequently Asked Questions

    Can Oil Filters Be Disposed of With Regular Household Trash?

    You shouldn’t dispose of oil filters with regular household trash because they contain hazardous waste.

    Instead, you should participate in oil filter recycling programs to properly handle and recycle the residual oil and metal components safely.

    How Long Does It Take for an Oil Filter to Decompose?

    Like a slow-burning candle, oil filter decomposition takes up to 500 years, causing prolonged environmental impact.

    You should handle disposal carefully to prevent toxic residue from contaminating soil and water, protecting ecosystems effectively.

    Are There Any Health Risks From Handling Used Oil Filters?

    Yes, handling used oil filters can expose you to health hazards like toxic oil residues. You should wear gloves and avoid skin contact to guarantee safe handling and reduce the risk of contamination or chemical exposure.

    Can Used Oil From Filters Be Reused or Repurposed?

    You can reuse oil from filters through oil recycling processes that remove contaminants. For filter repurposing, crushed filters are recycled as scrap metal, but oil extraction requires specialized facilities to guarantee safe recovery.

    What Tools Are Needed to Remove an Oil Filter Safely?

    Picture gripping the oil filter tightly; you’ll need an oil filter wrench, gloves, a drain pan, and rags. These tools guarantee safe oil filter removal techniques, preventing spills and protecting your hands throughout the precise process.

    Conclusion

    You might think tossing your oil filter in the trash is the easiest fix, but ironically, that’s the worst move you can make. Properly draining, storing, and recycling oil filters isn’t just a hassle—it’s essential to prevent environmental damage and comply with regulations.

    So, follow the steps carefully, find a recycling center, or consider eco-friendly filters. It’s a small effort that makes a big difference, even if convenience tries to convince you otherwise.

    When thinking about how to dispose of oil filter, remember that proper disposal protects the environment and ensures you are following the law. Taking the time to recycle your oil filter responsibly is worth every bit of effort.

  • How to Change Oil and Oil Filter

    How to Change Oil and Oil Filter

    To change your oil and oil filter, first gather the correct oil, filter, and tools. Make sure you safely lift your vehicle on a flat surface with the parking brake engaged.

    Drain the old oil by removing the drain plug, then unscrew the old filter. Apply oil to the new filter gasket, install it by hand, and tighten appropriately.

    Add fresh oil according to your manual’s specifications. Check the oil levels and inspect for leaks.

    Proper disposal of used oil and filters protects the environment. Follow these steps carefully for a thorough service.

    Key Takeaways

    • Prepare the vehicle on a flat surface, engage the parking brake, and secure with jack stands or ramps for safety.
    • Drain old oil by removing the drain plug into a pan, then remove and inspect the old oil filter.
    • Apply fresh oil to the new filter gasket, hand-tighten the filter, then refill engine with specified oil type and amount.
    • Start the engine briefly to circulate oil, check for leaks, then verify oil level with the dipstick and add if needed.
    • Collect used oil and filters in proper containers and dispose of them at authorized recycling centers following local regulations.

    Gather the Tools and Materials You’ll Need

    Before you begin changing your oil and oil filter, gather all necessary tools and materials to guarantee a smooth process.

    Start by selecting the correct oil type specified in your vehicle’s manual. Common options include conventional, synthetic, or blends.

    Next, choose the appropriate oil filter size, confirming compatibility with your engine model.

    Essential tools include a wrench set, an oil filter wrench, a drain pan, and a funnel for precise pouring. You’ll also need gloves and rags for cleanliness.

    Verify the oil capacity to measure the correct quantity. Having these items ready prevents interruptions and errors during the procedure.

    Organize everything logically for efficient access, reducing downtime and enhancing safety.

    This preparation guarantees your oil change proceeds systematically and effectively.

    Prepare Your Vehicle: Safety Tips and Setup for Oil Change

    Before starting, make sure your vehicle is securely supported on a flat surface using jack stands or ramps to prevent movement. Collect all required tools within reach, including wrenches, drain pans, and replacement parts.

    Always wear gloves and safety glasses to protect yourself from hot oil and sharp components.

    Ensure Vehicle Stability

    A level, solid surface provides the foundation for a safe and stable oil change. Begin by parking your vehicle on concrete or asphalt, avoiding inclined or uneven terrain that compromises vehicle stability. Engage the parking brake firmly to prevent any movement during the procedure.

    If available, place wheel chocks behind the rear wheels for additional restraint. These safety precautions reduce the risk of accidental rolling or shifting.

    Next, if you need to raise the vehicle, use a certified hydraulic jack positioned at the manufacturer’s recommended lift points.

    Securely support the vehicle with jack stands rated for its weight before working underneath. Never rely solely on the jack, as this jeopardizes safety.

    Gather Necessary Tools

    Gathering the necessary tools guarantees a smooth and efficient oil change process. First, identify the correct oil types specified for your vehicle to ascertain maximum engine performance.

    Next, select the appropriate oil filter size, matching the manufacturer’s recommendations precisely to avoid leaks or improper fit.

    You’ll need a wrench set for loosening the drain plug and filter housing, plus a drain pan to catch used oil. Have a funnel ready to prevent spills when adding new oil. Additionally, keep clean rags or paper towels on hand for quick cleanup.

    Confirm you have a jack or ramps if your vehicle’s clearance is low, assuring safe access to the oil drain plug and filter.

    Preparing these tools methodically minimizes errors and streamlines the oil change procedure.

    Wear Protective Gear

    Wearing protective gloves and safety glasses shields your skin and eyes from hot oil and harmful chemicals during the oil change.

    Before starting, put on durable protective gloves to prevent skin contact with used oil, which contains contaminants and irritants. Choose gloves resistant to oils and solvents for maximum protection.

    Next, wear safety goggles to protect your eyes from splashes when draining the oil or removing the filter. Confirm your goggles fit snugly to prevent any fluid ingress. This protective gear minimizes risk of chemical burns, allergic reactions, and eye injuries.

    Always inspect gloves and goggles for damage before use.

    Drain Old Oil and Remove Old Oil Filter

    Start by positioning a drain pan beneath the oil drain plug to catch the used oil. Use a wrench to loosen the plug carefully, allowing oil to flow out steadily.

    Let the oil drain completely to avoid contamination. Once drained, reinstall the drain plug securely, guaranteeing the correct torque specifications are met to prevent leaks.

    Next, move to the oil filter removal. Use an oil filter wrench to loosen the old filter, turning it counterclockwise.

    Be prepared for residual oil to spill during removal; keep the drain pan positioned accordingly. Inspect the filter mounting surface for debris or old gasket remnants, cleaning as necessary to confirm a proper seal with the new filter.

    Completing these steps prepares the engine for fresh oil and a new filter.

    Install the New Oil Filter

    Start by preparing the new oil filter and applying a thin layer of fresh oil to the rubber gasket to guarantee a proper seal.

    Align the filter carefully and screw it onto the mounting base by hand.

    Tighten the filter securely, following the manufacturer’s torque specifications to avoid leaks or damage.

    Prepare New Filter

    Before installing the new oil filter, make certain you apply a thin layer of fresh oil to the rubber gasket; this creates a proper seal and prevents leaks.

    Identify the filter type, spin-on or cartridge, to determine the correct installation procedure. Spin-on filters screw directly onto the engine block, while cartridge filters require housing assembly.

    Use installation tips such as hand-tightening the filter until the gasket contacts the mounting surface, then turn it an additional 3/4 to 1 full turn.

    Avoid over-tightening, which can damage the gasket or complicate future removal. Confirm the filter is clean and free of debris before installation.

    Position the filter straight to prevent cross-threading. Following these steps guarantees a secure, leak-free fit that maintains peak engine performance.

    Apply Oil To Gasket

    Apply a thin layer of fresh engine oil evenly around the rubber gasket on the new filter. This step guarantees a proper seal and prevents the gasket from binding or tearing during installation.

    Verify oil compatibility by using the same grade and type recommended for your engine to maintain gasket integrity. Different gasket types, such as nitrile rubber or silicone, may have specific lubrication needs, so consult the filter manufacturer’s guidelines.

    Avoid over-applying oil; a light, uniform coat suffices to enhance the seal and ease filter removal during the next oil change. Properly lubricating the gasket reduces the risk of leaks and guarantees consistent oil pressure.

    Always handle the filter carefully to preserve the gasket’s shape and effectiveness before proceeding with installation.

    Tighten Filter Properly

    Once you’ve evenly coated the new filter gasket with oil to guarantee a proper seal, position the filter carefully onto the mounting surface, aligning the threads correctly.

    Proper filter orientation is critical to prevent leaks and guarantee peak performance.

    Follow these steps to tighten the filter properly:

    1. Hand-tighten the filter clockwise until the gasket contacts the mounting surface.
    2. Using a filter wrench, apply the specified filter torque, typically ¾ to 1 turn past gasket contact; consult your vehicle’s manual for exact values.
    3. Avoid over-tightening, which can damage the gasket or housing, causing leaks or difficult future removal.

    Adhering strictly to these procedures guarantees a secure installation and peak oil flow, preventing premature filter failure and maintaining engine integrity.

    Add Fresh Oil and Check for Leaks and Oil Levels

    Although adding fresh oil requires careful attention, you’ll assure engine longevity by using the correct oil type and quantity specified for your vehicle.

    Begin by consulting your owner’s manual to select the proper oil viscosity to guarantee ideal lubrication.

    Remove the oil filler cap and slowly pour in the fresh oil using a clean funnel, preventing spills. After filling, replace the cap securely.

    Start the engine and let it run for a few minutes to circulate the oil thoroughly.

    Perform leak detection by inspecting around the drain plug and oil filter for any signs of leakage.

    Finally, turn off the engine, wait a few minutes, and check the oil level with the dipstick, adding oil if necessary to reach the recommended mark.

    How to Dispose of Old Oil and Filters the Right Way

    After confirming the oil level and verifying there are no leaks, focus on disposing of the used oil and filters properly.

    Adhering to disposal regulations is essential to prevent environmental contamination. Follow these steps:

    1. Collect the used oil in a clean, leak-proof container with a secure lid. Avoid mixing with other fluids.
    2. Place used oil filters in a sealable plastic bag or container to prevent residual oil leakage.
    3. Deliver both the oil and filters to an authorized oil recycling center or hazardous waste facility.

    Never pour used oil down drains, onto soil, or in regular trash. Proper oil recycling conserves resources and complies with environmental laws.

    Frequently Asked Questions

    How Often Should I Change My Oil and Oil Filter?

    You should follow your vehicle’s maintenance schedule, typically changing oil and oil filter every 3,000 to 7,500 miles.

    Oil change frequency depends on driving conditions and oil type, so always consult your owner’s manual for precision.

    What Type of Oil Is Best for My Car?

    Selecting synthetic oil surpasses standard conventional oil for superior stability and strength. Still, study your car’s manual to secure specific specifications.

    Synthetic offers enhanced efficiency, while conventional suits older engines requiring basic lubrication.

    Can I Reuse an Old Oil Filter?

    You shouldn’t reuse an old oil filter due to compromised oil filter longevity and potential contaminants.

    Replacing it guarantees peak engine protection and minimizes environmental impact by preventing oil leakage and pollution from degraded filters.

    What Are Signs My Car Needs an Oil Change Sooner?

    You’ll notice decreased engine performance, unusual noises, or a burning oil smell when your car needs an oil change sooner. Also, check the oil’s color and consistency regularly to prevent damage and maintain ideal engine function.

    How Does Driving Style Affect Oil Change Frequency?

    Your driving habits directly impact oil degradation; aggressive acceleration, frequent short trips, and stop-and-go traffic accelerate oil breakdown. Adjust your oil change frequency accordingly to maintain peak engine performance and prevent premature wear.

    Conclusion

    Changing your oil and filter is like giving your engine a fresh set of lungs—essential for keeping it running smoothly. By following each step carefully, from draining old oil to properly disposing of waste, you guarantee your vehicle’s longevity and performance.

    Stay methodical and precise, double-checking for leaks and correct oil levels before finishing. Regular maintenance like this isn’t just routine; it’s the foundation for reliable, efficient driving. Remember, mastering how to change oil and oil filter is key to maintaining your vehicle’s health.

  • Can You Drive Corvette Without Magride Shocks

    Can You Drive Corvette Without Magride Shocks

    You can drive a Corvette without MagRide shocks by replacing them with conventional or aftermarket suspension components. However, removing MagRide means losing the system’s real-time damping adjustments that adapt instantly to changing road conditions.

    This results in a firmer ride, increased body roll, and reduced handling precision. Performance and comfort may decline, especially during aggressive driving situations.

    While it is feasible to drive without MagRide shocks, this switch compromises your Corvette’s dynamic control and the safety benefits that MagRide provides. Understanding these impacts and exploring alternative options will help you make an informed decision.

    Key Takeaways

    • Yes, you can drive a Corvette without MagRide shocks by using conventional or aftermarket suspension components.
    • Without MagRide, the suspension lacks real-time damping adjustments, reducing ride comfort and handling responsiveness.
    • Removing MagRide increases body roll and decreases stability, especially during aggressive cornering or high-speed driving.
    • Conventional shocks or coilovers can replace MagRide but won’t provide the adaptive benefits of magnetorheological technology.
    • Driving without MagRide is feasible but results in compromised ride quality, handling precision, and overall driving dynamics.

    What Are MagRide Shocks And How Do They Work In A Corvette

    MagRide shocks are an advanced suspension technology that uses magnetorheological fluid to adjust damping in real time.

    When you drive a Corvette equipped with MagRide technology, the suspension continuously monitors road conditions and driving inputs.

    The fluid inside the shocks contains microscopic iron particles that respond instantly to magnetic fields generated by electronic controls. This allows the Corvette suspension to stiffen or soften on the fly, optimizing ride comfort and handling performance.

    You’ll notice improved responsiveness because the system minimizes body roll and absorbs road imperfections precisely.

    By controlling damping forces electronically, MagRide technology enhances stability and traction without sacrificing ride quality.

    This sophisticated suspension system integrates seamlessly with the Corvette’s chassis, providing dynamic adjustments that traditional shocks can’t match.

    Which Corvette Models Come With MagRide Shocks And Which Don’t

    Although advanced suspension systems have become more common, not all Corvette models come equipped with MagRide shocks.

    Advanced suspensions are widespread, yet MagRide shocks remain exclusive to select Corvette models.

    When exploring Corvette features, you’ll notice that suspension technology varies based on trim levels and model years. For instance, MagRide shocks are standard or optional depending on performance packages.

    Here’s a quick breakdown:

    • C7 Corvette Stingray (2014-2019): Available with MagRide on higher trims like Z51.
    • C7 Z06 and ZR1: Equipped with MagRide as standard for enhanced handling.
    • C8 Corvette Stingray (2020-present): Offers MagRide as an optional suspension upgrade.
    • Base models across generations generally come with traditional shock absorbers.

    Understanding which Corvette models include MagRide shocks helps you assess their impact on ride quality and handling precision.

    Can You Drive A Corvette Without MagRide Shocks?

    How essential are advanced suspension systems like MagRide for driving a Corvette effectively? While MagRide offers adaptive damping that optimizes handling, you can technically drive a Corvette without it.

    Corvette enthusiasts often explore suspension upgrades to tailor performance, but removing or bypassing MagRide shocks means relying on conventional suspension components. This substitution is feasible, especially if you choose high-quality aftermarket shocks designed for sports cars.

    However, it’s vital to guarantee compatibility with the Corvette’s chassis and dynamics. Without MagRide, you lose real-time damping adjustments, which could impact responsiveness in varying conditions.

    Still, for everyday driving or track use with manual settings, operating without MagRide is possible.

    Ultimately, your decision should consider how suspension upgrades align with your performance goals and driving environment.

    Effects Of Driving Without MagRide On Ride Quality And Handling

    When you drive a Corvette without MagRide shocks, you’ll notice a marked decrease in ride comfort due to the loss of adaptive damping control.

    This change directly affects handling stability, as the suspension can’t adjust in real-time to road conditions or driving dynamics.

    Understanding these impacts is essential for evaluating performance trade-offs without MagRide technology.

    Ride Comfort Impact

    Since MagRide shocks actively adjust damping forces in real-time, driving a Corvette without them greatly alters ride quality and handling dynamics.

    You’ll notice that the ride comfort you once took for granted diminishes, as traditional shocks can’t adapt to road irregularities as effectively.

    This results in harsher impacts and less absorption of vibrations.

    Specifically, without MagRide:

    • Ride quality becomes inconsistent, varying sharply with road surface conditions.
    • Comfort levels drop due to increased body movement and jolts.
    • Passive shocks delay response to sudden terrain changes, increasing discomfort.
    • You experience less refinement in suspension feedback, affecting overall driving ease.

    Handling Stability Changes

    Although Corvettes without MagRide shocks remain drivable, you’ll experience noticeable shifts in handling stability. MagRide’s adaptive suspension tuning optimizes driving dynamics by adjusting shock firmness in real time. Without it, your Corvette’s suspension becomes static, reducing responsiveness and increasing body roll during cornering. This affects your ability to maintain precise control, especially at higher speeds or on uneven roads.

    Handling Aspect With MagRide Without MagRide
    Suspension Tuning Adaptive, real-time adjustments Fixed, non-adaptive
    Body Roll Control Minimized via active damping Increased body roll
    Cornering Stability Enhanced grip and balance Reduced stability
    Response to Bumps Smooth, controlled Harsher, less controlled
    Overall Dynamics Optimized for varying conditions Compromised, less precise

    This table highlights how driving dynamics degrade without MagRide, impacting handling stability.

    Why MagRide Shocks Matter For Your Corvette’s Performance And Safety

    Because MagRide shocks continuously adjust damping in real-time, they optimize your Corvette’s handling and stability under varying driving conditions.

    MagRide shocks adapt instantly, enhancing your Corvette’s handling and stability across all driving conditions.

    The MagRide features use magnetorheological fluid controlled by electromagnetic fields, enabling immediate suspension response.

    This dynamic adjustment delivers critical performance enhancements, improving traction, cornering precision, and ride comfort simultaneously.

    By integrating MagRide shocks, you benefit from:

    • Enhanced shock absorption tailored instantly to road irregularities
    • Improved vehicle stability during aggressive maneuvers
    • Reduced body roll for sharper, safer cornering
    • Optimized tire contact patches for superior grip

    These technical advantages translate directly into safer, more confident driving.

    Ignoring the role MagRide plays means forfeiting advanced suspension tuning designed specifically to elevate your Corvette’s performance and safety under diverse driving scenarios.

    Risks Of Removing Or Disabling MagRide Shocks

    If you remove or disable MagRide shocks, you compromise your Corvette’s ability to adapt suspension settings dynamically, which directly degrades handling precision and ride stability.

    This results in significant safety concerns, as the suspension can no longer respond to changing road conditions or driving inputs, increasing the risk of loss of control.

    Additionally, you face notable performance trade offs; the vehicle’s cornering capabilities, braking efficiency, and overall responsiveness deteriorate without the real-time damping adjustments MagRide provides.

    The shocks’ electronic control optimizes traction and minimizes body roll, functions you’d forfeit by disabling them.

    Ultimately, removing or disabling these shocks undermines the integrated suspension system, leading to a less predictable and less safe driving experience that contradicts the Corvette’s engineered performance standards.

    Alternatives To MagRide Shocks For Corvette Owners

    Several viable alternatives to MagRide shocks exist for Corvette owners seeking comparable suspension performance without relying on the electronic damping system.

    You can explore aftermarket options that offer mechanical damping solutions, often at a lower cost compared to OEM MagRide units.

    Here are four alternatives to take into account:

    • Traditional Hydraulic Shocks: Provide consistent damping but lack adaptive features.
    • Coilover Suspension Kits: Allow adjustable ride height and damping, enhancing customization.
    • Monotube Performance Shocks: Improve handling with high-pressure gas technology.
    • Air Suspension Systems: Offer adjustable ride quality, though more complex and costly.

    When evaluating these alternatives, perform cost comparisons factoring in installation, maintenance, and performance impact.

    Each option balances trade-offs between adaptability, ride comfort, and long-term durability, allowing you to tailor your Corvette’s suspension to your driving preferences without MagRide technology.

    Pros And Cons Of Keeping Vs. Removing MagRide Shocks

    You need to weigh how MagRide shocks affect your Corvette’s performance versus their maintenance demands.

    Keeping them guarantees adaptive handling but may increase repair complexity and costs.

    Removing them simplifies upkeep but can degrade ride quality and responsiveness.

    Performance Impacts

    While removing MagRide shocks from your Corvette might seem like a straightforward modification, it markedly alters the vehicle’s dynamic response and handling characteristics.

    MagRide’s adaptive damping adjusts in real-time, optimizing grip and stability. Replacing them with conventional shock alternatives can simplify the suspension but sacrifices this precision.

    Consider these performance impacts:

    • Reduced responsiveness in cornering due to fixed damping rates
    • Increased body roll and pitch during aggressive maneuvers
    • Potential loss of ride comfort over varying road surfaces
    • Simplified suspension tuning but less adaptability during high-speed driving

    If you’re exploring Corvette upgrades, weigh these trade-offs carefully.

    While traditional shocks may lower complexity, you’ll likely compromise the refined control MagRide offers, affecting overall driving precision and safety.

    Maintenance Considerations

    Because MagRide shocks employ advanced magnetorheological fluid technology, maintaining them requires specialized knowledge and equipment that can increase service complexity and cost.

    You’ll need to adhere strictly to the manufacturer’s maintenance schedule, which often includes periodic diagnostics and fluid checks not required for conventional shocks.

    While retaining MagRide shocks preserves adaptive performance benefits, you should anticipate higher maintenance expenses and potentially longer service times.

    Conversely, removing MagRide shocks simplifies maintenance, as traditional shocks have straightforward shock replacement procedures and fewer electronic dependencies.

    However, this may compromise ride quality and handling precision.

    Ultimately, your decision hinges on balancing maintenance demands against desired performance.

    If you prioritize ease of upkeep and lower costs, conventional shocks offer an advantage.

    But if you value dynamic adaptability, committing to MagRide’s maintenance schedule is essential.

    Frequently Asked Questions

    How Much Do Magride Shocks Cost to Replace on a Corvette?

    You can expect Magride pricing for Corvette shock replacements to range from $1,200 to $2,000, depending on OEM or aftermarket parts.

    Evaluate replacement options carefully for performance and cost efficiency before deciding.

    Can Magride Shocks Be Upgraded or Tuned for Better Performance?

    Think of MagRide shocks as the Corvette’s heartbeat; you can boost performance tuning and shock upgrades to sharpen handling and responsiveness. Advanced software tweaks and hardware swaps let you fine-tune suspension dynamics precisely for better road control.

    Do Magride Shocks Affect Corvette’s Fuel Efficiency?

    Yes, MagRide shocks slightly affect your Corvette’s fuel efficiency by adjusting suspension stiffness, optimizing performance impact during dynamic driving.

    However, the improvement is marginal and primarily enhances handling rather than greatly altering fuel consumption.

    How Often Should Magride Shocks Be Serviced or Inspected?

    You should follow Magride maintenance tips by inspecting shocks every 12,000 miles or annually. Regular shock inspection frequency guarantees peak performance and prevents wear, keeping your Corvette’s adaptive suspension system responsive and reliable.

    Are Magride Shocks Compatible With Aftermarket Suspension Parts?

    You’ll find Magride shocks have limited aftermarket compatibility since their adaptive technology demands precise integration. Mixing parts can compromise suspension performance, so guarantee any upgrades are specifically designed to maintain system functionality and responsiveness.

    Conclusion

    You can technically drive your Corvette without MagRide shocks, but doing so compromises the vehicle’s adaptive suspension system. This reduction affects ride quality and handling precision.

    MagRide isn’t just a luxury; it actively adjusts damping for peak performance and safety. Removing or disabling it risks uneven tire wear, diminished control, and potential damage.

    If you consider alternatives, weigh the trade-offs carefully. MagRide remains integral to maintaining your Corvette’s engineered balance and dynamic responsiveness, making it essential if you want to drive your Corvette without MagRide shocks effectively.

  • How Long Do Platinum Spark Plugs Last

    How Long Do Platinum Spark Plugs Last

    You can count on platinum spark plugs lasting between 60,000 and 100,000 miles when properly maintained. Their durable platinum electrode resists wear, ensuring consistent performance over time. However, factors like engine heat, fuel quality, and installation techniques impact longevity.

    Regular inspections and maintaining the correct gap help avoid misfires and efficiency loss. If you want to understand how to maximize their lifespan and when to replace them, there’s more detailed guidance ahead.

    Key Takeaways

    • Platinum spark plugs typically last between 60,000 to 100,000 miles with proper maintenance.
    • Their durability comes from platinum’s resistance to electrode wear, maintaining spark quality longer than copper plugs.
    • Regular inspections every 30,000 miles help detect early wear and extend plug lifespan.
    • Engine conditions, fuel quality, and installation affect how long platinum spark plugs remain effective.
    • Replace plugs upon wear signs or after 60,000-100,000 miles to maintain engine performance and fuel efficiency.

    How Long Do Platinum Spark Plugs Typically Last?

    How long can you expect platinum spark plugs to perform reliably? Typically, platinum spark plugs offer a lifespan between 60,000 and 100,000 miles due to their superior platinum durability.

    This precious metal resists electrode wear much better than conventional copper plugs, maintaining consistent spark quality over extended periods. However, achieving this potential requires proper spark plug maintenance. Regular inspections and timely replacements prevent performance degradation caused by fouling or electrode erosion.

    While platinum spark plugs are engineered for longevity, factors such as engine conditions and driving habits influence their effective life. By adhering to manufacturer-recommended maintenance intervals and monitoring ignition system health, you can maximize the operational reliability and efficiency of your platinum spark plugs, ensuring peak engine performance throughout their service interval.

    Key Factors That Affect Platinum Spark Plug Lifespan

    Although platinum spark plugs are designed for durability, several key factors directly impact their lifespan.

    First, proper installation techniques are essential; incorrect torque or cross-threading can damage the plugs, leading to premature failure. You need to verify the plugs are installed with the manufacturer’s specified torque settings to avoid electrode wear or casing damage.

    Second, engine operating conditions influence longevity. Excessive heat, detonation, or oil contamination accelerate electrode erosion.

    Third, adherence to maintenance tips, such as regular inspection and cleaning, helps identify early signs of wear or deposits that can affect performance.

    Finally, fuel quality and engine tuning also play roles. Poor combustion conditions increase carbon buildup, reducing spark plug efficiency and lifespan.

    Paying attention to these factors guarantees ideal spark plug durability.

    How to Extend the Life of Platinum Spark Plugs

    To maximize the lifespan of your platinum spark plugs, you must follow specific maintenance and operational practices that minimize wear and prevent damage.

    Proper spark plug maintenance coupled with mindful driving habits plays a vital role in extending their service life.

    Here are four essential strategies:

    1. Regular Inspection: Check spark plugs for fouling, corrosion, or wear every 30,000 miles to catch early issues.
    2. Maintain Proper Gap: Use a feeler gauge to verify the electrode gap matches manufacturer specifications, optimizing combustion efficiency.
    3. Use Quality Fuel: High-quality fuel reduces deposit buildup on spark plugs, supporting consistent performance.
    4. Adopt Smooth Driving Habits: Avoid excessive idling and rapid acceleration, which increase engine strain and spark plug degradation.

    Signs Your Platinum Spark Plugs Need Replacement

    When should you replace your platinum spark plugs to maintain peak engine performance? Watch for signs like reduced spark plug performance, which often leads to engine misfire.

    If your vehicle experiences rough idling, difficulty starting, or decreased fuel efficiency, these symptoms typically indicate worn platinum spark plugs. Additionally, inspect the spark plugs for visible wear such as electrode erosion or heavy carbon deposits, which impair efficient sparking.

    Persistent engine misfire, even after checking ignition coils and fuel systems, strongly suggests spark plug degradation. Ignoring these signs can cause further engine damage and reduced power output.

    Persistent engine misfire after other checks points to spark plug wear; ignoring it risks further damage and power loss.

    Monitoring these indicators helps you maintain prime combustion, ensuring your engine runs smoothly and efficiently.

    Replacing spark plugs at the right time prevents costly repairs and keeps performance consistent.

    When and How to Replace Platinum Spark Plugs

    You should replace your platinum spark plugs when you notice signs of wear or after reaching the manufacturer’s recommended intervals, typically between 60,000 and 100,000 miles.

    To guarantee peak engine performance, follow a step-by-step process that includes safely removing the old plugs, checking gap settings, and installing new ones with the correct torque.

    Proper replacement helps maintain fuel efficiency and prevents engine misfires.

    Signs of Wear

    Recognizing the signs of wear on platinum spark plugs is essential for maintaining engine performance and fuel efficiency.

    Spark plug degradation can cause distinct performance symptoms that signal the need for replacement. Watch for these key indicators:

    1. Engine Misfires

    Irregular combustion caused by worn electrodes reduces ignition reliability.

    2. Poor Fuel Economy

    Inefficient spark leads to incomplete combustion, increasing fuel consumption.

    3. Difficulty Starting

    Worn plugs struggle to generate a strong spark, making ignition harder.

    4. Rough Idling

    Inconsistent spark delivery causes unstable engine idle and vibrations.

    Monitoring these symptoms lets you identify spark plug degradation early, preventing more severe engine issues.

    Replace platinum spark plugs promptly when these signs appear to maintain ideal engine function.

    Replacement Intervals

    Noticing signs of wear on your platinum spark plugs means it’s time to contemplate their replacement intervals. Typically, manufacturers recommend replacement every 60,000 to 100,000 miles. Ignoring this can increase replacement cost due to engine damage and cause a significant performance impact like misfires or poor fuel efficiency.

    Mileage Interval Replacement Cost Estimate Performance Impact
    0-30,000 miles Low Ideal performance
    30,000-60,000 Moderate Minor power reduction
    60,000-90,000 Moderate to High Noticeable misfires, rough idle
    90,000-120,000 High Severe misfires, poor mileage
    120,000+ Very High Engine damage risk

    Stay proactive to minimize costs and maintain engine efficiency.

    Step-by-Step Replacement

    When your vehicle approaches the recommended mileage for spark plug replacement, it’s essential to follow a systematic procedure to guarantee proper installation and peak engine performance.

    Here’s a step-by-step guide on replacing platinum spark plugs with key installation tips:

    1. Prepare the engine: Allow it to cool completely to avoid damage or burns.
    2. Remove old spark plugs: Disconnect the ignition coil or wire, then use a spark plug socket and ratchet to carefully extract the plugs.
    3. Check and gap new plugs: Verify the gap matches manufacturer specifications using a feeler gauge, adjusting if necessary.
    4. Install new plugs: Insert carefully by hand to avoid cross-threading, then tighten to the specified torque. Reattach ignition components securely.

    Following these precise steps guarantees peak ignition and prolongs the life of your platinum spark plugs.

    Platinum Spark Plugs vs. Other Spark Plug Types

    Several key differences set platinum spark plugs apart from other types, such as copper and iridium variants. You’ll find that platinum spark plugs offer superior platinum durability due to their corrosion-resistant electrodes, which extend their operational lifespan compared to copper plugs.

    While copper spark plugs provide excellent conductivity, they wear out faster, reducing overall spark plug efficiency. On the other hand, iridium spark plugs excel in longevity and performance but come at a higher cost.

    Platinum plugs strike a balance between cost and durability, maintaining consistent spark plug efficiency over 60,000 to 100,000 miles.

    Platinum spark plugs offer reliable performance and durability, lasting between 60,000 and 100,000 miles.

    When choosing, consider your vehicle’s requirements: platinum plugs suit daily drivers seeking longevity without premium pricing, whereas iridium plugs are ideal for high-performance engines demanding maximum efficiency and durability.

    Frequently Asked Questions

    Can Platinum Spark Plugs Improve Fuel Efficiency?

    Yes, you’ll notice fuel savings with platinum spark plugs due to their superior spark longevity and consistent ignition. This guarantees efficient combustion, reducing wasted fuel and improving overall engine performance and fuel efficiency over time.

    Are Platinum Spark Plugs Compatible With All Car Models?

    You can use platinum spark plugs in many vehicles, but platinum sparkplug compatibility depends on your vehicle engine types.

    Always consult your owner’s manual or a professional to verify the plugs match your engine’s specifications and performance needs.

    How Do Platinum Spark Plugs Affect Engine Performance?

    You’ll boost engine efficiency by up to 10% using platinum spark plugs, thanks to their superior spark plug longevity. Their precise ignition improves combustion, reducing misfires and enhancing overall engine performance and fuel economy consistently.

    What Is the Cost Difference Between Platinum and Other Spark Plugs?

    You’ll find the cost comparison shows platinum spark plugs are pricier than copper but less expensive than iridium types. Different spark plug types offer varying longevity and performance, so your choice depends on balancing cost and durability.

    Can Platinum Spark Plugs Cause Engine Misfires?

    Don’t let a faulty spark plug lifespan throw a wrench in your engine maintenance. Yes, platinum spark plugs can cause misfires if they wear out or get fouled, affecting ignition and engine performance. Stay vigilant!

    Conclusion

    You might expect platinum spark plugs to last forever given their name, but even these durable components need attention after 60,000 to 100,000 miles. Ignoring signs of wear won’t make them magically improve performance.

    By understanding factors that affect their lifespan and knowing when to replace them, you’ll keep your engine running smoothly—because, ironically, even the “precious” ones aren’t invincible. Regular checks are your best defense against unexpected breakdowns.

    In conclusion, knowing how long do platinum spark plugs last helps you maintain optimal engine performance and avoid costly repairs.

  • Is It Easy to Change Spark Plugs

    Is It Easy to Change Spark Plugs

    You can change spark plugs yourself if you have the right tools and some mechanical know-how. Changing spark plugs is generally straightforward but depends on your engine type—accessibility varies between inline and V-shaped engines.

    You’ll need a spark plug socket, ratchet, torque wrench, and gap gauge. Be cautious of tight spaces and corroded threads. Follow torque specs carefully to avoid damage.

    If you want to guarantee reliability and safety, keep certain challenges and tips in mind as you proceed.

    Key Takeaways

    • Changing spark plugs is generally manageable with basic mechanical knowledge and proper preparation.
    • Accessing spark plugs varies by engine type and may require removing engine covers or components.
    • Essential tools include a spark plug socket, ratchet wrench, torque wrench, and gap gauge for accurate installation.
    • Challenges like tight spaces or corroded threads can complicate removal but can be mitigated with penetrating oil and care.
    • Safety measures such as working on a cool engine, disconnecting the battery, and wearing protective gear are crucial.

    How To Check If Your Spark Plugs Need Replacing

    How can you tell if your spark plugs need replacing? First, consider the spark plug lifespan, which typically ranges from 30,000 to 100,000 miles depending on the type and vehicle.

    You’ll want to inspect them if you notice performance symptoms like engine misfires, rough idling, or reduced fuel efficiency.

    Remove a spark plug and examine the electrode; excessive wear, heavy deposits, or a burnt appearance indicate deterioration.

    Also, check for a widened gap, which disrupts the spark and impairs combustion.

    If your vehicle struggles during acceleration or has difficulty starting, these are signs the spark plugs might be failing.

    Monitoring these indicators helps you maintain peak engine performance and prevents potential damage caused by neglecting worn spark plugs.

    How Easy Is It To Change Spark Plugs Yourself?

    Although changing spark plugs requires some mechanical knowledge, you can often perform the task yourself with the right tools and preparation.

    Spark plug maintenance is a manageable part of DIY automotive repairs if you follow structured steps. Here’s what you should consider:

    Changing spark plugs is a straightforward DIY task when approached with clear, step-by-step guidance.

    1. Access: Locate your spark plugs, which can be straightforward or require removing components depending on your engine design.
    2. Technique: Use proper tools and techniques to avoid damaging the spark plug or engine parts.
    3. Inspection: Carefully examine old plugs for wear signs to confirm replacement necessity and guarantee new plugs match specifications.

    Mastering these aspects will make changing spark plugs a precise and efficient task, saving you time and money while maintaining engine performance.

    What Tools You Need To Change Spark Plugs

    You’ll need a specific set of tools to change spark plugs efficiently and safely.

    First, a spark plug socket, designed to fit various spark plug types, is vital; it usually has a rubber insert to grip the plug securely without damage.

    A ratchet wrench with an extension bar helps reach deep-set plugs, especially in tight engine compartments.

    A torque wrench is important to tighten plugs to manufacturer specifications, preventing overtightening or loosening.

    Additionally, a gap gauge lets you measure and adjust the spark plug gap accurately, which varies by spark plug type and engine requirements.

    Finally, a breaker bar can assist in loosening stubborn plugs safely.

    Having these vital tools guarantees you can handle most spark plug replacements with precision and care.

    How To Locate Spark Plugs Before Changing Them

    To locate your spark plugs, first understand your engine layout, whether it’s inline, V-shaped, or flat.

    Next, identify the spark plug wires or ignition coils connected directly to the plugs. These wires lead you to each spark plug’s exact position for removal and replacement.

    Engine Layout Basics

    Before changing your spark plugs, you need to identify their exact location within the engine. Different engine types have distinct spark plug configurations, so understanding your engine layout is essential.

    1. Inline Engines: Spark plugs align along one side of the engine block, making them more accessible.
    2. V-Type Engines: Spark plugs are positioned on both sides of the “V,” requiring you to check each bank separately.
    3. Boxer Engines: Plugs sit on opposite sides, often requiring removal of engine covers to access.

    Knowing your engine type helps you anticipate where the spark plugs sit, how many there are, and the tools needed.

    This foundational knowledge streamlines the replacement process and prevents mistakes during removal or installation.

    Identifying Spark Plug Wires

    How can you accurately locate spark plugs without first identifying their wires? Begin by tracing the wire routing from the ignition coil or distributor cap to each spark plug.

    Different spark plug types may have distinct wire connectors, so note any variations. Proper wire routing guarantees you avoid mix-ups during replacement, which can cause engine misfires.

    Cylinder Number Wire Color Connector Type
    1 Black Boot
    2 Red Clip
    3 Blue Boot
    4 Green Clip
    5 Yellow Boot

    How To Remove Old Spark Plugs Safely

    Although spark plugs may seem simple, removing them requires careful attention to avoid damage. Different spark plug types demand specific removal techniques to prevent thread stripping or electrode damage. Follow these steps:

    1. Guarantee Engine Coolness: Wait until the engine is completely cool to avoid burns and thermal damage to the spark plug threads.
    2. Use the Correct Socket: Select a spark plug socket matching the plug type, typically 5/8″ or 13/16″, to guarantee a firm grip without slipping.
    3. Apply Steady Torque: Turn the socket counterclockwise with consistent, moderate force. Avoid jerky movements to prevent snapping the plug or damaging the cylinder head.

    How To Install New Spark Plugs Correctly

    Once you’ve carefully removed the old spark plugs without causing damage, installing new ones requires equal precision to guarantee peak engine performance.

    First, identify the correct spark plug types for your engine. Apply a small amount of anti-seize compound on the threads to prevent seizing, then hand-tighten each plug to avoid cross-threading.

    Use a torque wrench to tighten to the manufacturer’s specified torque value. Follow these installation tips to optimize performance and longevity.

    Step Detail Tool Required
    1. Select Plug Match spark plug types Manufacturer specs
    2. Apply Compound Light anti-seize on threads Anti-seize compound
    3. Tighten Torque to spec, avoid over-tightening Torque wrench

    Common Challenges When Changing Spark Plugs

    When changing spark plugs, you’ll often face challenges like accessing plugs in tight engine spaces that limit your tool movement.

    Corroded threads can make removal difficult and risk damaging the cylinder head if not handled properly.

    Applying the correct torque is critical to guarantee plug performance and prevent over-tightening or loosening.

    Accessing Hard-to-Reach Plugs

    Because engine designs vary widely, accessing certain spark plugs can present significant challenges. To improve spark plug accessibility, you often need to perform engine cover removal carefully, as these covers can obstruct access.

    Here are three key strategies:

    1. Remove obstructive components: Detach engine covers, air intake ducts, or ignition coils to clear the path to the plugs.
    2. Use specialized tools: Employ angled spark plug sockets or extension bars to reach deep or tight spaces without damaging surrounding parts.
    3. Work systematically: Identify plug locations beforehand and plan your removal sequence to avoid unnecessary disassembly.

    Dealing With Corroded Threads

    After gaining access to hard-to-reach spark plugs, you may encounter corroded threads that complicate removal and installation. Corrosion often forms from moisture and contaminants, seizing the spark plug in place.

    To address this, apply penetrating oil and allow it to soak before carefully loosening the plug with a proper socket. Avoid using excessive force to prevent thread damage.

    If threads are stripped or damaged, you’ll need thread repair techniques such as helicoil inserts or thread chasers to restore integrity.

    During reinstallation, apply anti-seize compound sparingly on new spark plug threads to facilitate future removal and guarantee corrosion prevention.

    Proper handling during this process prevents costly repairs and maintains engine performance by securing a tight, reliable spark plug fit.

    Ensuring Proper Torque Application

    Anyone working on spark plug replacement knows that applying the correct torque is critical for engine reliability.

    Over-tightening can damage the threads, while under-tightening causes poor sealing and misfires.

    To guarantee proper torque application, follow these steps:

    1. Consult Torque Specifications: Always refer to the manufacturer’s torque specifications for your vehicle’s spark plugs to avoid guesswork.
    2. Use a Calibrated Torque Wrench: Employ a torque wrench to apply consistent and accurate torque, preventing overtightening or undertightening.
    3. Apply Torque Gradually: Tighten the spark plug slowly and steadily, stopping immediately when the torque wrench clicks or indicates the preset value.

    How Car Models Affect Spark Plug Replacement

    While the basic function of spark plugs remains consistent, different car models require specific types and replacement intervals due to variations in engine design, fuel systems, and performance specifications. You must select spark plug types compatible with your engine to maintain ideal combustion and efficiency. Ignoring engine compatibility may cause misfires or damage.

    Car Model Spark Plug Type Replacement Interval Engine Design Notes
    Honda Civic Iridium 100,000 miles Inline-4 High durability
    Ford F-150 Platinum 60,000 miles V6/V8 Heavy-duty performance
    Toyota Camry Copper 30,000 miles Inline-4 or V6 Budget-friendly option
    BMW 3 Series Double Platinum 60,000 miles Turbocharged Inline-4 Enhanced ignition
    Chevrolet Malibu Iridium 100,000 miles V6 Long-lasting performance

    When Should You Call A Pro To Change Spark Plugs?

    If you encounter complex engine issues while replacing spark plugs, it’s best to call a pro.

    You also need specialized tools to properly remove and install plugs without causing damage.

    Without these, attempting the job yourself can lead to costly repairs or incomplete maintenance.

    Complex Engine Issues

    Because spark plug issues can sometimes signal deeper engine problems, you should call a professional when you notice persistent misfires, unusual engine noises, or error codes despite replacing the plugs yourself.

    These symptoms often indicate complex underlying issues that require advanced engine diagnostics.

    Attempting repairs without proper expertise may worsen performance issues or cause further damage.

    Here are three situations to involve a pro:

    1. Persistent Misfires: If misfires continue after spark plug replacement, the problem may lie in ignition coils, fuel injectors, or compression issues.
    2. Unusual Engine Noises: Knocking or pinging sounds can point to timing defects or detonation, beyond spark plug faults.
    3. Diagnostic Trouble Codes (DTCs): Repeated error codes linked to ignition or fuel systems demand specialized diagnostic tools to accurately identify causes.

    In these scenarios, professional intervention guarantees precise diagnosis and effective resolution.

    Lack Of Proper Tools

    Even when you understand the process of changing spark plugs, lacking the proper tools can make the task difficult or risky.

    If you don’t have the right spark plug socket, torque wrench, or gap gauge, you risk damaging the spark plugs or the engine components.

    Tool compatibility is critical; using incorrect sizes or low-quality tools can strip threads or cause improper installation.

    If you have a lack of experience handling specialized automotive tools, you mightn’t apply the correct torque or properly align the spark plug.

    In these cases, it’s best to call a professional.

    They’ve the precise tools and expertise to guarantee the spark plugs are replaced safely and correctly, preventing potential engine damage or performance issues.

    Safety Tips For Changing Spark Plugs Yourself

    Although changing spark plugs may seem straightforward, prioritizing safety assures you avoid injury and damage. Always wear appropriate safety gear, including gloves and safety glasses, to protect your hands and eyes from debris and accidental sparks.

    Be mindful of fire hazards; never work on a hot engine or near open flames, as fuel vapors can ignite.

    1. Disconnect the battery to eliminate electrical shock risks.
    2. Confirm the engine is cool to prevent burns and reduce fire hazards.
    3. Use insulated tools designed for automotive work to avoid accidental short circuits.

    Frequently Asked Questions

    What Are the Signs of a Bad Spark Plug Wire?

    You’ll notice engine misfire, rough idling, or poor acceleration when spark plug wires fail. Cracks, corrosion, or spark plug failure signs like visible damage indicate it’s time to inspect and replace those wires promptly for proper engine function.

    Can Using the Wrong Spark Plug Damage My Engine?

    Yes, using the wrong spark plug can damage your engine. Poor spark plug compatibility affects engine performance, causing misfires, increased wear, and potential overheating.

    Always guarantee you choose the correct spark plug specified for your vehicle.

    How Do Spark Plugs Affect Fuel Efficiency?

    You can improve fuel efficiency by up to 30% when your spark plugs maintain ideal spark plug lifespan, ensuring complete fuel combustion.

    Worn plugs reduce combustion quality, causing wasted fuel and lower mileage, so timely replacement is essential.

    What Types of Spark Plugs Are Best for High-Performance Cars?

    You want high performance spark plugs made from iridium or platinum for durability and ideal ignition. Racing spark plugs offer superior heat dissipation and spark energy, enhancing combustion efficiency and power in high-performance engines.

    How Often Should Spark Plug Gaps Be Checked?

    You should check spark plug gaps every 30,000 miles or during routine spark plug maintenance. Consistent gap adjustment guarantees peak performance, prevents misfires, and maintains efficient combustion in your engine’s high-performance environment.

    Conclusion

    Changing spark plugs yourself can feel like carefully unscrewing the engine’s heartbeat. With the right tools and clear steps, you’ll confidently remove old plugs and install new ones, ensuring smooth ignition.

    Remember, knowing your car’s layout and safety tips helps avoid common pitfalls. If you encounter stubborn plugs or complex setups, calling a pro saves time and hassle.

    By staying precise and cautious, you keep your engine running efficiently and reliably. Overall, changing spark plugs is a manageable task when approached with care and knowledge.

  • What Are the Best Spark Plugs

    What Are the Best Spark Plugs

    You want the best spark plugs that guarantee reliable ignition, peak combustion, and long service life. Iridium plugs often stand out due to their fine-tipped design, superior wear resistance, and up to 100,000-mile lifespan, outperforming copper and platinum options.

    Choosing plugs that match your engine’s specifications and maintaining the correct gap size maximizes performance and fuel efficiency. Brands like NGK, Bosch, and Denso offer trusted quality.

    Understanding compatibility, signs of wear, and installation best practices can further enhance your engine’s output and durability.

    Key Takeaways

    • Iridium spark plugs are best for longevity, lasting up to 100,000 miles with superior wear resistance and consistent ignition performance.
    • NGK, Bosch, Denso, ACDelco, and Champion are top spark plug brands known for reliability and advanced technology.
    • Platinum plugs offer a balance of durability and performance, lasting about 60,000 miles with improved electrode life.
    • Proper spark plug compatibility with vehicle specifications ensures optimal combustion, avoiding misfires and engine damage.
    • Regular inspection and timely replacement maintain fuel efficiency, engine power, and prevent common issues like fouling and electrode wear.

    How Spark Plugs Impact Your Engine’s Performance

    Although spark plugs may seem like small components, they play a critical role in your engine’s combustion process by igniting the air-fuel mixture at precisely the right moment.

    The effectiveness of this ignition depends heavily on spark plug materials, which influence conductivity, durability, and heat dissipation.

    Improper materials can lead to inconsistent spark delivery, affecting combustion efficiency. Additionally, ignition timing, controlled by your engine’s management system, must synchronize perfectly with the spark plug’s ability to generate a robust spark.

    If timing is off, you risk incomplete combustion, resulting in reduced power, higher emissions, and increased fuel consumption.

    Comparing Spark Plug Types: Copper, Platinum, and Iridium

    How do you choose the right spark plug type for your engine’s needs? Understanding spark plug materials is essential.

    Copper plugs offer excellent conductivity but have the shortest lifespan, typically around 20,000 miles, due to rapid electrode wear.

    Platinum plugs improve durability with a platinum disc on the center electrode, extending lifespan to about 60,000 miles while maintaining good performance.

    Platinum plugs boost durability with a platinum disc, lasting around 60,000 miles and ensuring reliable performance.

    Iridium plugs, made with a fine iridium tip, provide superior wear resistance and can last up to 100,000 miles.

    This lifespan comparison highlights durability improvements with advanced materials.

    However, conductivity slightly decreases from copper to iridium, so balance your choice based on performance demands and maintenance intervals.

    Why Iridium Spark Plugs Are Often the Best Choice

    When you prioritize long-term engine efficiency and minimal maintenance, iridium spark plugs stand out as the ideal choice. Their fine iridium tip, with a melting point over 2400°C, offers superior durability compared to copper or platinum.

    This material’s hardness reduces electrode erosion, ensuring consistent spark delivery and ignition performance. You’ll benefit from iridium benefits such as improved fuel combustion and reduced misfires, which enhance overall engine responsiveness.

    The longevity advantages are significant: iridium plugs typically last up to 60,000–120,000 miles, cutting down frequent replacements.

    Additionally, their precise electrode design lowers voltage requirements, promoting stable arcs even under high compression.

    Signs You Need to Replace Your Spark Plugs

    You’ll notice engine misfires, rough idling, or hesitation during acceleration when your spark plugs begin to fail.

    These performance issues often coincide with increased fuel consumption due to incomplete combustion.

    Monitoring these signs helps you determine when it’s time to replace your spark plugs for peak engine efficiency.

    Engine Performance Issues

    Although spark plugs are small components, their condition directly affects your engine’s performance. If you notice rough idling, misfires, or difficulty starting your vehicle, these symptoms often stem from worn or fouled spark plugs disrupting the ignition system.

    Poor spark plug maintenance can lead to incomplete combustion, causing engine hesitation or reduced power output. You might also detect increased engine vibration, which signals inconsistent firing. Addressing these issues promptly guarantees ideal combustion efficiency and prevents damage to other components like the catalytic converter.

    Regular inspection and replacement of spark plugs according to manufacturer guidelines maintain precise ignition timing and consistent spark delivery.

    Increased Fuel Consumption

    If your vehicle starts consuming noticeably more fuel than usual, faulty spark plugs could be the culprit. Spark plugs play a critical role in igniting the air-fuel mixture efficiently; worn or degraded plugs cause incomplete combustion, directly reducing fuel efficiency.

    Different spark plug types, such as copper, platinum, and iridium, have varying lifespans and performance characteristics affecting how well they maintain peak combustion. For example, iridium plugs provide consistent spark energy longer, preserving fuel efficiency better than copper plugs.

    When plugs wear out, misfires increase, forcing your engine to burn extra fuel to compensate. Monitoring fuel consumption trends alongside regular spark plug inspections can help you identify when replacement is necessary.

    Replacing your spark plugs with the appropriate type guarantees your engine runs efficiently, preventing increased fuel consumption and maintaining overall performance.

    How Often Should You Change Your Spark Plugs for Best Performance?

    You should change your spark plugs according to the manufacturer’s recommended intervals, typically between 30,000 and 100,000 miles depending on the type.

    Pay close attention to signs of wear like misfires, rough idling, and decreased fuel efficiency, as these indicate it’s time for replacement.

    Regular maintenance guarantees peak ignition timing and combustion, directly impacting your engine’s performance and longevity.

    Changing your spark plugs every 30,000 to 100,000 miles, depending on the type and manufacturer specifications, guarantees peak engine performance and fuel efficiency.

    The spark plug lifespan varies considerably: conventional copper plugs generally require replacement around 30,000 miles, while platinum or iridium variants can last up to 100,000 miles.

    To determine the ideal replacement frequency, consult your vehicle’s service manual and consider driving conditions, as severe use may shorten the spark plug lifespan.

    Adhering to recommended change intervals prevents misfires and maintains combustion efficiency.

    Regularly scheduled replacement guarantees your ignition system operates within design parameters, reducing emissions and avoiding costly engine damage.

    Signs of Wear

    Though spark plugs are designed to last for a specified mileage range, recognizing the signs of wear is crucial to maintaining peak engine performance.

    You should routinely inspect your spark plugs within the recommended spark plug lifespan to identify wear indicators such as electrode erosion, fouling, or carbon buildup.

    A worn electrode decreases spark efficiency, leading to misfires. Additionally, excessive deposits or cracks on the insulator signal degradation.

    Pay close attention to changes in gap size; a widened gap impairs ignition timing and combustion quality.

    If you notice these wear indicators, it’s time to replace the spark plugs to guarantee optimal functioning.

    Timely replacement based on observable wear, rather than just mileage, helps prevent engine inefficiencies and maintains consistent performance.

    Impact on Engine Performance

    Maintaining ideal engine performance hinges on replacing spark plugs at appropriate intervals tailored to your vehicle’s specifications. Over time, the degradation of spark plug materials, such as iridium or platinum, affects the electrode gap and conductivity, leading to inconsistent ignition timing.

    This disruption can cause misfires, reduced fuel efficiency, and diminished power output. Typically, manufacturers recommend changing plugs between 30,000 to 100,000 miles, depending on the material and engine design. You should consult your owner’s manual to determine the best replacement schedule.

    Neglecting timely replacement compromises combustion efficiency, increasing emissions and engine wear. By adhering to the specified intervals and selecting plugs with durable materials, you maintain precise ignition timing and guarantee consistent engine performance, maximizing both power and longevity.

    How to Choose the Right Spark Plugs for Your Vehicle

    How do you determine the ideal spark plug for your vehicle’s engine? Start by consulting your vehicle specifications, which detail the required spark plug type, heat range, and gap size.

    Ensuring spark plug compatibility is critical. Select plugs that match these factory recommendations to avoid misfires or engine damage. Consider the electrode material; iridium and platinum offer longer life and better conductivity, but your vehicle’s design may favor a specific type.

    Choose spark plugs matching factory specs to prevent misfires; consider electrode material for durability and performance.

    Additionally, verify the thread size and reach to guarantee proper fit within the combustion chamber.

    Don’t overlook the importance of the heat range, which affects operating temperature and performance.

    Top Spark Plug Brands in 2024

    When selecting spark plugs, you’ll want to focus on brands that consistently deliver high-quality materials, precise manufacturing tolerances, and advanced electrode designs.

    NGK performance stands out with its superior iridium and platinum tips, enhancing ignition efficiency and longevity.

    Bosch reliability is proven through rigorous testing and ceramic insulator technology, guaranteeing stable operation under extreme conditions.

    Denso innovation shines in its patented U-groove electrode, which improves spark exposure and combustion.

    ACDelco value offers dependable OEM-quality plugs that balance cost and durability, making them a practical choice.

    Champion durability is synonymous with robust construction and anti-fouling coatings, providing extended service intervals.

    How High-Quality Spark Plugs Boost Fuel Efficiency

    You’ll notice that high-quality spark plugs enhance the combustion process by delivering a consistent and powerful spark, ensuring fuel ignites efficiently.

    This precision reduces engine misfires, which directly lowers wasted fuel and emissions.

    Improved Combustion Process

    Although the combustion process occurs within milliseconds, the quality of your spark plugs directly influences its efficiency and consistency. High-quality spark plugs provide a stable and powerful spark, ensuring ideal ignition of the air-fuel mixture.

    This precise ignition timing maximizes combustion efficiency by promoting complete fuel burn, which reduces unburned hydrocarbons and improves power output. When you use premium spark plugs with advanced electrode materials and designs, you enhance the spark’s reliability and intensity, minimizing energy loss during ignition.

    This improved combustion process not only boosts fuel efficiency but also stabilizes engine performance under various operating conditions. By maintaining ideal ignition, high-quality spark plugs help your engine run cleaner and more efficiently, ultimately translating to better fuel economy and reduced emissions.

    Reduced Engine Misfires

    Since engine misfires disrupt the combustion cycle, using high-quality spark plugs considerably reduces their occurrence by delivering consistent, strong sparks at the correct timing.

    You’ll notice that precise ignition timing is critical; premium spark plugs guarantee each spark ignites the air-fuel mixture effectively, preventing incomplete combustion.

    Proper spark plug maintenance supports this by preserving electrode integrity and preventing fouling, which can cause weak or irregular sparks leading to misfires.

    By minimizing misfires, you maintain engine stability, reduce unburned fuel waste, and enhance overall fuel efficiency.

    Furthermore, high-quality plugs withstand extreme temperatures and stress, providing reliable performance over extended intervals.

    Staying diligent with spark plug maintenance assures consistent ignition timing, keeping your engine running smoothly and efficiently while lowering emissions and fuel consumption.

    How to Install Spark Plugs

    Before installing new spark plugs, make sure the engine is cool to prevent damage and personal injury. Proper spark plug maintenance requires the right spark plug tools and a systematic approach.

    Follow these steps:

    1. Use a spark plug socket and ratchet to remove old plugs carefully, avoiding damage to threads.
    2. Inspect and gap new plugs according to manufacturer specifications using a feeler gauge.
    3. Apply a thin layer of anti-seize compound to the threads to prevent seizing.
    4. Hand-thread plugs into the cylinder head, then tighten with a torque wrench to specified values to guarantee proper seal and function.

    Adhering to this precise method prevents misfires and optimizes engine performance, extending the life of your spark plugs.

    Common Spark Plug Problems and How to Fix Them

    Spark plugs play an essential role in engine ignition, but they can develop specific problems that impair performance and fuel efficiency. Common issues include fouling, electrode wear, and improper gap size.

    Fouled plugs, often coated with carbon or oil, cause misfires and rough idling. Electrode wear reduces spark intensity, leading to weak combustion. Incorrect gap size disrupts the spark’s effectiveness, affecting acceleration and fuel economy.

    For effective spark plug maintenance, regularly inspect and clean the electrodes, and use a gap gauge to verify correct spacing.

    When troubleshooting spark plugs, look for discoloration or deposits that indicate specific engine problems like rich fuel mixture or oil leakage.

    Replacing worn or damaged plugs promptly restores engine efficiency and prevents long-term damage.

    Frequently Asked Questions

    Can Spark Plugs Affect My Car’s Emissions?

    Yes, faulty spark plug materials can cause incomplete combustion, increasing emissions. Using high-quality spark plugs guarantees your engine meets emissions standards by promoting efficient fuel burning and reducing harmful pollutants released through your exhaust system.

    Do Spark Plugs Influence Engine Noise?

    Like a maestro tuning an orchestra, you’ll find engine noise shifts with spark plug types. Precise gaps and materials influence combustion timing, reducing misfires and rough idling. This way, your engine hums smoothly and efficiently.

    Are Spark Plugs Compatible With Electric or Hybrid Vehicles?

    You won’t find spark plugs in electric vehicles, as they lack combustion engines. However, hybrid vehicles require spark plugs meeting specific hybrid vehicle requirements for efficient ignition, ensuring electric vehicle compatibility within dual powertrain systems.

    Can Using the Wrong Spark Plug Void My Car Warranty?

    Using the wrong spark plug can ripple through your engine’s harmony, risking warranty implications. Stick strictly to spark plug specifications your manufacturer outlines; otherwise, you might void coverage, compromising repairs and costs you’ll face unexpectedly.

    How Do Spark Plugs Perform in Extreme Weather Conditions?

    Spark plugs perform well in extreme weather by relying on temperature resistance to maintain ignition. You’ll notice spark plug longevity decreases if you use plugs not designed for your climate.

    Choose ones rated for your specific temperature range.

    Conclusion

    By choosing iridium spark plugs, you tap into a technology that lasts up to 60,000 miles—double that of traditional copper plugs—ensuring consistent engine performance and fuel efficiency. Replacing worn plugs before they degrade can improve combustion, reduce emissions, and prevent costly repairs.

    Remember, maintaining your spark plugs not only optimizes power but also keeps your engine running smoothly, making every mile more efficient and reliable. Don’t overlook this small part with a big impact when selecting the best spark plugs for your vehicle.

  • How to Adjust Carburetor Idle

    How to Adjust Carburetor Idle

    To adjust your carburetor idle, first warm your engine to normal operating temperature and verify no vacuum leaks exist. Proper carburetor idle adjustment is essential for smooth engine performance and fuel efficiency.

    Locate the idle speed screw and turn it clockwise to raise RPM or counterclockwise to lower it until reaching the specified idle speed. Next, fine-tune the idle mixture screw by slowly turning it to find the highest stable RPM. After adjusting, recheck the idle speed to ensure stability.

    Proper adjustment improves overall engine performance and efficiency. Continue exploring to uncover detailed steps and troubleshooting tips.

    Key Takeaways

    • Warm the engine to normal operating temperature before making any idle adjustments for accurate results.
    • Locate and identify the idle speed screw and idle mixture screw on the carburetor using the service manual.
    • Turn the idle speed screw clockwise to increase RPM or counterclockwise to decrease RPM until the desired idle speed is reached.
    • Adjust the idle mixture screw slowly, turning clockwise until the engine falters, then counterclockwise to achieve the highest steady RPM.
    • Check for vacuum leaks, clean throttle body passages, and ensure proper choke operation if idle issues persist after adjustments.

    Essential Prep Before Adjusting Carburetor Idle

    Before you begin adjusting the carburetor idle, make certain the engine is warmed up to its normal operating temperature. This guarantees accurate idle speed readings.

    Ensure the engine reaches normal operating temperature before adjusting the carburetor idle for accurate results.

    Start with a thorough preparation checklist: verify the air filter is clean, check for vacuum leaks, and confirm the throttle linkage moves freely.

    Understanding carburetor basics is essential; recognize that the idle adjustment controls fuel-air mixture at low engine speeds.

    Disconnect any electronic controls or emissions devices that might interfere. Use proper tools, such as a screwdriver or socket wrench, for precise screw turns.

    Double-check that the choke is fully open to prevent a rich mixture during adjustment.

    Completing this preparation checklist sets the stage for effective and safe carburetor idle tuning.

    Find and Identify Carburetor Idle Screws

    Once you have the engine prepared and running at operating temperature, locate the idle screws on your carburetor to begin fine-tuning.

    Different carburetor types feature varying screw locations, so identifying the correct ones is essential. Typically, you’ll find an idle mixture screw controlling fuel-to-air ratio and an idle speed screw adjusting throttle plate position.

    These screws are usually positioned near the throttle linkage or base plate. Screw heads may be flathead or Phillips depending on the model. Often, screws are marked or have spring tension to prevent movement.

    Refer to your carburetor’s service manual to confirm exact screw locations for your specific carburetor type. Proper identification guarantees accurate adjustments, preventing engine stalling or rough idle.

    Avoid confusing idle screws with choke or main jet screws, as improper adjustments can affect performance.

    How to Adjust Carburetor Idle Speed Step-by-Step

    Start by locating the idle speed screw on your carburetor, which controls the throttle plate position and consequently the engine’s idle RPM. Understanding carburetor basics helps you grasp why idle adjustment is essential: idle importance lies in maintaining engine stability at low speeds.

    Follow these steps:

    Step Action Result
    1 Warm engine to operating temp Accurate idle setting
    2 Turn screw clockwise Increase idle RPM
    3 Turn screw counterclockwise Decrease idle RPM
    4 Adjust until RPM matches spec Stable idle achieved
    5 Verify smooth engine operation Confirm idle importance met

    Adjust gradually, allowing the engine to respond. Proper idle speed prevents stalling and guarantees smooth performance.

    Fine-Tune Carburetor Idle Mixture for Smooth Performance

    Fine-Tune Carburetor Idle Mixture for Smooth Performance

    Although adjusting the idle speed sets the foundation, fine-tuning the idle mixture screw guarantees your engine runs smoothly and efficiently at low RPMs. Achieving the correct mixture balance is critical for performance enhancement and prevents stalling or rough idling.

    To fine-tune:

    • Warm up the engine to normal operating temperature.
    • Locate the idle mixture screw on the carburetor.
    • Slowly turn the screw clockwise until the engine starts to falter.
    • Then, turn it counterclockwise until you reach the highest steady RPM.
    • Adjust the idle speed screw afterward to maintain the desired RPM.

    This precise adjustment guarantees ideal air-fuel ratio, improving combustion efficiency and maintaining steady idle performance.

    Troubleshooting Common Carburetor Idle Issues

    Carburetor idle issues can stem from various factors, and pinpointing the exact cause is crucial for effective troubleshooting.

    Start by checking the idle adjustment screw; improper settings often degrade carburetor performance.

    If the engine stalls or idles roughly, clean the throttle body and idle passages to remove deposits obstructing fuel flow.

    Also, inspect vacuum lines for leaks, as they can cause erratic idle speeds.

    Ascertain the choke operates correctly, as a sticking choke affects idle quality.

    A dirty or worn spark plug may mimic carburetor idle problems, so examine ignition components.

    Finally, verify the fuel filter isn’t clogged, restricting flow and disrupting carburetor performance.

    When to Get Professional Help With Carburetor Idle

    If you notice persistent rough idling or stalling despite adjustments, it’s time to consult a professional.

    You shouldn’t risk safety when dealing with complex carburetor issues that affect engine performance.

    Expert tuning guarantees precise calibration, which can prevent damage and improve fuel efficiency.

    Signs of Complex Issues

    When your engine exhibits persistent stalling, uneven idling, or unusually high fuel consumption despite basic adjustments, you should consider seeking professional help.

    These idle symptoms often indicate deeper mechanical problems or carburetor malfunctions beyond typical tuning.

    Key performance indicators signaling complex issues include:

    • Irregular RPM fluctuations despite idle screw adjustments
    • Black smoke from the exhaust suggesting fuel mixture problems
    • Engine backfiring or hesitation during acceleration
    • Difficulty maintaining a stable idle speed after warm-up
    • Noticeable decrease in overall engine responsiveness

    If you experience these signs, it’s likely the carburetor requires thorough inspection, cleaning, or component replacement by a specialist.

    Attempting further DIY fixes might worsen the problem or mask underlying faults that affect engine reliability and efficiency.

    When Safety Is Concerned

    Because improper idle adjustments can lead to unsafe engine behavior, you should seek professional help immediately if you notice sudden loss of power, erratic engine response, or difficulty controlling the vehicle at low speeds.

    These symptoms suggest underlying carburetor or engine issues beyond simple idle tuning.

    When handling such scenarios, prioritize safety precautions. Avoid driving the vehicle until a qualified technician inspects it to prevent accidents.

    Familiarize yourself with emergency procedures, such as safely shutting off the engine if it stalls unexpectedly.

    Attempting further adjustments without proper expertise risks exacerbating the problem or causing engine damage.

    Remember, precise carburetor idle settings are critical for stable engine performance and operational safety.

    Don’t hesitate to consult professionals who can diagnose and correct complex faults effectively, ensuring safe and reliable vehicle operation.

    Benefits of Expert Tuning

    Although basic idle adjustments can be done by most vehicle owners, expert tuning guarantees ideal carburetor performance that balances fuel efficiency, emissions, and engine responsiveness.

    When you seek expert advice, you tap into specialized knowledge that guarantees precise calibration beyond standard adjustments.

    Professional tuning delivers measurable performance enhancement by optimizing air-fuel ratios and idle speed settings tailored to your engine’s specific needs.

    Consider getting professional help if you encounter:

    • Persistent rough idling despite manual tweaks
    • Unexpected stalling during idle
    • Excessive fuel consumption or emissions spikes
    • Difficulty maintaining consistent idle speed
    • Engine hesitation or lag on acceleration

    Frequently Asked Questions

    Can Carburetor Adjustments Affect Fuel Efficiency Significantly?

    Yes, adjusting your carburetor’s fuel mixture and idle speed can greatly impact fuel efficiency. Proper tuning guarantees ideal combustion, reducing fuel waste and improving engine performance.

    Don’t overlook precise idle adjustments for best results.

    How Often Should I Check My Carburetor Idle Settings?

    You should check your carburetor idle settings every 3,000 miles or during routine carburetor maintenance. Regular idle tuning guarantees peak engine performance, prevents stalling, and maintains fuel efficiency. This keeps your vehicle running smoothly and reliably.

    What Tools Are Best for Cleaning a Carburetor Before Adjustment?

    You’ll need carburetor cleaning essentials: a carb cleaner spray, small wire brushes, compressed air, and screwdrivers. These tools guarantee thorough cleaning, removing deposits and debris, which is essential before you adjust the carburetor idle settings.

    Are There Differences in Adjusting Idle on Two-Stroke Vs Four-Stroke Engines?

    You know what they say, “The devil’s in the details.” Two stroke differences lie in simpler idle adjustments; four stroke specifics require careful synchronization of valves and fuel mix to guarantee stable, precise idle control and ideal engine performance.

    Can a Dirty Air Filter Cause Idle Problems Similar to Carburetor Issues?

    Yes, a dirty air filter can cause idle symptoms similar to carburetor issues. Regular air filter maintenance guarantees proper airflow, preventing rough idling or stalling caused by fuel-air mixture imbalances affecting engine performance.

    Conclusion

    Now that you’ve mastered adjusting your carburetor idle, you’ll never have to guess why your engine stalls—unless, of course, you enjoy the mystery of random breakdowns.

    Remember, a well-tuned idle isn’t just about smooth running; it’s about preventing costly repairs. So, unless you prefer spending time pushing your vehicle more than driving it, follow these steps carefully.

    If it still misbehaves, don’t hesitate to call a pro—your carburetor isn’t psychic. Properly adjusting the carburetor idle is key to keeping your engine running smoothly and efficiently.

  • How to Rebuild Husqvarna Trimmer Carburetor

    How to Rebuild Husqvarna Trimmer Carburetor

    To rebuild your Husqvarna trimmer carburetor, start by removing it from the trimmer and carefully disassembling all its parts. Use carburetor cleaner to thoroughly clear jets, needles, and passages from any debris or buildup. This step is crucial for restoring proper fuel flow and engine function.

    Next, replace any worn gaskets and diaphragms with new parts from a rebuild kit. Make sure to handle all components gently to avoid damage during reassembly. Reassemble the carburetor precisely to prevent leaks or blockages that could affect performance.

    Once the carburetor is reinstalled, adjust the idle and fuel mixture screws to achieve ideal engine performance. If the trimmer still struggles to run smoothly, consider exploring further troubleshooting steps to enhance its reliability and efficiency.

    Key Takeaways

    • Remove the carburetor carefully and disassemble all parts on a clean, well-lit workspace.
    • Use carburetor cleaner spray to thoroughly clean jets, needle valves, and fuel passages.
    • Replace worn gaskets, diaphragms, and fuel inlet needles with components from a Husqvarna rebuild kit.
    • Reassemble the carburetor precisely, ensuring proper alignment to avoid leaks or blockages.
    • Adjust idle, low-speed, and high-speed screws after warming the engine for optimal performance.

    Signs Your Husqvarna Trimmer Carburetor Is Clogged

    How can you tell if your Husqvarna trimmer’s carburetor is clogged? You’ll notice inconsistent engine performance, such as difficulty starting, stalling at idle, or reduced power under load.

    These symptoms often result from poor fuel flow caused by debris buildup. Regular carburetor maintenance is crucial to prevent this issue.

    Poor fuel flow from debris buildup causes issues; regular carburetor maintenance is essential to prevent problems.

    Check for signs like black smoke, rough idling, or an unusually strong fuel odor, which indicate improper fuel-air mixture caused by clogging.

    Additionally, using low-quality or old gasoline can accelerate carburetor blockage, so always verify fuel quality meets manufacturer recommendations.

    Monitoring these signs early helps you address clogging before it severely impacts your trimmer’s function. Staying proactive with carburetor upkeep guarantees reliable, efficient operation.

    Tools and Parts to Rebuild Your Husqvarna Trimmer Carburetor

    To successfully rebuild your Husqvarna trimmer carburetor, you’ll need a specific set of tools and replacement parts.

    Essential tools include a precision screwdriver set, needle-nose pliers, a small pick or hook tool, and a carburetor cleaner spray.

    A clean workspace with good lighting will help prevent losing tiny components.

    Replacement parts typically involve gaskets, diaphragms, and fuel inlet needles tailored to your model.

    Having a carburetor rebuild kit is highly recommended, as it consolidates these essential components for effective repair.

    Following carburetor maintenance tips, verify you inspect each part for wear or damage before assembly.

    Using the correct tools and parts guarantees a precise rebuild, restoring peak performance to your Husqvarna trimmer.

    How to Clean and Rebuild Your Husqvarna Trimmer Carburetor

    Although rebuilding a Husqvarna trimmer carburetor requires attention to detail, following a systematic cleaning and assembly process guarantees ideal engine performance.

    Start by removing the carburetor from the fuel system and disassembling it carefully.

    Use a carburetor cleaner spray to remove varnish, dirt, and debris from all parts, including jets, needle valves, and passages.

    Inspect gaskets and diaphragms for wear; replace them as needed to ascertain a tight seal.

    Reassemble the carburetor precisely, aligning all components to avoid leaks or blockages.

    Proper carburetor maintenance prevents fuel starvation and flooding issues, maintaining consistent engine operation.

    After rebuilding, reinstall the carburetor, ensuring fuel lines connect securely.

    This methodical approach to cleaning and rebuilding optimizes your Husqvarna trimmer’s fuel system efficiency and longevity.

    Adjusting Your Husqvarna Trimmer Carburetor for Best Performance

    Once you’ve rebuilt your Husqvarna trimmer carburetor, you’ll need to adjust it carefully to secure peak engine performance. Start by warming up the engine to operating temperature.

    Locate the high-speed (H), low-speed (L), and idle (T) adjustment screws. For precise carburetor tuning, first set the idle screw to achieve a steady idle without stalling.

    Next, adjust the low-speed screw to guarantee smooth acceleration from idle without hesitation. Then, fine-tune the high-speed screw for maximum RPM without engine knocking or smoke.

    Use a tachometer if available to verify RPM specifications in your model’s manual. Small incremental turns, no more than a quarter rotation, are best to avoid over-adjustment.

    Proper carburetor tuning results in ideal fuel-air mixture, directly contributing to performance enhancement and fuel efficiency.

    Troubleshooting Common Husqvarna Trimmer Carburetor Issues

    When your Husqvarna trimmer shows signs of poor performance, such as rough idling, stalling, or difficulty starting, it’s likely that the carburetor needs troubleshooting.

    First, inspect for carburetor leaks, which can cause an improper fuel mixture and reduce engine efficiency. Check all gaskets and seals for cracks or wear, replacing any damaged components immediately.

    Next, verify that the fuel mixture is correctly balanced; a mixture too rich or lean affects combustion and engine response.

    Clean the carburetor jets and passages to remove debris that could block fuel flow.

    If the trimmer still performs poorly, examine the diaphragm and needle valve for wear or damage, as these regulate fuel delivery.

    Systematic troubleshooting guarantees your trimmer runs reliably and extends carburetor life.

    Frequently Asked Questions

    What Fuel Type Is Best for Husqvarna Trimmers?

    You should use unleaded gasoline with an octane rating of 89 or higher as the best fuel for Husqvarna trimmers.

    Follow the manufacturer’s fuel recommendations to guarantee peak engine performance and longevity.

    How Often Should I Service My Trimmer Carburetor?

    Think of your trimmer’s carburetor as its heart; you should service it every 25 hours of use. Follow trimmer maintenance tips and precise carburetor cleaning techniques to keep performance sharp and prevent costly breakdowns.

    Can I Use Aftermarket Carburetor Parts?

    You can use aftermarket parts if they guarantee carburetor compatibility and maintain aftermarket quality. Verify specifications carefully, as poor-quality parts may cause performance issues or damage, compromising your trimmer’s reliability and efficiency.

    What Safety Precautions Are Needed During Carburetor Rebuild?

    Remember how a spark ignited a campfire? You need safety gear like gloves and goggles when handling flammable liquids during carburetor rebuilds.

    Work in a ventilated area, avoid sparks, and keep a fire extinguisher nearby.

    How Do Temperature Changes Affect Carburetor Performance?

    You’ll notice temperature fluctuations impact carburetor efficiency by altering fuel vaporization and air density. Warmer temps can cause vapor lock, while cold reduces fuel flow, so adjust settings to maintain ideal mixture and performance.

    Conclusion

    Rebuilding your Husqvarna trimmer carburetor might seem like a tough nut to crack, but with the right tools and steps, you can get it running like new.

    Regular cleaning and precise adjustments guarantee peak performance and prevent future clogging. If you hit a snag, troubleshoot methodically to avoid wasting time.

    Stay patient and methodical—this hands-on approach will save you money and extend your trimmer’s lifespan. Proper care and attention are key when rebuilding your Husqvarna trimmer carburetor.