Author: hello@wash-o-rama.com

  • How to Replace Shocks and Struts

    How to Replace Shocks and Struts

    To replace shocks and struts, first securely lift and support your vehicle using manufacturer-recommended jack points and quality jack stands. This is an essential step to ensure safety during the process.

    Remove the old parts by unbolting the mounting hardware. If you are handling struts, compress the coil springs safely using a spring compressor.

    Install new shocks or struts by aligning the mounts properly and tightening bolts to the specified torque values. After assembly, verify fasteners and component seating before lowering the vehicle.

    Understanding these steps guarantees a safe, effective repair — there’s more to master for flawless suspension performance.

    Key Takeaways

    • Securely lift the vehicle using manufacturer-recommended jack points and support it with high-quality jack stands before starting.
    • Remove old shocks by unbolting upper and lower mounts, and compress coil springs safely when dealing with struts.
    • Use a spring compressor to decompress coil springs and detach the strut assembly by loosening top mount and lower bolts.
    • Install new shocks or struts by aligning mounting points and tightening all bolts to manufacturer-specified torque values.
    • Before lowering, double-check fasteners, confirm proper seating of components, and inspect for correct positioning of dust boots and bump stops.

    Tools and Parts Needed for Shock and Strut Replacement

    To replace shocks and struts effectively, you’ll need a specific set of tools and parts prepared in advance. Start by identifying the correct shock absorber types for your vehicle, whether twin-tube, monotube, or gas-charged, as this guarantees compatibility and performance.

    Identify the correct shock absorber type to ensure compatibility and optimal performance before replacement.

    For strut replacement, obtain a complete strut assembly or individual strut assembly components such as the coil spring, mount, and bearing.

    Essential tools include a spring compressor for safely handling coil springs, a socket set with ratchets and extensions, a torque wrench, and penetrating oil for rusted fasteners.

    Additionally, have a breaker bar and a jack stand ready, but we’ll cover vehicle support later.

    Preparing these tools and parts precisely will streamline the replacement process and maintain suspension integrity.

    Lift and Support Your Vehicle Safely

    Start by locating the manufacturer’s recommended jack points to avoid damaging your vehicle’s frame.

    Use high-quality jack stands to securely support the car once it’s lifted.

    Always confirm the vehicle is stable before beginning any work underneath.

    Choose Proper Jack Points

    Anyone working on suspension components must identify the proper jack points on the vehicle’s frame or designated lift areas. Choosing the correct jack location is critical to maintaining vehicle stability and avoiding damage.

    Follow these steps:

    1. Consult your vehicle’s owner manual to locate factory-recommended jack points.
    2. Inspect the frame or pinch welds near the wheels for reinforced areas designed to bear weight.
    3. Avoid placing the jack on plastic parts, fuel lines, or suspension components.
    4. Position the jack securely under the identified point, ensuring it’s centered to distribute weight evenly.

    Proper jack location guarantees a stable lift, preventing the vehicle from shifting or falling during shock or strut replacement.

    Always double-check the jack point before lifting to protect both yourself and your vehicle.

    Use Quality Jack Stands

    Although lifting your vehicle with a jack is essential, you must support it with quality jack stands to guarantee safety throughout the repair.

    Prioritize jack stand safety by selecting stands rated for your vehicle’s weight, ensuring they’ve a solid, stable base and durable construction.

    When choosing jackstands, opt for those with adjustable height locks that securely engage to prevent accidental collapse.

    Avoid cheap or damaged stands, as they compromise stability and increase risk.

    Place each jack stand under the manufacturer’s recommended lift points, and confirm they sit firmly on a flat, hard surface.

    By carefully choosing jackstands built to meet or exceed safety standards, you maintain a secure work environment, minimizing hazards while replacing shocks and struts.

    Never rely solely on a hydraulic jack for vehicle support.

    Ensure Stable Vehicle Position

    Before you lift your vehicle, verify it’s parked on a flat, level surface to prevent any shifting or tipping during the repair. Securing your vehicle properly is essential for maintaining shock absorber performance and guaranteeing the strut assembly functions safely during replacement.

    Follow these steps to guarantee stable vehicle positioning:

    1. Engage the parking brake firmly to immobilize the vehicle.
    2. Place wheel chocks on the wheels remaining on the ground to prevent roll.
    3. Position the jack under the manufacturer-recommended lift point to avoid frame damage.
    4. After raising the vehicle, install quality jack stands firmly under solid frame locations before removing the jack.

    This setup stabilizes the vehicle, protecting you and preserving component integrity while you service the shocks and struts.

    Remove Old Shocks and Struts

    Begin by safely lifting and supporting your vehicle to access the suspension components.

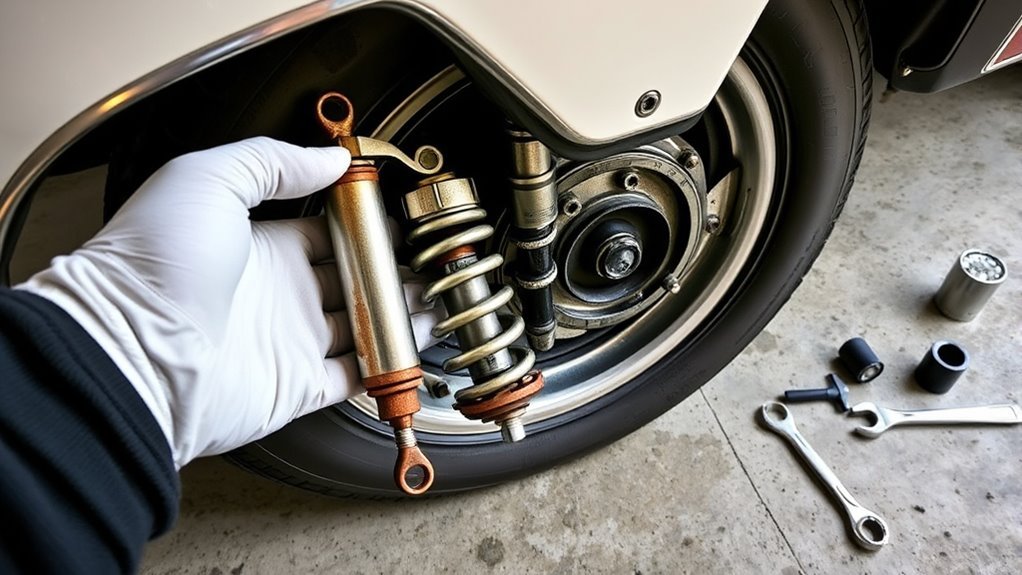
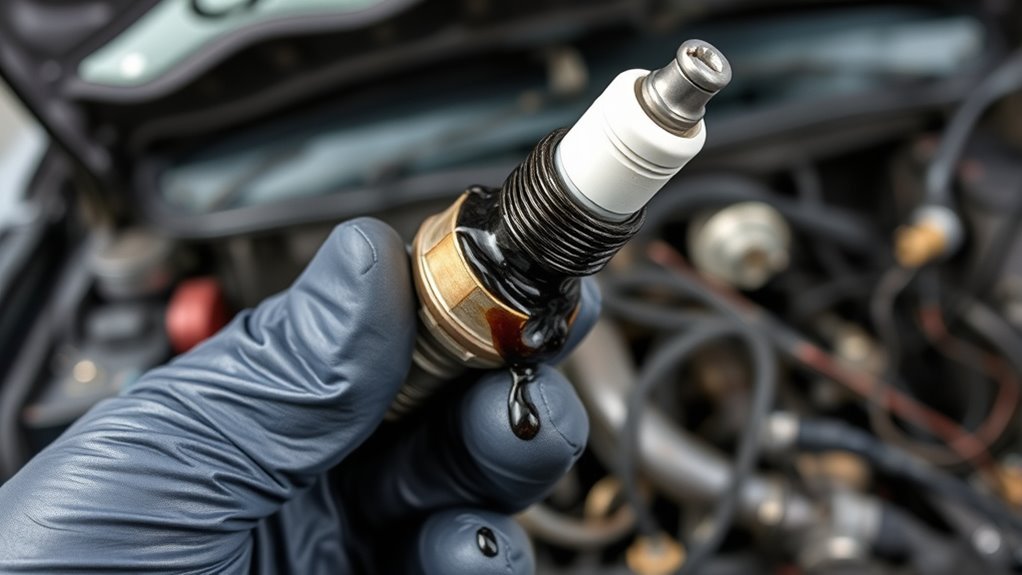
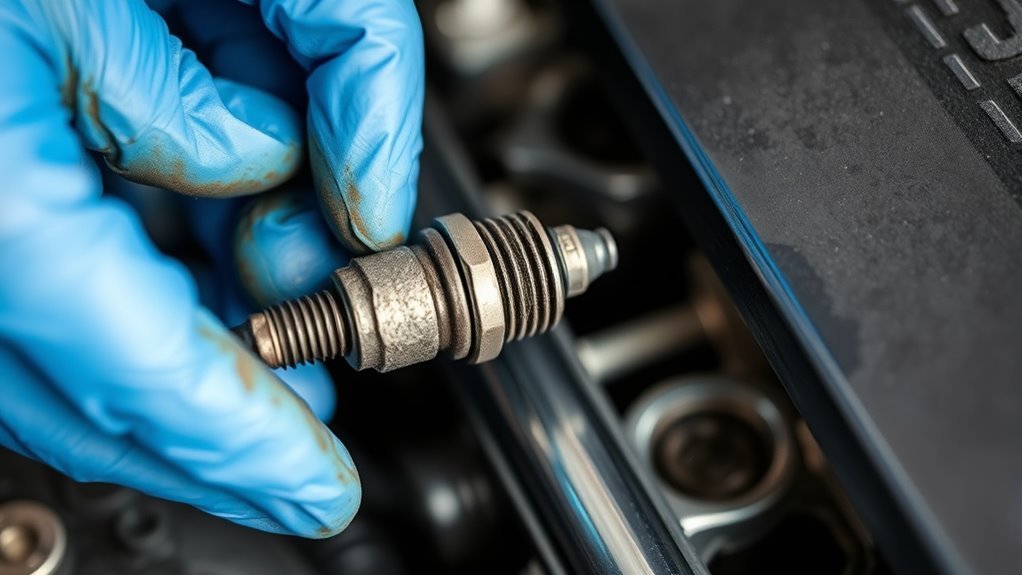
    Start with old shock identification by inspecting for leaks, dents, or worn bushings, confirming which shocks or struts require replacement.

    For shock removal, unbolt the lower and upper mounting hardware using the appropriate sockets and wrenches.

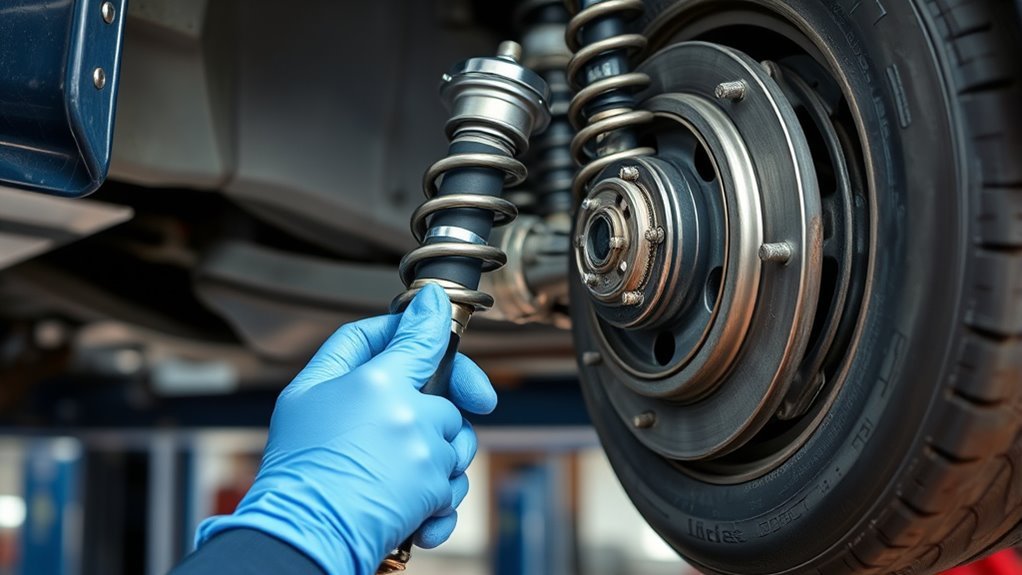
    When removing struts, apply strut removal techniques such as compressing the coil spring with a spring compressor to relieve tension safely.

    Then, detach the strut assembly by loosening the top mount bolts inside the engine bay or trunk and the lower mounting bolts near the wheel hub.

    Keep track of all hardware and components removed for proper reassembly.

    Avoid forcing parts; if stuck, use penetrating oil and gentle prying to prevent damage.

    Install New Shocks and Struts Correctly

    Before you begin installing new shocks and struts, make sure you follow all safety precautions to prevent injury.

    Use the correct tools designed for suspension work to guarantee proper fit and torque specifications.

    Follow a step-by-step installation process to secure components accurately and maintain vehicle performance.

    Safety Precautions First

    Two critical safety precautions guarantee you install new shocks and struts without injury or damage: securely lifting the vehicle and properly supporting it with jack stands.

    Before starting, always wear appropriate personal protective equipment to safeguard against debris and chemical exposure.

    Create a safe work environment by clearing the area and guaranteeing adequate lighting.

    Follow these steps:

    1. Use a reliable jack to lift the vehicle at manufacturer-specified lift points.
    2. Position jack stands under solid frame sections to support the vehicle securely.
    3. Double-check stability before removing any suspension components.
    4. Keep tools organized and maintain clear access to prevent tripping hazards.

    Adhering to these safety measures minimizes risks and guarantees your shock and strut replacement proceeds smoothly and safely.

    Proper Tool Selection

    Although having new shocks and struts ready is essential, selecting the proper tools secures a correct and efficient installation. You’ll need specific tool types such as spring compressors, socket wrenches, torque wrenches, and strut nut sockets.

    Choosing high-quality tool brands like Snap-on, Craftsman, or Tekton guarantees durability and accuracy. Spring compressors must match the shock or strut size to safely compress coil springs. Torque wrenches calibrated to the vehicle manufacturer’s specifications prevent over-tightening or under-tightening fasteners.

    Avoid generic or worn tools to reduce the risk of damage or injury. Organize your tools before starting to streamline the process, and verify all tool types correspond to your vehicle model.

    Proper tool selection is fundamental to a secure, professional installation.

    Step-by-Step Installation Guide

    Once you’ve gathered the appropriate tools and new components, you can begin the installation by safely lifting and securing the vehicle.

    Proper shock absorption and ideal strut performance depend on precise installation. Follow these steps:

    1. Remove the old shocks or struts by loosening bolts and disconnecting any mounting hardware.
    2. Align the new shock or strut assembly carefully, ensuring the mounting points match exactly.
    3. Tighten all bolts to the manufacturer’s specified torque, securing the unit firmly without over-tightening.
    4. Reattach any components removed during disassembly, and lower the vehicle safely.

    After installation, test drive to confirm improved shock absorption and strut performance.

    Proper torque and alignment are critical to avoid premature wear and maintain vehicle stability.

    Troubles You Might Face When Replacing Shocks and Struts

    When replacing shocks and struts, you might encounter challenges such as stubborn bolts, worn-out components, or alignment issues. One common mistake is forcing bolts without proper lubrication, which can strip threads or break studs.

    Use penetrating oil and appropriate tools to ease bolt removal. Another issue is misidentifying worn parts, leading to ineffective repairs. Inspect all suspension components carefully before replacement.

    Troubleshooting tips include verifying torque specifications to avoid under- or over-tightening fasteners, which can cause premature wear or failure.

    Alignment problems often arise if the suspension geometry shifts during installation. Double-check mounting positions and consider a professional alignment afterward.

    Address these challenges methodically to guarantee a safe, durable repair and avoid common pitfalls.

    Check Your Work Before Lowering the Vehicle

    Before lowering the vehicle, double-check all fasteners to verify they meet the specified torque values and confirm that the shocks and struts are properly seated in their mounts. This final inspection is critical to guarantee safety and performance.

    Always double-check fasteners and ensure shocks and struts are securely seated before lowering the vehicle for safety.

    Follow these steps:

    1. Re-torque all bolts to manufacturer specifications using a calibrated torque wrench.
    2. Inspect mounting points for secure fitment and absence of gaps or misalignment.
    3. Verify that all dust boots and bump stops are correctly positioned.
    4. Check brake and suspension components disturbed during the process for proper reassembly.

    Once confirmed, carefully lower the vehicle.

    Perform a controlled test drive to assess handling and confirm the new shocks and struts function correctly. Address any unusual noises or vibrations immediately before regular use.

    How to Tell When Your Shocks and Struts Need Replacing

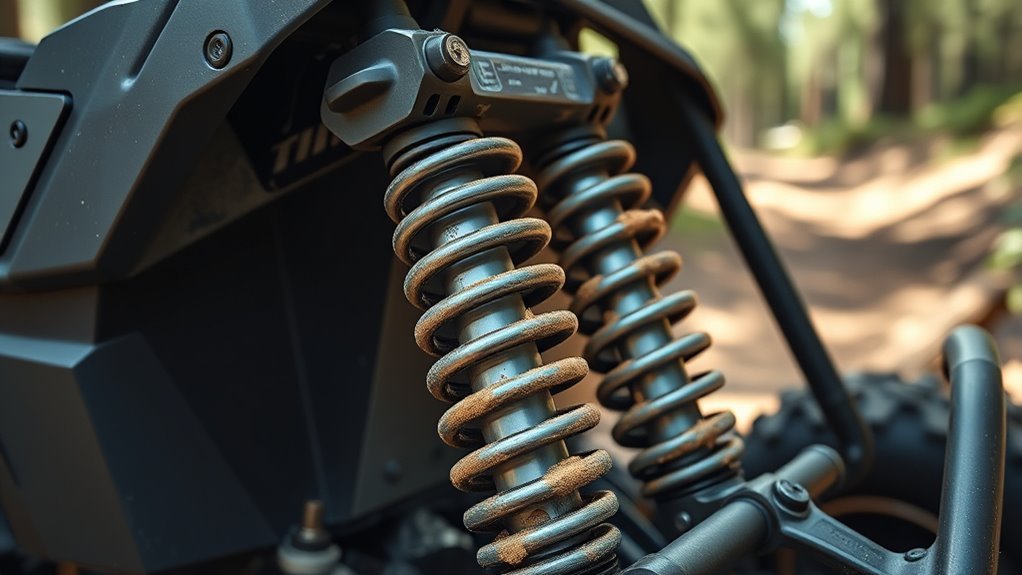
    How can you determine if your shocks and struts require replacement? Begin by inspecting for obvious symptoms of wear such as fluid leaks, dented or damaged components, and uneven tire wear.

    Next, evaluate the vehicle’s performance impact: excessive bouncing after hitting a bump, nose-diving during braking, or swaying in turns indicate compromised shock or strut function.

    Conduct a bounce test by pressing down firmly on each corner of the vehicle; if it bounces more than twice, the shocks or struts likely need replacing.

    Additionally, listen for unusual noises like clunking when driving over rough terrain.

    Monitoring these symptoms of wear closely guarantees you maintain peak ride stability and control. Replace shocks and struts promptly to avoid further suspension damage and maintain safety.

    When to Consider Professional Help for Shock and Strut Replacement

    Although replacing shocks and struts can be a straightforward task for experienced DIYers, you should consider professional help if you lack the necessary tools or technical knowledge.

    This is especially important if your vehicle uses advanced suspension systems.

    Here are key indicators that professional expertise is necessary:

    1. You encounter complex suspension designs requiring specialized equipment.
    2. Cost considerations make purchasing tools impractical compared to professional service fees.
    3. You notice unusual noises or handling issues during test drives after basic repairs.
    4. Safety-critical components, like strut mounts or electronic sensors, require precise calibration.

    Tips to Maintain Your Shocks and Struts After Replacement

    Once you’ve replaced your shocks and struts, maintaining their performance hinges on regular inspections and mindful driving habits.

    Start with shock maintenance by checking for fluid leaks, damaged mounts, and unusual noises every 5,000 miles. Clean the components to prevent dirt buildup that accelerates wear.

    Inspect shocks every 5,000 miles for leaks, damaged mounts, and noises to ensure longevity.

    For effective strut care, inspect the strut assembly for corrosion or cracks, and confirm the coil springs remain intact. Avoid aggressive driving, such as rapid acceleration or hard braking, which stresses suspension components.

    Additionally, keep your tires properly inflated and aligned to reduce uneven load on shocks and struts. Scheduling periodic suspension system evaluations will help you identify early signs of wear.

    Frequently Asked Questions

    What Are the Differences Between Shocks and Struts?

    You’ll find a shock absorber controls movement by damping, while a strut assembly combines a shock absorber with structural support. It bears weight and aligns suspension components, making struts more integral to your vehicle’s suspension system.

    Can I Replace Shocks and Struts on All Vehicle Types?

    You can replace shocks and struts on most vehicle types, but always follow specific replacement guidelines for your model. Some vehicles require special tools or procedures, so consult your service manual to guarantee proper installation and safety.

    How Do Worn Shocks and Struts Affect Vehicle Safety?

    Worn shocks and struts degrade suspension performance, reducing your vehicle handling precision. This compromises stability during turns, increases stopping distances, and causes uneven tire wear.

    These issues directly affect your safety and control on the road.

    What Is the Average Cost of Professional Shock and Strut Replacement?

    The average costs for professional services replacing shocks and struts range between $400 and $900, depending on your vehicle type and parts quality.

    You should budget accordingly for labor and high-quality components to guarantee peak performance.

    How Long Do Shocks and Struts Typically Last Before Replacement?

    You might think shock lifespan and strut durability vary wildly, but typically, shocks and struts last 50,000 to 100,000 miles. Regularly inspect them to maintain ideal vehicle stability and prevent premature wear or failure.

    Conclusion

    Replacing your shocks and struts isn’t just a task—it’s the backbone of your vehicle’s smooth ride and safety.

    By following each step carefully, you guarantee your suspension works like new, absorbing bumps and keeping control sharp. Remember, proper tools and precautions are your best allies.

    If challenges arise, don’t hesitate to seek help. With routine checks and maintenance, your shocks and struts will keep performing like the silent guardians they are on every journey.

    Proper replacement of your shocks and struts ensures your vehicle remains stable and comfortable, making it essential to the overall performance and safety of your car.

  • What Does an Oil Filter Do

    What Does an Oil Filter Do

    An oil filter protects your engine by removing contaminants from the oil, ensuring it stays clean and effective at lubricating internal parts.

    It traps dirt, metal fragments, and sludge, preventing wear and maintaining oil pressure. Clean oil helps reduce friction, overheating, and mechanical stress, extending engine life.

    Different filter types exist, and timely replacement is essential for peak performance. Understanding how the filter works and when to change it can keep your engine running smoothly.

    Key Takeaways

    • An oil filter removes contaminants and debris from engine oil to prevent engine wear and damage.
    • It traps dirt particles while allowing clean oil to circulate through the engine.
    • The filter maintains oil cleanliness, ensuring proper lubrication and consistent oil pressure.
    • By filtering oil, it helps preserve oil viscosity and reduces friction on engine components.
    • Regular oil filter maintenance supports engine reliability, performance, and longevity.

    How An Oil Filter Protects Your Engine

    Although you mightn’t notice it, your engine relies heavily on the oil filter to maintain peak performance. The oil filter plays a critical role in removing contaminants that can cause wear and damage to engine components.

    Proper filter maintenance guarantees that the oil filter continues to function effectively, preventing abrasive particles from circulating within the engine. Neglecting this maintenance reduces oil filter longevity and compromises engine protection.

    By regularly replacing the oil filter according to manufacturer specifications, you maintain maximum filtration efficiency, prolong engine life, and sustain consistent oil pressure.

    Monitoring filter condition and adhering to timely replacements are essential steps in safeguarding your engine against premature wear, overheating, and costly repairs.

    In short, attentive filter maintenance directly supports your engine’s reliability and performance.

    How Oil Filters Catch Dirt And Debris

    When oil flows through the filter, it passes through a dense, fibrous media designed to trap dirt, metal particles, and other contaminants. This media captures dirt particles efficiently, preventing debris accumulation within the engine.

    Here’s how it works:

    1. Oil enters the filter housing under pressure.
    2. It spreads evenly across the filter media’s surface.
    3. The fibrous structure traps dirt particles and debris while allowing clean oil to pass.
    4. Accumulated debris remains in the filter, preventing recirculation.

    This precise filtration process guarantees contaminants don’t circulate, reducing engine wear.

    You rely on this mechanism to maintain oil cleanliness by capturing microscopic particles that would otherwise cause damage. Understanding this function highlights why the filter’s design and material quality are vital for effective dirt and debris removal.

    Why Clean Oil Matters For Engine Health

    Since oil continuously circulates through your engine, keeping it clean is crucial for peak performance and longevity. Contaminants like dirt, metal particles, and combustion byproducts degrade oil quality, compromising oil viscosity.

    When oil viscosity drops, it fails to provide adequate lubrication, increasing friction and wear on critical engine components. Maintaining clean oil guarantees consistent oil viscosity, which reduces mechanical stress and heat buildup.

    This directly supports engine longevity by minimizing component deterioration and preventing premature failure. Clean oil also enhances thermal stability, allowing the engine to operate efficiently under varying temperatures.

    By regularly using a quality oil filter and changing oil on schedule, you protect your engine’s internal surfaces, optimize fuel efficiency, and extend service intervals.

    Ultimately, clean oil is crucial for preserving your engine’s reliability and lifespan.

    The Different Types Of Oil Filters

    You’ll encounter several types of oil filters designed to remove contaminants efficiently.

    Cartridge oil filters use replaceable filter elements, while spin-on filters combine the housing and filter in a single unit for easy replacement.

    Magnetic oil filters add an extra layer by capturing metallic particles through magnetic attraction.

    Cartridge Oil Filters

    Cartridge oil filters consist of a replaceable filter element housed within a permanent metal casing, designed to simplify maintenance and reduce waste. When you handle cartridge oil filters, understanding cartridge materials is vital. They typically include synthetic fibers or cellulose blends for peak filtration efficiency.

    Proper cartridge maintenance guarantees your engine remains protected by regularly replacing the filter element without discarding the entire housing.

    Here’s what you need to know about cartridge oil filters:

    1. They offer precise filtration tailored by cartridge materials.
    2. Maintenance involves swapping only the filter element, minimizing waste.
    3. The permanent casing provides structural support and containment.
    4. Installation requires careful sealing to prevent oil leaks.

    Using cartridge oil filters helps maintain engine performance while supporting environmentally conscious practices.

    Spin-On Oil Filters

    While cartridge oil filters focus on replaceable elements within a fixed housing, spin-on oil filters combine the filter media and casing into a single, disposable unit. This spin on design simplifies maintenance; you just unscrew the old filter and screw on a new one.

    Spin-on filters use advanced filter materials like cellulose, synthetic fibers, or blends to capture contaminants effectively. Their sealed metal casing guarantees durability under pressure and prevents leaks.

    Feature Cartridge Filters Spin-On Filters
    Design Replaceable element only Integrated media and casing
    Maintenance Housing reused Fully disposable
    Filter Materials Various media types Cellulose, synthetic blends
    Installation More involved Quick twist-on installation

    You benefit from the spin on design’s convenience and reliability for routine oil changes.

    Magnetic Oil Filters

    Magnetic oil filters utilize powerful magnets to attract and hold ferrous metal particles suspended in the engine oil, preventing them from circulating and causing wear.

    This magnetic filtration method enhances filter efficiency by capturing microscopic metal debris that traditional filters might miss.

    When you use magnetic oil filters, you benefit from:

    1. Improved engine protection by reducing abrasive metal contaminants.
    2. Extended oil and engine life due to decreased particle circulation.
    3. Minimal maintenance, as magnets require occasional cleaning rather than replacement.
    4. Compatibility with conventional and synthetic oils without affecting flow rates.

    When To Change Your Oil Filter

    Because the oil filter plays an essential role in maintaining engine cleanliness, you should change it regularly to guarantee peak performance. Typically, the oil filter lifespan ranges between 3,000 to 7,500 miles, depending on your vehicle’s make and oil type.

    Always consult your maintenance schedule for manufacturer-recommended intervals. Adhering to this schedule prevents clogging, which can reduce filtration efficiency and strain your engine.

    Environmental conditions, such as frequent short trips or dusty surroundings, may necessitate more frequent changes. Neglecting timely replacement risks circulating contaminants, accelerating engine wear.

    By proactively monitoring and replacing the oil filter as specified, you maintain ideal oil flow and engine protection.

    How To Change Your Oil Filter

    Regularly replacing your oil filter guarantees your engine runs smoothly, but knowing how to change it correctly is equally important.

    Proper oil filter maintenance prevents contaminants from damaging engine components. Here’s how to change your oil filter using the right changing tools:

    1. Warm up the engine slightly to ease oil flow, then securely lift the vehicle and place a drain pan underneath.
    2. Use an oil filter wrench to loosen and remove the old filter, avoiding spills.
    3. Apply a thin layer of fresh oil to the new filter’s gasket to guarantee a tight seal.
    4. Install the new filter by hand, tightening according to manufacturer specifications, then refill the engine with fresh oil.

    Following these precise steps protects your engine and extends its longevity.

    How To Tell If Your Oil Filter Is Failing

    How can you recognize when your oil filter starts to fail? Key oil filter symptoms include a noticeable drop in engine performance and unusual engine noises, often caused by inadequate oil flow.

    Monitor filter performance indicators such as oil pressure gauge readings; a sudden increase or decrease in oil pressure may signal clogging or bypass valve activation.

    Additionally, check for contaminated oil during oil changes—excessive debris or sludge indicates a compromised filter.

    Another critical sign is the illumination of the oil warning light on your dashboard, signaling potential filtration issues.

    If you observe these symptoms, it’s crucial to inspect or replace the oil filter promptly to prevent engine damage due to poor lubrication and contamination buildup.

    Maintaining peak filter performance supports engine longevity and efficiency.

    Tips For Choosing The Right Oil Filter For Your Car

    When selecting an oil filter for your vehicle, you need to take into account factors such as compatibility with your engine model, filtration efficiency, and construction quality.

    Choosing the right oil filter guarantees peak engine protection and performance. Consider these tips:

    1. Verify filter compatibility by checking your car’s manual or manufacturer specifications to avoid improper fit or function.
    2. Evaluate oil filter brands based on industry certifications and customer reviews for reliability and consistent quality.
    3. Opt for filters with high filtration efficiency to trap contaminants effectively without restricting oil flow.
    4. Inspect construction materials, such as anti-drainback valves and robust sealants, to guarantee durability under operating conditions.

    Frequently Asked Questions

    Can I Use Any Oil Filter Brand for My Vehicle?

    You shouldn’t use just any oil filter brand; guarantee oil filter compatibility with your vehicle’s specifications. Check filter brand recommendations in your owner’s manual or trusted sources to maintain engine performance and avoid damage or leaks.

    Do Oil Filters Affect Fuel Efficiency?

    Yes, oil filter maintenance directly impacts fuel efficiency. A clogged or poor-quality filter reduces engine performance, increasing fuel consumption.

    Keeping your oil filter clean guarantees ideal flow, minimizing fuel efficiency impact and enhancing engine longevity.

    Are Synthetic Oil Filters Better Than Regular Ones?

    Yes, synthetic oil filters offer synthetic advantages like enhanced filtration efficiency and filter longevity. You’ll experience better contaminant capture and longer service intervals compared to regular filters.

    This improves your engine’s protection and overall performance.

    Can a Clogged Oil Filter Cause Engine Overheating?

    Just like a knight’s armor slowing him down, a clogged oil filter restricts oil flow, impairing engine performance and causing overheating.

    Regular filter maintenance guarantees proper lubrication and prevents costly engine damage due to excessive heat buildup.

    Is It Necessary to Drain Old Oil Before Changing the Filter?

    Yes, you should drain old oil before replacing the filter to guarantee the oil change process is thorough. Proper filter replacement timing prevents contamination and maintains engine efficiency during the oil change process.

    Conclusion

    Think of your oil filter as a fortress wall, standing guard to keep harmful debris from invading your engine’s delicate chambers. By catching dirt and contaminants, it guarantees your oil flows clean and strong, protecting essential parts from wear and tear.

    Regularly changing your oil filter keeps this shield intact, maintaining peak engine health and performance. Choosing the right filter means reinforcing your engine’s defense, letting it run smoothly mile after mile.

    In conclusion, understanding what does an oil filter do helps you appreciate its vital role in prolonging engine life and ensuring optimal vehicle operation.

  • How to Clean a Carburetor

    How to Clean a Carburetor

    To clean a carburetor, start by safely removing it from your engine. Disconnect the fuel lines and linkages carefully to avoid damage.

    Next, disassemble key parts such as the float bowl, jets, and needle valve. Soak these components in a carburetor cleaner solution to dissolve grime and deposits.

    Use brushes and compressed air to thoroughly clear out any remaining deposits and clogs. Inspect each part for wear or damage before proceeding.

    Once cleaned and inspected, reassemble the carburetor carefully, ensuring all parts are properly aligned. After reinstalling it, test the engine’s idling and throttle response.

    Adjust the screws as needed to fine-tune performance. Keep following for detailed steps to restore peak carburetor performance.

    Key Takeaways

    • Remove the carburetor by disconnecting fuel lines, throttle linkage, and mounting bolts in a well-ventilated area.
    • Disassemble parts like the float bowl, jets, and needle valve, keeping components organized for reassembly.
    • Soak parts in carburetor cleaner, scrub with a soft brush, and clear jets and passages with compressed air or a fine wire.
    • Reassemble carefully, aligning all parts properly, tightening fasteners evenly, and ensuring correct routing of linkages and fuel lines.
    • Test by starting the engine, checking for smooth idle, proper throttle response, and no fuel leaks, adjusting as necessary.

    How to Tell If Your Carburetor Needs Cleaning

    Although your engine might run, signs like rough idling, poor acceleration, or increased fuel consumption indicate your carburetor likely needs cleaning.

    These carburetor symptoms often result from clogged jets or deposits disrupting fuel-air mixture flow.

    Clogged jets or deposits often disrupt the fuel-air mixture flow, causing common carburetor symptoms.

    You should also watch for black smoke from the exhaust or difficulty starting the engine, as these signal improper fuel delivery.

    Regular cleaning frequency depends on usage and environment but typically ranges from every 12,000 to 15,000 miles or annually for occasional use.

    Ignoring these symptoms can lead to engine performance issues and higher emissions.

    Monitoring your vehicle for these precise signs helps determine the best cleaning intervals, maintaining efficient operation and extending carburetor life.

    Staying proactive prevents minor clogs from escalating into major repairs or replacements.

    Common Carburetor Problems Cleaning Can Fix

    You’ll often find that cleaning your carburetor resolves fuel flow issues by removing clogs and buildup.

    It also helps prevent engine stalling caused by inconsistent fuel delivery.

    Additionally, a thorough cleaning can stabilize idle speed by ensuring smooth operation of the throttle components.

    Fuel Flow Issues

    When fuel doesn’t flow properly through your carburetor, the engine can experience stalling, hesitation, or poor acceleration. These symptoms often stem from fuel delivery problems caused by clogging issues within the carburetor passages.

    Dirt, varnish, or debris can obstruct jets, needles, and fuel channels, restricting flow and disrupting the air-fuel mixture. To fix this, you need to disassemble the carburetor carefully and use a specialized carburetor cleaner to dissolve deposits.

    Pay close attention to tiny orifices and fuel passages, verifying they’re completely clear. After cleaning, inspect components for wear or damage before reassembling.

    Properly restoring fuel delivery guarantees smooth engine performance and responsiveness, preventing fuel starvation and inefficient combustion.

    Regular maintenance helps avoid future clogging and prolongs carburetor life.

    Engine Stalling Causes

    Since carburetors regulate the air-fuel mixture essential for combustion, any imbalance can cause engine stalling. When dirt, varnish, or debris clog the jets or passages, the mixture becomes inconsistent, impairing engine performance.

    You’ll notice frequent stalls during acceleration or idling as the fuel supply fluctuates. Cleaning the carburetor removes these blockages, restoring the correct air-to-fuel ratio. This not only prevents stalling but also improves fuel efficiency by ensuring complete combustion.

    Additionally, deposits on the throttle plate or choke mechanism can disrupt airflow, triggering stalls. By thoroughly cleaning these components, you maintain smooth engine operation and consistent power delivery.

    Addressing these common carburetor issues will help you avoid stalling problems and optimize overall engine reliability and efficiency.

    Idle Speed Problems

    Carburetor cleanliness directly affects idle speed consistency and stability. When dirt or varnish builds up inside the carburetor, it can clog passages critical for maintaining proper idle. This often leads to idle speed problems such as fluctuating RPMs or engine stalling.

    To fix these issues, thoroughly clean the carburetor, focusing on jets, passages, and the throttle body. After cleaning, use precise idle adjustment techniques to set the correct idle speed, ensuring smooth operation.

    Additionally, removing blockages improves throttle response issues, allowing the engine to react promptly to accelerator input. Neglecting carburetor maintenance can result in uneven idling and poor throttle performance, so regular cleaning is essential for reliable engine function and consistent idle speed control.

    Tools and Materials Needed for Carburetor Cleaning

    Before you begin cleaning, gather all the essential tools and materials to guarantee a smooth and efficient process.

    Using the correct items guarantees thorough cleaning while protecting both you and the carburetor components.

    At a minimum, you’ll need:

    1. High-quality cleaning solutions, specifically formulated carburetor cleaners that dissolve varnish and carbon deposits without damaging metal or rubber parts.
    2. Protective gear, including nitrile gloves and safety goggles, to shield your skin and eyes from harsh chemicals and debris.
    3. A set of precision screwdrivers and small brushes to access tight spaces and remove buildup effectively.

    Having these on hand allows you to work efficiently and safely, minimizing the risk of damage or injury.

    Proper preparation is key to restoring peak carburetor function.

    How to Safely Remove Your Carburetor

    You’ll want to disconnect three main components when removing your carburetor: the fuel line, throttle linkage, and mounting bolts. Prioritize carburetor safety by working in a well-ventilated area and wearing gloves to prevent fuel exposure. Use proper removal techniques to avoid damaging delicate parts.

    Component Tool Needed Safety Tip
    Fuel Line Wrench or pliers Clamp fuel line to prevent spills
    Throttle Linkage Screwdriver Note linkage position for reassembly
    Mounting Bolts Socket set Loosen bolts evenly to avoid warping

    Always relieve fuel system pressure before starting. Label parts and take photos to ease reinstallation. These steps guarantee a safe, efficient removal process without damage or contamination.

    How to Disassemble Your Carburetor Step-by-Step

    After safely removing the carburetor, the next step involves carefully disassembling its components to inspect and clean each part.

    Follow these precise steps to guarantee effective carburetor maintenance:

    1. Remove the float bowl by unscrewing the retaining screws carefully, avoiding damage to the gasket.
    2. Detach the float assembly and needle valve, noting their positions for accurate reassembly.
    3. Extract jets and screws using the appropriate tools, keeping them organized to prevent loss.

    Adhering to carburetor maintenance tips, disassemble only as much as necessary to avoid complications.

    Regular cleaning frequency recommendations suggest inspecting and disassembling your carburetor every 12 months or sooner if performance issues arise.

    This careful approach sets you up for thorough cleaning and peak engine performance.

    How to Clean Carburetor Parts Thoroughly

    Once you’ve disassembled the carburetor components, soak each part in a suitable cleaner to dissolve deposits.

    Use a brush to scrub away remaining residue and guarantee all passages are clear.

    Finally, inspect each piece thoroughly for wear or damage before reassembly.

    Disassemble Carburetor Components

    Begin by carefully removing all external components attached to the carburetor, including the throttle linkage, fuel lines, and air filter assembly.

    For effective carburetor maintenance, precise disassembly techniques are crucial. Follow these steps:

    1. Detach the float bowl by unscrewing its retaining screws; handle the float and needle valve gently to avoid damage.
    2. Remove jets, emulsion tubes, and screws, keeping track of their original positions for accurate reassembly.
    3. Extract the throttle shaft and choke assembly, inspecting for wear or corrosion.

    Use appropriate tools to prevent stripping or damaging delicate parts.

    Organize components systematically to streamline cleaning and reassembly.

    Mastering these disassembly techniques guarantees thorough inspection and prepares each part for the next cleaning phase.

    Soak Parts In Cleaner

    Although disassembled parts can appear clean, soaking them in a specialized carburetor cleaner dissolves stubborn varnish, deposits, and grime embedded in small passages and surfaces.

    Use a recommended soaking solution specifically formulated for carburetors to guarantee effective chemical action without damaging components.

    Submerge all metal parts fully, avoiding rubber or plastic components that may degrade.

    Pay close attention to cleaning duration: typically, 20 to 30 minutes suffices for moderate buildup, but heavily soiled parts may require up to an hour.

    Avoid excessive soaking to prevent corrosion or material weakening.

    Agitate the solution gently if possible to enhance penetration.

    After soaking, rinse parts thoroughly with water or a compatible solvent to remove residual cleaner and dissolved contaminants, preparing them for the next cleaning step.

    Scrub And Inspect Thoroughly

    After soaking, you’ll need to scrub each part carefully to remove any remaining deposits or residues that the cleaner couldn’t dissolve.

    Use proper cleaning techniques to avoid damaging delicate components.

    Follow these carburetor maintenance tips for effective scrubbing and inspection:

    1. Use a soft-bristle brush and carburetor-safe solvent to gently clean passages and surfaces without abrasion.
    2. Inspect parts under bright light or magnification, checking for cracks, corrosion, or warping that could impair function.
    3. Clear all jets, passages, and orifices with compressed air or a fine wire tool to guarantee unobstructed fuel flow.

    This thorough approach guarantees peak performance and longevity of your carburetor by preventing clogs and mechanical failures.

    How to Reassemble and Reinstall Your Carburetor

    Carefully align all components to their original positions as you start reassembling the carburetor, guaranteeing each gasket and seal fits snugly to prevent air leaks.

    Use precise reassembly techniques to avoid damaging delicate parts, paying close attention to the orientation of jets, diaphragms, and screws.

    Handle jets, diaphragms, and screws carefully during reassembly to ensure correct orientation and prevent damage.

    Tighten fasteners evenly but avoid over-torquing to maintain proper sealing without warping components.

    When reinstalling the carburetor, attach it securely to the intake manifold using the correct torque specifications.

    Reconnect all linkages, fuel lines, and vacuum hoses exactly as they were, verifying their routing to prevent kinks or disconnections.

    Follow installation tips such as checking for clean mating surfaces and replacing old gaskets.

    Proper reassembly and installation guarantee peak carburetor performance and prevent operational issues.

    Testing Your Carburetor After Cleaning

    Once you’ve reassembled and reinstalled the carburetor, you’ll need to verify its functionality through a series of performance tests.

    Proper testing guarantees ideal carburetor performance and identifies any necessary post cleaning adjustments. Follow these steps:

    1. Start the engine and listen for smooth idling; rough or fluctuating idle signals potential issues.
    2. Check throttle response by gradually increasing engine speed; hesitation or stalling suggests fuel delivery problems.
    3. Inspect for fuel leaks around the carburetor base and connections during operation; leaks compromise performance and safety.

    If you observe abnormalities, adjust the idle mixture screws or float level as needed.

    Accurate post cleaning adjustments ensure that your carburetor operates efficiently, prolonging engine life and improving fuel economy.

    Frequently Asked Questions

    Can Carburetor Cleaning Improve Fuel Efficiency?

    Yes, regular carburetor maintenance directly improves fuel efficiency by ensuring ideal air-fuel mixture. When you clean your carburetor, you prevent clogging and inefficient combustion, which helps your engine run smoothly and saves fuel.

    How Often Should I Clean My Carburetor?

    You should perform carburetor maintenance every 12,000 to 15,000 miles, adjusting cleaning frequency based on usage and fuel quality.

    Regular checks prevent buildup, ensuring peak engine performance and fuel efficiency through timely cleaning.

    Is It Necessary to Replace the Carburetor After Cleaning?

    You don’t have to replace the carburetor after cleaning if you apply proper carburetor maintenance and cleaning techniques.

    Replacement is only necessary when parts are damaged, corroded, or cleaning doesn’t restore peak performance.

    Can I Use Carburetor Cleaner on Fuel Injectors?

    Think of your fuel injector as a delicate watch; you shouldn’t use carburetor spray on it. Carburetor cleaner’s harsh chemicals can damage fuel injectors, so always use a cleaner specifically formulated for fuel injectors.

    What Are the Symptoms of a Damaged Carburetor Float?

    You’ll notice fuel leaks, engine flooding, or stalling if your carburetor float is damaged. Poor float adjustment can cause erratic fuel levels, leading to these symptoms.

    Check and adjust the float precisely for proper function.

    Conclusion

    Now that you’ve mastered the fine art of carburetor cleaning—because who doesn’t want to play mechanic in their free time?—your engine will purr like a kitten instead of cough like a grumpy cat.

    Remember, precision and patience make all the difference, so don’t rush. If you skipped any step, well, enjoy that extra smoke show.

    Otherwise, pat yourself on the back—you’ve just given your carburetor a spa day it desperately needed. This thorough carburetor cleaning will keep your engine running smoothly for miles to come.

  • How to Adjust Carburetor Mixture Screws

    How to Adjust Carburetor Mixture Screws

    To adjust carburetor mixture screws, first locate the “L” and “H” screws near the throttle body, using the right screwdriver. Warm up your engine fully, then gently seat each screw clockwise before backing them out 1–1.5 turns.

    Start the engine and adjust each screw individually to find the smoothest idle or peak RPM. Watch for signs like rough idling or poor acceleration to refine the mixture.

    Proper tuning improves fuel economy and performance—explore more detailed steps and troubleshooting tips ahead.

    Key Takeaways

    • Locate the mixture screws marked “L” (low-speed) and “H” (high-speed) on the carburetor throttle body area.
    • Warm up the engine to normal operating temperature before starting any mixture screw adjustments.
    • Gently seat each mixture screw clockwise, then back out 1 to 1.5 turns as a baseline for tuning.
    • Adjust one screw at a time while monitoring engine RPM or idle quality, aiming for smooth idle and stable speed.
    • Fine-tune screws to eliminate rough idling or hesitation, improving fuel economy and engine performance.

    Finding the Carburetor Mixture Screws on Your Engine

    Where exactly are the carburetor mixture screws located on your engine? First, identify the carburetor location. It’s typically mounted between the air filter housing and the intake manifold.

    Once you’ve pinpointed the carburetor, focus on the throttle body area where the fuel and air mix. The mixture screws are usually positioned on the side or bottom of the carburetor body.

    For screw identification, look for small, slotted or Phillips-head screws, generally marked “L” for low-speed and “H” for high-speed adjustments. These screws control the air-fuel ratio and are often recessed or partially covered by a plug or cap.

    Proper screw identification is vital before any adjustments to avoid damaging the carburetor or misadjusting the fuel mixture, which affects engine performance.

    Essential Tools and Preparing Your Engine for Adjustment

    Before adjusting the carburetor mixture screws, gather the necessary tools like a screwdriver, tachometer, and safety gear.

    Warm up your engine to its normal operating temperature to guarantee accurate adjustments.

    Always follow safety precautions to prevent injury and equipment damage during the process.

    Necessary Tools Checklist

    Several essential tools are required to accurately adjust your carburetor mixture screws, ensuring precise tuning and ideal engine performance.

    Start with a set of flathead and Phillips screwdrivers, as carburetor types vary and may require different heads. A small, calibrated carburetor adjustment screwdriver is vital for delicate tuning.

    You’ll also need a tachometer to monitor engine RPM during adjustment techniques. A vacuum gauge can help verify proper mixture settings in some carburetor designs.

    Additionally, have a clean rag and penetrating oil on hand to clean screws and prevent seizing.

    Finally, safety glasses and gloves protect you during the process. Gathering these tools beforehand streamlines the procedure and supports precise, repeatable adjustments aligned with your specific carburetor type.

    Engine Warm-Up Procedures

    Although it might seem straightforward, properly warming up your engine is critical to obtaining accurate carburetor mixture screw adjustments.

    Begin by starting the engine and letting it idle until the engine temperature reaches its normal operating range, typically indicated by the temperature gauge or a specified time in the manual. This guarantees the fuel-air mixture reflects real operating conditions.

    Avoid revving the engine during warm-up, as fluctuating engine temperature can lead to inconsistent readings. Maintaining the correct engine temperature stabilizes fuel vaporization and combustion, directly impacting fuel efficiency.

    Only once the engine is fully warmed up should you proceed with adjusting the mixture screws, making certain the settings optimize performance under typical operating conditions.

    Skipping this step risks improper tuning and degraded engine efficiency.

    Safety Precautions Overview

    When you prepare to adjust the carburetor mixture screws, gathering the right tools and guaranteeing your engine is properly set up is essential for both safety and accuracy. Always wear appropriate safety gear, such as gloves, goggles, and flame-resistant clothing, to minimize injury risks. Be mindful of fire hazards: keep flammable materials away and work in a well-ventilated area. Confirm the engine is cool to prevent burns and accidental ignition.

    Essential Tool Purpose Safety Tip
    Screwdriver Adjust mixture screws Use insulated handle
    Tachometer Measure RPM Avoid placing near moving parts
    Fire extinguisher Emergency fire control Guarantee accessibility

    Proper preparation prevents accidents and guarantees precise carburetor tuning.

    How to Adjust Carburetor Mixture Screws Step-by-Step

    Before you begin adjusting the carburetor mixture screws, make certain the engine is warmed up and running at idle.

    Locate the mixture screws, usually two, on the carburetor body. Using a screwdriver, turn each screw clockwise gently until it lightly seats; don’t overtighten.

    Find the mixture screws on the carburetor and gently turn clockwise until they lightly seat without overtightening.

    Then, back each screw out 1 to 1.5 turns as a baseline for carburetor tuning. Start the engine and listen carefully.

    Slowly turn one screw clockwise in small increments while monitoring engine response. When the idle speed peaks or stabilizes, stop adjusting that screw.

    Repeat the process with the second screw. This method guarantees initial fuel-air mixture balance for performance optimization.

    After both screws are set, verify stable idle speed and smooth engine operation before proceeding to fine adjustments.

    Fine-Tuning Carburetor Mixture Screws for Best Performance

    With the initial mixture screws set to stabilize idle speed and engine operation, you can now fine-tune their positions for ideal performance.

    Begin carburetor tuning by slowly turning each screw in quarter-turn increments, monitoring engine response carefully. Use a tachometer or listen for subtle changes in idle smoothness and RPM.

    Your goal is to achieve the highest, most stable idle speed without causing engine hesitation or roughness. Adjust both screws equally to maintain balance, then verify overall engine response under load.

    Performance enhancement requires patience and precision; small adjustments can considerably impact fuel-air mixture quality.

    Once you find the best screw positions, lock them in place if applicable. This method guarantees efficient combustion, improved throttle response, and reduced emissions, maximizing your engine’s performance and reliability.

    Troubleshooting Common Carburetor Mixture Screw Issues

    You’ll want to start by identifying symptoms like rough idling or poor acceleration that signal mixture screw issues.

    Next, check for common errors such as incorrect screw positioning or damage that disrupts fuel flow.

    Correcting these adjustments guarantees peak engine performance and prevents further complications.

    Identifying Mixture Screw Problems

    Although mixture screw issues can be subtle, recognizing their symptoms is essential for effective carburetor tuning. You need to identify mixture screw problems early by observing specific adjustment indicators and mixture screw symptoms.

    Common signs include:

    • Rough idle or engine stalling at low RPMs, signaling an overly lean or rich mixture.
    • Hesitation or bogging during acceleration, which suggests improper fuel-air balance.
    • Excessive exhaust smoke or poor fuel economy, indicating a mixture skewed too rich.

    Pay close attention to these symptoms during engine operation and idle adjustments. They serve as precise adjustment indicators, guiding you to pinpoint mixture screw faults without guesswork.

    Detecting these issues accurately allows you to prepare for proper correction and avoid further engine performance degradation.

    Correcting Adjustment Errors

    When mixture screw adjustments lead to persistent engine issues, you must methodically troubleshoot to restore peak performance. Begin by reviewing your mixture screw calibration and adjustment techniques for accuracy. Incorrect calibration often causes rough idling, stalling, or poor throttle response.

    Use the table below to identify common errors and corrective actions:

    Symptom Correction
    Engine stalls Lean mixture; enrich by turning screw in slowly
    Rough idle Rich mixture; lean out by turning screw out gradually
    Hesitation on throttle Incorrect synchronization; recalibrate mixture screws
    Poor fuel economy Over-rich mixture; fine-tune screws for leaner setting

    Apply small incremental adjustments and always allow the engine to stabilize before re-evaluating. This precision guarantees effective mixture screw calibration and peak engine performance.

    When to Get Professional Help With Carburetor Mixture Screws

    If your adjustments fail to improve engine performance or you encounter persistent issues like rough idling or stalling, it’s time to seek professional assistance. Knowing when to consult a technician helps prevent further damage and guarantees accurate diagnosis.

    Signs of malfunction beyond mixture screw misadjustment include:

    • Inconsistent fuel delivery despite correct screw settings
    • Visible damage or wear on carburetor components
    • Engine hesitation or backfiring during acceleration

    These symptoms indicate underlying problems that require specialized tools and expertise. Attempting advanced repairs without proper knowledge can worsen the situation.

    A professional can perform precise calibration, inspect internal parts, and recommend necessary replacements.

    Don’t ignore these signs of malfunction; timely intervention saves costs and maintains peak engine function.

    Maintaining Your Carburetor After Adjustment

    Properly maintaining your carburetor after adjustment guarantees consistent engine performance and prevents premature wear. Follow essential carburetor maintenance tips such as regularly cleaning the air filter, checking for fuel leaks, and ensuring the throttle linkage operates smoothly.

    Implement a routine inspection checklist that includes examining the mixture screws for proper seating and verifying the float level remains within specifications.

    Monitor engine idle quality and responsiveness, adjusting mixture screws as needed to compensate for changes in altitude or fuel quality.

    Avoid prolonged exposure to dirt and moisture, which can degrade internal components.

    Frequently Asked Questions

    What Types of Engines Commonly Use Carburetor Mixture Screws?

    You’ll commonly find carburetor mixture screws on motorcycle engines and small engines like lawnmowers or chainsaws. These screws precisely control air-fuel ratios, optimizing performance and efficiency in these types of engines.

    How Do Carburetor Mixture Screws Affect Fuel Efficiency?

    You don’t want perfect fuel economy, right? Well, tuning carburetor mixture screws precisely improves combustion, ensuring ideal fuel-air balance.

    Follow these tuning tips to enhance fuel economy, reduce emissions, and boost engine performance efficiently.

    Can Incorrect Mixture Screw Settings Damage the Engine?

    Yes, incorrect mixture tuning can damage your engine. Lean settings cause overheating and detonation, while rich mixtures foul spark plugs and reduce engine performance.

    Proper adjustment guarantees ideal combustion and prevents long-term engine wear or failure.

    Are There Different Mixture Screws for Two-Stroke and Four-Stroke Engines?

    Think of mixture screw types like different lenses; two-stroke and four-stroke engines need distinct adjustments to optimize engine performance.

    You’ll find their screws differ, tailoring fuel-air mix precisely for each engine’s combustion style.

    How Often Should Carburetor Mixture Screws Be Adjusted?

    You should adjust carburetor mixture screws during regular carburetor maintenance, typically every 6-12 months or if engine performance declines. Frequent tuning guarantees ideal fuel-air mixture, preventing poor combustion and maintaining efficient engine operation.

    Conclusion

    Adjusting your carburetor mixture screws is like tuning a fine instrument—precision makes all the difference. By carefully following each step and using the right tools, you guarantee your engine runs smoothly and efficiently.

    Remember, small tweaks can have a big impact on performance. If issues persist despite your efforts, don’t hesitate to seek professional help.

    Regular maintenance after adjustments keeps your carburetor in top shape, preventing future problems and extending engine life. Proper adjustment of your carburetor mixture screws is essential for optimal engine performance and longevity.

  • Can Bad Spark Plugs Cause Rough Idle

    Can Bad Spark Plugs Cause Rough Idle

    Yes, bad spark plugs can cause rough idle by failing to ignite the air-fuel mixture consistently. This leads to engine misfires and uneven power delivery, which you can feel as vibrations and hesitation during idle.

    Worn, fouled, or damaged spark plugs reduce the strength of the spark, impairing overall engine performance. Testing and replacing faulty plugs often resolves rough idle issues. However, other engine factors might also contribute to the problem.

    Understanding all potential causes helps you pinpoint and fix rough idle effectively.

    Key Takeaways

    • Bad spark plugs cause rough idle by failing to ignite the air-fuel mixture consistently, leading to engine misfires and vibrations.
    • Worn or fouled plugs reduce spark strength, resulting in uneven power delivery and poor acceleration from incomplete combustion.
    • Symptoms include rough idle, increased fuel consumption, difficulty starting, and engine surging due to inconsistent firing.
    • Inspecting spark plugs for wear, deposits, and testing spark strength helps diagnose rough idle caused by plug issues.
    • Replacing bad spark plugs restores smooth idle, improves fuel efficiency, and prevents further ignition system damage.

    Why Do Bad Spark Plugs Cause Rough Idle?

    Although your engine relies on multiple components to run smoothly, bad spark plugs directly disrupt the combustion process by failing to ignite the air-fuel mixture properly. When spark plugs wear out or become fouled, their ability to generate a consistent spark diminishes, leading to incomplete combustion.

    Different spark plug types, such as copper, platinum, and iridium, vary in durability and performance, but all can degrade over time. This degradation causes engine misfires, where cylinders don’t fire at the correct time or at all.

    These misfires create uneven power delivery, which translates into a rough idle that you can feel as vibration or hesitation. Properly functioning spark plugs guarantee efficient combustion, so monitoring their condition and replacing them according to specifications is essential to maintaining smooth engine operation.

    What Are the Signs Your Spark Plugs Are Causing Rough Idle?

    How can you tell if your spark plugs are causing your engine to idle roughly? Engine diagnostics often reveal specific symptoms linked to faulty spark plug types. Recognizing these signs early can prevent further engine damage.

    Symptom Explanation
    Rough idle Misfiring due to worn or fouled plugs
    Poor acceleration Incomplete combustion reduces power
    Increased fuel usage Inefficient burning leads to higher consumption
    Difficulty starting Spark plugs fail to ignite fuel-air mixture
    Engine surging Inconsistent firing causes RPM fluctuations

    Monitoring these symptoms through engine diagnostics helps pinpoint spark plug issues. Each spark plug type, copper, platinum, or iridium, has wear patterns affecting idle quality differently. Identifying these signs guarantees timely maintenance and smoother engine performance.

    How Can You Test Spark Plugs for Rough Idle?

    Identifying symptoms of faulty spark plugs is only the first step; testing the plugs directly confirms their condition and impact on rough idle.

    Begin with a thorough spark plug inspection by removing each plug and examining its electrodes and insulator for wear, carbon deposits, or oil fouling.

    Next, perform spark plug testing using a multimeter to measure resistance. Values outside the manufacturer’s range indicate deterioration.

    Additionally, you can conduct a spark test by reconnecting the plug to the ignition coil, grounding the plug’s threaded shell, and observing the spark strength while cranking the engine.

    Weak or inconsistent sparks during this test suggest plug failure contributes to rough idle.

    Combining visual inspection with electrical testing guarantees an accurate diagnosis of spark plug-related idle issues.

    Will Replacing Spark Plugs Fix Rough Idle?

    Replacing spark plugs can greatly enhance engine performance and smooth out a rough idle by restoring proper ignition timing and fuel combustion.

    You’ll notice better throttle response and reduced misfires once worn or fouled plugs are replaced.

    However, it’s important to replace them according to the manufacturer’s recommended intervals to maintain peak operation.

    Spark Plug Replacement Benefits

    Spark plugs play an essential role in engine performance, and worn or fouled plugs often contribute to rough idle issues. When you replace your spark plugs, choosing the right spark plug materials and trusted spark plug brands is critical to restoring smooth operation.

    Here are the benefits you can expect:

    1. Improved combustion efficiency by guaranteeing consistent spark delivery.
    2. Reduced misfires that cause engine vibrations and unstable idle.
    3. Enhanced fuel economy due to peak ignition timing.
    4. Prolonged ignition system life by preventing excessive wear on coils and wires.

    Replacing spark plugs eliminates the irregular spark gaps and deposits that lead to rough idling. By selecting high-quality spark plug materials like iridium or platinum from reputable brands, you guarantee durability and reliable ignition, directly addressing rough idle symptoms.

    Impact On Engine Performance

    Although rough idle can stem from various engine issues, worn or faulty spark plugs often play a significant role in degrading engine performance.

    When spark plugs fail to generate a consistent spark, fuel combustion becomes incomplete, reducing engine efficiency.

    This incomplete combustion leads to misfires, causing your engine to run unevenly, especially at idle.

    By replacing bad spark plugs, you restore ideal spark delivery, which improves fuel combustion and stabilizes engine operation.

    This directly enhances engine efficiency, resulting in smoother idle and better throttle response.

    So yes, replacing spark plugs can fix rough idle caused by poor combustion.

    However, keep in mind that other factors may also affect idle quality, so a thorough diagnostic is essential to pinpoint the exact cause.

    When To Replace Plugs

    Identifying the right time to replace spark plugs can directly address rough idle issues caused by poor combustion. You should monitor the spark plug lifespan and adhere to the recommended replacement frequency to maintain peak engine performance.

    Consider these key indicators for replacement:

    1. Engine misfires or rough idling persist despite other maintenance.
    2. Visible wear such as electrode erosion or heavy deposits on plugs.
    3. Mileage exceeds the manufacturer’s specified replacement interval, typically 30,000 to 100,000 miles depending on plug type.
    4. Decreased fuel efficiency or difficulty starting the engine.

    Replacing spark plugs at these points restores consistent combustion, often resolving rough idle problems.

    Staying proactive with replacement frequency guarantees reliable ignition and smooth engine operation.

    What Other Engine Problems Cause Rough Idle?

    When your engine idles roughly, several other issues beyond bad spark plugs could be at play. Vacuum leaks can disrupt the air-fuel mixture, causing unstable idling. Faulty fuel injectors may deliver uneven fuel amounts, leading to misfires and rough idle.

    Additionally, a dirty idle air control valve or malfunctioning sensors like the mass airflow sensor can impair engine performance.

    Problem Cause Effect on Idle
    Vacuum Leaks Cracked hoses or gaskets Erratic idle speed
    Fuel Injectors Clogged or leaking injectors Misfires, rough running
    Idle Air Control Valve Carbon buildup or failure Stalling or surging idle

    Identifying these issues helps you pinpoint the root cause of rough idling efficiently.

    What Makes Spark Plugs Go Bad and Cause Rough Idle?

    Because spark plugs endure constant heat and electrical stress, they naturally wear out over time, leading to degradation that affects engine performance.

    Spark plugs face constant heat and electrical stress, causing wear that degrades engine performance over time.

    Their spark plug lifespan is influenced by several factors that can cause rough idle by disrupting the ignition system. You should watch for:

    1. Electrode erosion wears down the gap, weakening spark strength.
    2. Carbon fouling from incomplete combustion reduces spark efficiency.
    3. Oil contamination seeps onto plugs, causing misfires and rough running.
    4. Overheating causes excessive heat damage to insulation, impairing spark delivery.

    Each of these issues compromises spark plug function, causing inconsistent firing and rough idle.

    Understanding these causes helps you identify when worn plugs are the root problem behind your engine’s uneven performance.

    How Can You Keep Spark Plugs in Good Shape Longer?

    To extend the lifespan of your spark plugs, stick to a regular maintenance schedule that includes timely inspections and replacements.

    Always use high-quality fuel to prevent deposits that can impair spark plug function.

    These practices help maintain peak ignition performance and reduce rough idling.

    Regular Maintenance Schedule

    Although spark plugs are designed to last thousands of miles, adhering to a regular maintenance schedule is essential to maximize their performance and longevity.

    Proper spark plug care prevents rough idle and engine misfires.

    Follow these maintenance tips:

    1. Inspect spark plugs every 30,000 miles for wear, deposits, or damage.
    2. Check and adjust the spark plug gap to the manufacturer’s specifications.
    3. Clean spark plugs with a wire brush or spark plug cleaner if fouled but still functional.
    4. Replace spark plugs promptly when signs of wear or corrosion appear to maintain peak combustion.

    Use Quality Fuel

    Maintaining a regular inspection and replacement routine for your spark plugs sets the foundation for peak engine performance.

    To keep them in good shape longer, prioritize using quality fuel with the correct octane rating specified by your vehicle manufacturer.

    Fuel quality directly influences combustion efficiency and residue buildup on spark plugs. Low-grade or incorrect octane fuel can cause incomplete combustion, leading to carbon deposits and fouling, which degrade spark plug performance and contribute to rough idling.

    By consistently selecting fuel that meets or exceeds your engine’s octane requirements, you minimize the risk of pre-ignition and guarantee cleaner combustion chambers.

    This practice reduces wear on spark plugs and prolongs their effective lifespan, maintaining smooth engine operation and ideal fuel efficiency.

    Frequently Asked Questions

    How Often Should Spark Plugs Be Replaced for Optimal Engine Performance?

    You should replace spark plugs every 30,000 to 100,000 miles, depending on your vehicle and plug type.

    Regular spark plug maintenance guarantees ideal engine performance by preventing misfires and improving fuel efficiency.

    Can Using the Wrong Type of Spark Plug Cause Rough Idle?

    Yes, using the wrong spark plug compatibility can cause rough idle by disrupting ignition timing and combustion efficiency. Ensuring correct spark plugs is essential for maintaining ideal engine performance and preventing misfires or uneven idling.

    Are There Specific Spark Plug Brands Known for Better Durability?

    Sure, you can trust “Brand X” to magically last forever if only! For real spark plug longevity, premium spark plugs like NGK or Denso offer precise engineering and materials, ensuring consistent performance and extended durability in your engine.

    How Does Driving Style Affect Spark Plug Lifespan?

    Your driving habits directly impact spark plug lifespan; aggressive acceleration and high engine load increase wear, while steady, moderate driving reduces stress.

    Managing engine load efficiently helps maintain ideal spark plug performance and longevity.

    Can Bad Spark Plugs Impact Fuel Efficiency?

    Yes, bad spark plugs increase fuel consumption, reduce engine efficiency, and cause misfires. You should prioritize spark plug maintenance to guarantee ideal combustion, improve fuel efficiency, and maintain smooth engine performance, saving fuel and costs in the long run.

    Conclusion

    Bad spark plugs can definitely throw your engine’s rhythm off, causing that rough idle you’re feeling.

    By recognizing the signs and testing your plugs, you’ll pinpoint the problem quickly. Replacing worn plugs often smooths things out, but don’t forget other engine issues could be at play.

    Keep your spark plugs in good shape by maintaining proper care, so your engine runs like a well-tuned orchestra, hitting every note perfectly.

    In conclusion, bad spark plugs can cause rough idle, so regular inspection and replacement are key to maintaining smooth engine performance.

  • How to Use Oil Filter Wrench

    How to Use Oil Filter Wrench

    To use an oil filter wrench, first identify your filter type—spin-on or cartridge—and select the correct wrench style and size. Position the wrench firmly around the filter, ensuring proper alignment for a secure grip.

    Turn counterclockwise with steady pressure to loosen the filter, avoiding slips or excessive force that could cause damage. If the filter is stubborn, apply penetrating oil and use appropriate techniques to ease removal.

    Follow proper steps to remove and replace your filter smoothly, and you can explore more detailed tips and best practices.

    Key Takeaways

    • Secure the wrench firmly around the oil filter for a strong grip and proper leverage.
    • Use band wrenches for smooth filters and cap wrenches for hexagonal filter ends.
    • Apply steady counterclockwise pressure to loosen the oil filter without slipping.
    • Align the wrench correctly to avoid damaging the filter or surrounding components.
    • If the filter is stubborn, apply penetrating oil and let it sit before attempting removal again.

    Get Your Car Ready for an Oil Change

    Before you begin using the oil filter wrench, make sure your car is securely positioned on a flat surface and the engine is cool. This step is critical for safety and effective oil change preparation.

    Engage the parking brake and use wheel chocks to prevent movement. Locate the oil drain plug and filter, confirming you have the correct tools and replacement parts on hand.

    Gather engine maintenance essentials such as gloves, a drain pan, and rags. Verify you have the right oil type and quantity specified by your vehicle manufacturer.

    Proper preparation minimizes the risk of spills and damage during the oil filter removal process. Taking these precautions guarantees your oil change proceeds smoothly, protecting both you and your vehicle’s engine components.

    Choose the Right Oil Filter Wrench for Your Car

    Selecting the right oil filter wrench depends on the type and size of your car’s oil filter. First, identify your oil filter type, spin-on or cartridge, as each requires a different wrench style. For spin-on filters, cup or band wrenches work well.

    Cartridge filters often need a socket-style wrench matching the end cap.

    Next, measure your oil filter diameter to determine the correct wrench size. Using a wrench too large or small can damage the filter or hinder removal. Adjustable wrenches offer versatility across wrench sizes but can slip if not secured properly.

    Consult your vehicle’s manual or oil filter specifications to confirm filter dimensions. By matching wrench sizes precisely to your oil filter types, you guarantee a secure fit, reducing the risk of damage during maintenance.

    How to Use an Oil Filter Wrench to Loosen the Filter

    Once you’ve matched the wrench size to your oil filter, position the wrench securely around the filter to guarantee a firm grip. For different oil filter types, select the appropriate wrench technique: band wrenches for smooth filters, cap wrenches for hexagonal ends, and claw wrenches for stubborn filters.

    Apply steady counterclockwise pressure to loosen the filter, ensuring you don’t slip and damage the filter or surrounding components.

    Oil Filter Type Recommended Wrench Technique
    Smooth Cylinder Band Wrench
    Hexagonal End Cap Wrench
    Tight/Corroded Claw Wrench
    Small Space Access Strap Wrench

    Maintaining steady force and correct wrench alignment optimizes your leverage while minimizing filter damage.

    Tips for Loosening Stubborn Oil Filters Without Damage

    If your oil filter resists loosening despite using the correct wrench, employing specific techniques can prevent damage.

    First, verify the oil filter type; some filters, especially cartridge types, require different approaches than spin-on filters.

    Identify your oil filter type, as cartridge and spin-on filters need different removal methods.

    Apply penetrating oil around the base of the filter and let it sit for 10-15 minutes to loosen corrosion or debris from poor filter installation.

    Use a strap wrench or adjustable oil filter wrench that suits the filter’s size and design, ensuring even pressure distribution to avoid crushing.

    Gently tap around the filter’s base with a rubber mallet to break the seal if necessary.

    Avoid excessive force, which can damage the filter or housing, complicating removal.

    These steps respect the filter installation integrity and help maintain system reliability.

    How to Remove and Replace Your Oil Filter

    Removing and replacing your oil filter involves a series of precise steps to guarantee a proper seal and avoid leaks.

    First, position a drain pan beneath the filter to catch residual oil. Use the appropriate oil filter wrench for your oil filter type, whether cartridge, spin-on, or other designs, and turn counterclockwise to loosen it.

    Once removed, clean the mounting surface thoroughly. Apply a thin layer of fresh oil to the new filter’s rubber gasket to enhance sealing.

    Screw the new filter on by hand until the gasket contacts the base, then tighten it an additional 3/4 turn; avoid over-tightening.

    Follow your vehicle’s recommended oil change frequency to maintain engine health.

    Finally, refill oil and check for leaks after running the engine briefly.

    Frequently Asked Questions

    Can I Use an Oil Filter Wrench on a Motorcycle?

    Yes, you can use an oil filter wrench on a motorcycle, but make sure it fits the specific filter type. Proper tool selection is essential for effective motorcycle maintenance and avoiding damage during filter removal or installation.

    How Often Should I Replace My Oil Filter Wrench?

    Think of your oil filter wrench like a trusty tool in a craftsman’s kit; replace it when you notice wear or slipping. Prioritize oil filter maintenance by checking wrench durability regularly to guarantee precise, effective filter changes.

    Are Oil Filter Wrenches Compatible With All Oil Filter Brands?

    Oil filter wrenches aren’t universally compatible with all oil filter types. You’ll need to match wrench compatibility to the filter’s size and design, ensuring a secure fit for effective removal without damaging the filter or vehicle components.

    Can an Oil Filter Wrench Damage the Oil Pan?

    Like a knight wielding a sword, you must handle the oil filter wrench carefully to avoid damage prevention failures. Improper use can dent or crack the oil pan, so apply steady, controlled force to protect it effectively.

    What Safety Precautions Should I Take When Using an Oil Filter Wrench?

    You should wear gloves for oil filter safety and guarantee proper wrench handling by applying steady pressure without over-tightening.

    Always work on a cooled engine and position yourself to avoid slipping or injury during removal or installation.

    Conclusion

    Now that you know how to use an oil filter wrench, you’re equipped to tackle your oil change confidently. Think of the wrench as your key to releasing a smoother maintenance process—without the struggle or damage.

    Remember, choosing the right tool and applying steady pressure are your best allies. With practice, loosening even the toughest filters becomes second nature.

    This ensures your engine stays healthy and your hands stay clean. Using an oil filter wrench correctly is essential for an efficient and hassle-free oil change.

  • Can Am Defender Shocks

    Can Am Defender Shocks

    Can-Am Defender shocks are essential for smoothly absorbing rough terrain and maintaining vehicle stability. These shocks utilize advanced damping technology, including hydraulic or gas-charged designs, to precisely control compression and rebound forces.

    Choosing the right shocks depends on your specific Can-Am Defender model, the terrain you frequently encounter, and whether you require adjustable performance features. Regular inspection and maintenance help prevent leaks and wear, ensuring consistent ride quality and control.

    Understanding proper installation techniques and upgrade options can further enhance your Defender’s suspension performance. This knowledge allows you to maximize the effectiveness of your shocks and improve overall vehicle handling.

    Key Takeaways

    • Can-Am Defender shocks improve ride comfort by absorbing terrain impacts and enhancing vehicle stability on rough surfaces.
    • Available in standard and performance variants, shocks cater to everyday use or aggressive off-road driving with adjustable damping.
    • Signs for shock replacement include excessive bouncing, fluid leaks, uneven ride height, and unusual vibration or noise.
    • Choosing shocks involves matching model compatibility, ride height, and desired adjustability for optimized suspension performance.
    • Proper installation requires correct tools, torque specifications, safety precautions, and careful alignment to ensure secure mounting.

    How Can-Am Defender Shocks Improve Ride Quality

    When you upgrade to Can-Am Defender shocks, you immediately enhance your vehicle’s ability to absorb terrain irregularities, resulting in a smoother and more controlled ride.

    These shocks utilize advanced damping technology that precisely modulates compression and rebound forces, reducing harsh impacts and vibrations.

    This modulation delivers improved comfort by minimizing jolts transferred to the cabin, allowing you to maintain control without fatigue.

    Additionally, the shocks’ robust construction and calibrated valving increase enhanced stability during rapid directional changes and uneven surfaces.

    By optimizing wheel contact with the ground, they guarantee consistent traction and reduce body roll.

    The result is a precise handling experience that adapts seamlessly to varied terrain, greatly upgrading your Defender’s overall ride quality and driver confidence.

    Types of Can-Am Defender Shocks

    You’ll find Can-Am Defender shocks primarily come in standard and performance variants, each designed for specific ride demands.

    Both hydraulic and gas-filled options are available, affecting responsiveness and damping characteristics.

    Understanding these types helps you select shocks that match your terrain and handling preferences precisely.

    Standard Vs Performance Shocks

    Although both standard and performance shocks serve to absorb impacts and maintain vehicle stability, they differ markedly in design and functionality.

    Standard shock advantages include simpler construction and reliable damping suited for everyday terrain, providing consistent ride comfort and durability. They’re typically more cost-effective and require less maintenance, making them ideal if you use your Can-Am Defender mainly on moderate trails or work sites.

    Performance shocks, however, offer enhanced benefits like adjustable damping rates and superior heat dissipation, which improve handling during aggressive driving or rugged off-road conditions.

    You’ll notice increased control, reduced fade, and better responsiveness with performance shocks, as they utilize advanced valving and materials.

    Choosing between them depends on your driving demands. Standard shocks prioritize reliability and economy, while performance shocks deliver elevated precision and adaptability.

    Hydraulic And Gas Options

    Selecting between standard and performance shocks often leads to evaluating the underlying mechanisms that govern shock absorption.

    When considering Can-Am Defender shocks, you’ll encounter hydraulic and gas options, each with distinct characteristics.

    Hydraulic shocks utilize fluid to dampen suspension movement, offering precise control and consistent performance across varied terrain. Their hydraulic advantages include superior heat dissipation and smooth, progressive resistance, which reduces abrupt impacts.

    On the other hand, gas shocks incorporate pressurized nitrogen gas to minimize fluid aeration, maintaining damping consistency under demanding conditions. The gas benefits include improved responsiveness and reduced shock fade during extended use.

    Choosing between these depends on your operational needs. Hydraulic shocks excel in controlled, steady absorption, while gas shocks deliver enhanced performance in aggressive, high-speed environments.

    Understanding these differences guarantees you select the best shock for your Defender’s suspension system.

    Signs Your Can-Am Defender Shocks Need Replacement

    When your Can-Am Defender exhibits reduced stability or excessive bouncing over rough terrain, it indicates worn or failing shocks. Recognizing shock absorber symptoms early can prevent further suspension damage and unsafe handling.

    Key indicators include:

    • Uneven or decreased ride height issues, signaling internal seal failure or gas loss in shocks.
    • Visible fluid leaks on the shock body, which reduce damping efficiency.
    • Excessive vibration or noise during operation, showing compromised shock internals or mounts.

    These signs highlight the need for timely replacement to maintain ideal ride control and vehicle safety. Ignoring such symptoms may lead to accelerated tire wear, poor traction, and degraded handling characteristics.

    Regular inspection focusing on these technical cues guarantees your Defender’s suspension performs reliably under demanding conditions.

    Choosing the Right Can-Am Defender Shocks

    How do you determine the best shocks for your Can-Am Defender’s specific needs? Start by evaluating shock compatibility with your model year and intended use, whether trail riding, utility, or off-road sport.

    Make sure the shocks accommodate your Defender’s ride height, especially if you’ve modified the suspension or installed lift kits. Opt for shocks with adjustable damping to tailor responsiveness and control.

    Pay attention to the shock’s length and mounting type to guarantee a proper fit and best performance. High-quality materials like aluminum or nitrogen gas-charged shocks improve durability and reduce fade under heavy loads.

    Reviewing manufacturer specifications and user feedback helps confirm compatibility and performance. By focusing on these technical aspects, you’ll select shocks that enhance your Defender’s handling, comfort, and reliability across diverse terrains.

    Installing Can-Am Defender Shocks

    Before installing your Can-Am Defender shocks, gather essential tools like a socket set, torque wrench, and jack stands for secure lifting.

    Follow a precise step-by-step process to remove old shocks and mount the new ones, ensuring all bolts meet manufacturer torque specifications.

    Always prioritize safety by working on a stable surface and wearing protective gear throughout the installation.

    Tools Needed

    To install Can-Am Defender shocks effectively, you’ll need a specific set of tools that guarantee precision and safety. Proper shock installation demands accuracy to avoid damaging components or compromising performance.

    Additionally, precise shock adjustments require the right equipment to secure correct tension and alignment.

    Prepare these essential tools:

    • Torque wrench: Vital for applying manufacturer-specified torque values to mounting bolts, guaranteeing secure and reliable shock installation.
    • Socket set with ratchet: Needed to remove and install bolts efficiently, fitting various sizes encountered during the process.
    • Adjustable wrench: Useful for holding nuts steady during shock adjustments, preventing unwanted rotation and facilitating fine-tuning.

    Having these tools ready will streamline your workflow, minimize errors, and maintain ideal shock function throughout the installation and adjustment phases.

    Step-by-Step Process

    While ensuring your Can-Am Defender is securely supported, start by loosening and removing the mounting bolts on the existing shocks using the appropriate socket size.

    Carefully detach the old shocks, noting their orientation.

    Position the new shocks aligned with the mounting points, then insert and hand-tighten the bolts to avoid cross-threading.

    Use a torque wrench to tighten bolts to manufacturer specifications, ensuring secure shock installation.

    Next, adjust the shocks according to your desired firmness or terrain requirements by rotating the preload collar or adjusting the damping settings, depending on your shock model.

    Confirm even shock adjustment on all shocks for balanced performance.

    Finally, double-check all fasteners for tightness.

    This methodical approach guarantees peak shock function and durability on your Can-Am Defender.

    Safety Precautions

    Although shock installation may seem straightforward, you must prioritize safety by using proper personal protective equipment, such as gloves and eye protection, and guaranteeing the Can-Am Defender is securely elevated on stable jack stands.

    Neglecting safety gear can lead to serious injury during shock maintenance.

    Before starting, confirm the vehicle is on a level surface and the parking brake is engaged. Always release any stored tension in the shocks gradually to prevent sudden movement.

    Keep these safety precautions in mind:

    • Use quality gloves to protect hands from sharp edges and chemicals.
    • Wear eye protection to guard against debris and fluid splashes.
    • Double-check jack stand stability before applying force to components.

    These steps guarantee a safe, efficient shock installation process without compromising your safety.

    Upgrading Can-Am Defender Shocks for Better Performance

    Since the Can-Am Defender’s stock shocks often fall short under demanding conditions, upgrading them can greatly enhance ride quality, handling, and durability.

    You should focus on advanced shock absorber technology, such as gas-charged or piggyback reservoir shocks, which offer improved heat dissipation and consistent damping performance.

    Incorporate performance enhancement techniques like adjustable compression and rebound settings to fine-tune your suspension for varied terrains.

    Consider shocks with high-quality internal valving and nitrogen gas to reduce cavitation and maintain stability under heavy loads.

    Upgrading also involves selecting components with reinforced shafts and seals to increase lifespan and reliability.

    By implementing these technical improvements, you’ll achieve superior shock response, minimize body roll, and improve traction.

    Properly chosen aftermarket shocks transform your Defender into a more capable and controlled off-road vehicle.

    Maintaining Can-Am Defender Shocks for Longevity

    To guarantee your Can-Am Defender shocks deliver consistent performance and extend their service life, you must perform regular maintenance focused on inspection, cleaning, and lubrication.

    Implementing effective shock maintenance tips is essential to avoid premature wear and failure.

    First, visually inspect the shocks for leaks, dents, or corrosion.

    Second, clean the shock body and mounting points to prevent debris buildup that can impair function.

    Third, apply appropriate lubrication to the bushings and pivot areas to reduce friction and wear.

    These shock longevity practices not only preserve damping efficiency but also ensure peak ride quality under demanding conditions.

    Frequently Asked Questions

    Are Can-Am Defender Shocks Compatible With Other UTV Models?

    You’ll find Can-Am Defender shocks have limited shock compatibility with other UTV models due to specific mounting points and damping characteristics. For UTV upgrades, always verify fitment details and vehicle specs to guarantee peak performance.

    What Tools Are Needed to Remove Stock Can-Am Defender Shocks?

    To perform shock removal on your Can-Am Defender, you’ll need a socket set, wrenches, a torque wrench, and penetrating oil. These tools meet shock removal tool requirements, ensuring precise, safe detachment of stock shocks without damage.

    Can I Rebuild Can-Am Defender Shocks Myself at Home?

    You can rebuild shocks yourself if you master shock rebuilding techniques and have home workshop essentials like a spring compressor and seal kits. Precision and cleanliness are essential for proper function and longevity in your Defender’s shocks.

    How Do Temperature Changes Affect Can-Am Defender Shock Performance?

    You’ll notice temperature effects cause the shock performance to vary; cold thickens the oil, reducing damping efficiency, while heat thins it, potentially causing fade. Maintaining ideal temperature keeps your shocks responsive and consistent.

    Are There Warranty Options for Aftermarket Can-Am Defender Shocks?

    You won’t find aftermarket warranties offering superhero-level shock performance guarantees, but many reputable brands provide limited coverage.

    Always review terms carefully, as warranty scopes vary, ensuring your upgraded shocks stay protected under specific conditions.

    Conclusion

    Upgrading your Can-Am Defender shocks is like giving your ride a new pair of eyes—suddenly, every bump and dip becomes manageable. By choosing the right shocks and maintaining them diligently, you guarantee peak performance and extended durability. Don’t ignore signs of wear; timely replacement keeps your Defender responsive and safe.

    With precise installation and proper care, your shocks will deliver smoother, more controlled rides, turning rough terrain into a well-mapped path. Investing in quality Can Am Defender shocks ensures your vehicle handles the toughest trails with confidence and reliability.

  • How to Change Rear Shocks 1975 Cadillac Eldorado

    How to Change Rear Shocks 1975 Cadillac Eldorado

    To change the rear shocks on your 1975 Cadillac Eldorado, start by gathering the correct replacement shocks and the necessary tools such as a socket wrench, jack, and torque wrench. Having everything ready before you begin will make the process smoother and safer.

    Next, safely lift the rear of the car using a jack and support it with jack stands placed at the designated points. This ensures stability while you work underneath.

    Remove the old shocks by loosening the mounting bolts carefully. Once removed, align the new shocks in place and install them, tightening the bolts to the manufacturer’s specified torque settings.

    After installation, lower the vehicle and take it for a test drive to check the suspension’s performance. Following this proper procedure guarantees smooth handling and safety.

    For those looking to go deeper, additional steps and tips are available to enhance your shock replacement process.

    Key Takeaways

    • Lift the rear of the 1975 Eldorado using a hydraulic jack and secure it with jack stands at designated support points.
    • Remove rear shocks by applying penetrating oil, then loosen and remove the lower mounting bolts first for easier access.
    • Install compatible replacement shocks by aligning mounting holes with frame and axle brackets, then tighten bolts to manufacturer torque specs.
    • Test drive to check suspension performance, listen for unusual noises, and assess body roll and stability during turns.
    • After the test ride, re-inspect and tighten all shock mounting hardware to ensure secure installation and proper alignment.

    How to Tell When Your Rear Shocks Need Replacing on a 1975 Eldorado

    Although your 1975 Eldorado may still drive smoothly, you’ll want to inspect the rear shocks regularly to confirm they’re functioning correctly.

    Start by evaluating common shock absorber signs: excessive bouncing after a bump, uneven tire wear, or visible fluid leaks on the shock body.

    Pay close attention to ride quality indicators such as increased body roll during turns or a harsh, unstable ride on uneven surfaces.

    Test by pushing down on the rear end; if the vehicle continues to oscillate more than twice, the shocks likely need replacement.

    Additionally, listen for clunking noises when driving over rough roads, which signal worn mounts or internal damage.

    Regularly checking these parameters guarantees peak handling and safety for your Eldorado.

    Gather Tools and Replacement Rear Shocks for Your 1975 Eldorado

    Before starting, gather the essential tools including a jack, jack stands, wrenches, and a socket set to guarantee proper fit and torque application.

    Verify you have the correct replacement rear shocks designed specifically for your 1975 Eldorado model to maintain peak performance.

    Don’t forget to prepare safety equipment like gloves and eye protection to prevent injury during the replacement process.

    Essential Tools Checklist

    To successfully change the rear shocks on your 1975 Eldorado, you’ll need to gather a specific set of tools and replacement parts. Having the right equipment guarantees you handle different shock absorber types efficiently and follow proper installation tips without delays.

    Here’s a precise checklist to prepare:

    • Socket wrench set (including deep sockets) for removing bolts and nuts
    • Jack and jack stands to safely elevate and support the vehicle
    • Torque wrench to tighten bolts to manufacturer specifications
    • Replacement rear shocks compatible with your Eldorado’s model year

    This toolkit allows you to methodically remove the old shocks and install the new ones correctly.

    Confirming you have these tools before starting will streamline the process and minimize errors related to shock absorber types and installation procedures.

    Selecting Correct Shock Absorbers

    Selecting the correct rear shock absorbers for your 1975 Eldorado requires careful consideration of the vehicle’s specifications and intended use.

    Begin by identifying compatible shock absorber types, typically twin-tube or monotube designs, each offering distinct damping characteristics.

    Twin-tube shocks provide a softer ride, suitable for daily driving, while monotube shocks offer better heat dissipation and responsiveness, ideal for performance upgrades.

    Next, verify the shock length, mounting style, and load capacity to match the Eldorado’s rear suspension geometry.

    Consider whether you want to maintain factory ride quality or enhance handling with upgraded components.

    Consult manufacturer catalogs or OEM specifications to guarantee precise fitment.

    Selecting the right shocks will optimize ride comfort, stability, and durability, assuring your repair or upgrade aligns with your driving requirements.

    Safety Equipment Preparation

    Although changing the rear shocks on your 1975 Eldorado may seem straightforward, assembling the proper safety equipment and tools is essential to guarantee a secure and efficient process.

    Prioritize safety gear and personal protection before you begin to minimize injury risks.

    Ascertain you have the right tools and replacement shocks ready to avoid interruptions.

    Gather these essentials:

    • Protective gloves and safety glasses to shield your hands and eyes
    • A reliable floor jack and jack stands rated for your vehicle’s weight
    • Wrenches and sockets compatible with your Eldorado’s shock mounting bolts
    • OEM or high-quality aftermarket rear shock absorbers designed specifically for the 1975 Eldorado

    Confirm everything is in good condition and accessible to maintain a methodical workflow.

    How to Safely Lift and Support Your Eldorado’s Rear

    Start by identifying the designated jack points on your 1975 Eldorado to avoid damaging the frame.

    Use a hydraulic jack to lift the rear steadily, then securely place quality jack stands under the recommended support areas.

    Always confirm the vehicle is stable before beginning any work on the rear shocks.

    Choosing Proper Jack Points

    Properly lifting and supporting your Eldorado’s rear requires identifying the vehicle’s designated jack points. Using correct jack point locations guarantees proper lifting, prevents damage, and assures safety.

    For your 1975 Cadillac Eldorado, focus on these key areas:

    • Locate the reinforced frame rails near the rear axle.
    • Identify the pinch welds along the rocker panels.
    • Avoid lifting from suspension components or body panels.
    • Confirm jack points by consulting the Eldorado’s service manual.

    Using Quality Jack Stands

    Once you’ve identified the correct jack points on your Eldorado, the next step involves selecting and positioning quality jack stands to securely support the vehicle’s rear. Choose jack stand types rated for the vehicle’s weight and equipped with robust stability features like wide bases and locking pins. Position the stands under the frame or designated support areas.

    Jack Stand Type Load Capacity Stability Features
    Steel 3 tons Wide base, locking pin
    Aluminum 2.5 tons Anti-slip feet, adjustable
    Ratchet 4 tons Auto-lock, broad footprint

    Raise the vehicle using a hydraulic jack, then carefully place the stands. Lower the car slowly onto the stands, ensuring they’re stable before starting shock replacement.

    Remove the Old Rear Shocks Without Damaging Components

    A secure workspace and the right tools are essential before you remove the old rear shocks. Employ proper shock removal techniques to avoid component damage and guarantee a smooth process.

    Ensure a safe workspace and proper tools before removing rear shocks to prevent damage and ensure smooth removal.

    Begin by supporting the rear axle with jack stands to relieve tension on the shocks. Use penetrating oil on bolts to ease removal and prevent stripping.

    Follow these steps:

    Loosen and remove the lower mounting bolt first to stabilize the shock.

    Carefully detach the upper mounting bolt without forcing it.

    Support the shock as you remove bolts to prevent sudden drops.

    Inspect surrounding components for wear or damage during removal.

    Install New Rear Shocks Step-by-Step on Your 1975 Eldorado

    Begin by positioning the new rear shock in place on your 1975 Eldorado, aligning the mounting holes with the frame and axle brackets.

    Select the appropriate shock absorber type, hydraulic or gas-charged, based on your vehicle’s specifications.

    Insert the mounting bolts through the aligned holes, confirming the shock’s orientation matches factory settings.

    Tighten the bolts gradually in a crisscross pattern to guarantee even pressure and secure fitment.

    Use a torque wrench to apply manufacturer-recommended torque values, avoiding over-tightening that could damage components.

    Installation tips include verifying that rubber bushings are properly seated to reduce noise and vibration.

    Double-check all connections for firmness before lowering the vehicle.

    This methodical approach guarantees the new rear shocks perform effectively and extend suspension lifespan.

    Test Ride and Troubleshoot Rear Shock Issues After Installation

    After installing your new rear shocks, you’ll want to conduct a thorough test ride to evaluate their performance under real driving conditions.

    During the test ride, pay close attention to how the vehicle responds to bumps, turns, and braking. Effective shock troubleshooting involves identifying any unusual noises, excessive bouncing, or instability.

    Focus on these checkpoints during your test ride:

    • Monitor suspension firmness and rebound response.
    • Listen for clunks or rattles indicating loose mounts.
    • Assess vehicle body roll during cornering.
    • Check for uneven tire wear or vibrations.

    If you detect any issues, re-inspect shock mounting hardware and alignment.

    Proper shock troubleshooting guarantees your 1975 Cadillac Eldorado’s rear suspension functions efficiently, providing a smooth and controlled ride.

    Frequently Asked Questions

    What Type of Rear Shocks Originally Came on the 1975 Eldorado?

    You’ll find the original equipment shock absorbers on the 1975 Eldorado are heavy-duty, twin-tube gas-charged shocks designed to handle the car’s weight and provide smooth ride control, ensuring peak rear suspension performance.

    Can I Upgrade to Modern Shocks on My 1975 Eldorado?

    Upgrading to modern shocks is like fitting your Eldorado with new shoes; you’ll benefit from advanced shock absorber technology, enhancing ride comfort and handling.

    Verify compatibility and consider performance upgrades carefully for peak results and safety.

    How Often Should Rear Shocks Be Replaced on This Model?

    You should check the replacement frequency every 50,000 miles, but inspect for shock wear sooner if you notice poor ride quality or leaks. Regular assessments guarantee your 1975 Eldorado’s rear shocks perform at their best and safely.

    Are There Any Common Issues Specific to Eldorado Rear Shocks?

    You’ll find Eldorado rear shocks often suffer reduced shock absorber lifespan due to age, leading to suspension noise issues like knocking. Regular inspection helps catch seal leaks and worn mounts, ensuring accurate diagnosis and timely replacement.

    What Is the Average Cost for Professional Rear Shock Replacement?

    Imagine John’s Eldorado rear shocks replacement; the cost breakdown showed $150 for parts and $120 labor charges. You’ll typically pay $270-$350 total, depending on shop rates and shock quality, ensuring precise, professional service.

    Conclusion

    Now that you’ve given your 1975 Eldorado’s rear shocks a well-deserved upgrade, you’re set to enjoy a smoother, more controlled ride.

    Remember, keeping these components in top shape isn’t just about comfort—it’s about ensuring your classic beauty handles with the precision it was designed for.

    Stay vigilant for any subtle signs of wear, and don’t hesitate to repeat this process when your Eldorado whispers it’s time for another tune-up.

    Regular maintenance and attention to detail will help you get the most out of changing rear shocks on your 1975 Cadillac Eldorado.

  • Why Is There Oil on My Spark Plugs

    Why Is There Oil on My Spark Plugs

    You’re finding oil on your spark plugs because oil is leaking into the combustion chamber, which is often caused by worn piston rings, damaged valve seals, or a failing valve cover gasket.

    This oil disrupts spark generation, leading to misfires and reduced engine performance. Worn seals and gaskets let oil seep onto plugs or into the combustion area, which fouls plugs and degrades combustion efficiency.

    Understanding the root causes and their effects will help you address the problem effectively.

    Key Takeaways

    • Oil on spark plugs often indicates worn piston rings or valve seals allowing oil into the combustion chamber.
    • Damaged valve cover gaskets can leak oil into spark plug wells, contaminating the plugs.
    • Oil fouling reduces spark plug efficiency, causing misfires and poor engine performance.
    • Regular inspection and replacement of gaskets, seals, and spark plugs prevent oil contamination.
    • Engine compression tests help diagnose piston ring or valve guide wear causing oil leaks onto plugs.

    What Causes Oil on Spark Plugs?

    When oil appears on your spark plugs, it’s usually because oil is leaking into the combustion chamber, which interferes with the spark needed for ignition. This leakage often results from worn valve seals or damaged cylinder walls.

    Oil on spark plugs signals leaks into the combustion chamber, often due to worn valve seals or cylinder wall damage.

    Increased oil consumption caused by these issues allows oil to coat the spark plugs, reducing their efficiency. Different spark plug types, such as copper, platinum, or iridium, may show varying degrees of fouling, but all are susceptible to oil contamination.

    Identifying oil on spark plugs requires careful inspection, as excessive oil can cause misfires and engine performance issues.

    Monitoring oil consumption rates alongside spark plug condition helps diagnose the root cause, enabling proper maintenance to prevent further engine damage and guarantee peak combustion.

    How Worn Piston Rings Cause Oil Fouling

    Although piston rings are designed to seal the combustion chamber effectively, worn piston rings allow engine oil to seep past them and into the cylinder. This piston wear compromises the seal, causing oil leakage that contaminates the spark plugs.

    As oil accumulates on the plugs, it disrupts combustion and leads to misfires.

    Cause Effect
    Piston ring wear Decreased sealing
    Oil leakage past rings Oil fouling on spark plugs
    Oil in combustion Misfires and poor ignition
    Increased piston wear Accelerated oil leakage
    Fouled spark plugs Reduced engine performance

    You must address piston ring wear promptly to stop oil leakage and maintain proper engine function.

    Why Valve Cover Gasket Leaks Matter

    Since the valve cover gasket seals the top of the engine and prevents oil from escaping, a leak can allow oil to seep into areas where it shouldn’t be, including the spark plug wells.

    You need to understand that gasket materials degrade over time due to heat and pressure, compromising the seal’s integrity. This degradation leads to oil leaks that contaminate the spark plugs, causing misfires and reducing engine efficiency.

    Timely leak detection is essential; you can spot leaks by inspecting for oil residue around the valve cover or through diagnostic tools measuring engine performance.

    Addressing valve cover gasket leaks promptly prevents further engine damage and maintains peak combustion.

    Choosing high-quality gasket materials guarantees a durable seal, minimizing the risk of leaks and costly repairs down the line.

    Cylinder Head and Valve Seal Wear Explained

    Because the cylinder head houses critical components like the valves and valve seals, wear in these areas directly impacts engine performance and oil control.

    When valve seals degrade or harden, they lose the ability to prevent oil from seeping into the combustion chamber. This oil contamination can accumulate on spark plugs, causing fouling.

    Additionally, any damage to the cylinder head, such as warping or cracks, can compromise the sealing surfaces, exacerbating oil leakage past valve seals.

    If you notice oil on your spark plugs, inspecting the cylinder head and valve seals for wear or damage is essential.

    Replacing worn valve seals or repairing cylinder head defects restores proper oil control, preventing further spark plug fouling and maintaining engine efficiency.

    How Oil Fouling Impacts Engine Performance

    When oil fouls your spark plugs, it reduces combustion efficiency by disrupting the air-fuel mixture ignition.

    You’ll also face a higher risk of misfires, which can cause rough engine operation and loss of power.

    Additionally, oil contamination can degrade engine oil quality, leading to increased wear and potential damage.

    Reduced Combustion Efficiency

    Although oil fouling on spark plugs might seem minor, it greatly disrupts combustion efficiency by hindering proper spark formation. When oil coats the spark plugs, it interferes with the ignition process inside the combustion chamber, leading to incomplete fuel mixture combustion. This directly reduces engine power and increases fuel consumption.

    Here’s how oil fouling impacts combustion efficiency:

    1. Impaired spark generation: Oil deposits insulate the spark plug electrodes, weakening the spark needed to ignite the air-fuel mixture.
    2. Incomplete combustion: A compromised spark causes a richer or leaner fuel mixture burn, lowering overall energy output.
    3. Increased emissions: Unburned fuel and oil residues produce higher hydrocarbon and particulate emissions.

    Addressing oil fouling is essential to maintaining ideal combustion chamber performance and engine efficiency.

    Increased Misfire Risk

    If oil contaminates your spark plugs, it greatly increases the risk of engine misfires by disrupting the consistent ignition of the air-fuel mixture.

    Oil fouling forms a conductive layer that impedes the spark’s ability to jump the gap, leading to ignition issues.

    These ignition failures cause incomplete combustion cycles, manifesting as misfire symptoms such as rough idling, hesitation during acceleration, and decreased power output.

    When the spark plugs fail to ignite the mixture reliably, engine control modules detect irregular combustion patterns, triggering diagnostic trouble codes.

    Addressing oil fouling promptly prevents persistent misfires, which can damage catalytic converters and reduce fuel efficiency.

    Monitoring for misfire symptoms and inspecting spark plugs regularly guarantees excellent engine performance and prevents long-term mechanical issues caused by oil contamination.

    Engine Oil Contamination Effects

    Oil fouling not only triggers misfires but also degrades overall engine performance by interfering with combustion efficiency.

    When engine oil contaminates the spark plug, it creates a barrier that disrupts the spark generation necessary for ignition.

    This contamination leads to:

    1. Reduced power output due to incomplete combustion.
    2. Increased fuel consumption as the engine compensates for inefficient burning.
    3. Elevated emissions resulting from unburned fuel and oil residues.

    You’ll notice rough idling, hesitation during acceleration, and difficulty starting the engine.

    Additionally, oil on the spark plug can cause carbon buildup, further impairing ignition and accelerating wear on ignition components.

    Addressing oil contamination promptly is vital to maintain peak engine performance and prevent long-term damage.

    Regular inspection of spark plugs helps identify oil fouling early, allowing you to diagnose underlying issues like worn piston rings or valve seals causing oil leaks.

    How to Diagnose Oil on Spark Plugs

    How can you accurately identify oil contamination on your spark plugs? Begin by removing the plugs and inspecting the electrodes and insulator tips.

    Oil contamination appears as a wet, glossy coating or black, oily residue, distinct from carbon fouling.

    Different spark plug types, such as copper or iridium, may exhibit varying discoloration, but oil presence is consistent across types.

    Analyze the oil types involved; engine oil typically leaves a thick, viscous film, while transmission or gear oil might present differently if cross-contamination occurs.

    Use a magnifying glass for detailed inspection.

    Additionally, check for misfires or rough idling, which often accompany oil-fouled plugs.

    Combining visual inspection with performance symptoms helps you diagnose oil contamination precisely, enabling targeted maintenance decisions.

    How to Fix Oil on Spark Plugs

    When you find oil on your spark plugs, addressing the underlying cause is essential to prevent recurrence. The oil leak that contaminates the spark plug often originates from worn valve cover gaskets, piston rings, or valve guides.

    To fix the issue, follow these steps:

    1. Replace faulty gaskets or seals: Inspect and replace valve cover gaskets or seals causing the oil leak.
    2. Evaluate piston rings and valve guides: If oil leakage persists, test compression and consider replacing worn piston rings or valve guides.
    3. Clean or replace spark plugs: Remove oil-contaminated spark plugs and clean them thoroughly or install new ones to restore peak engine performance.

    Frequently Asked Questions

    Can Oil on Spark Plugs Cause My Car to Fail Emissions Tests?

    Yes, oil contamination on your spark plugs can cause your car to fail emissions tests. It disrupts combustion, increasing pollutants and preventing your vehicle from meeting strict emissions standards required by regulations.

    Address this promptly.

    Is Oil Fouling on Spark Plugs Covered Under Car Warranty?

    Warranty coverage for oil fouling on spark plugs varies by manufacturer and cause. If it’s due to a covered defect, repair costs may be included; otherwise, you’ll likely bear the expense.

    Always check your specific warranty terms.

    How Often Should Spark Plugs Be Replaced if Oil Fouling Occurs?

    If oil fouling coats your spark plugs like a thick, greasy blanket, replace them every 10,000 to 15,000 miles.

    Regular spark plug maintenance curbs excessive oil consumption and guarantees peak engine performance and fuel efficiency.

    Can Using Synthetic Oil Prevent Oil Fouling on Spark Plugs?

    Yes, using synthetic oil benefits your engine by reducing oil breakdown and leakage, which helps maintain spark plug performance. It provides better lubrication and cleaner combustion, decreasing the likelihood of oil fouling on your spark plugs.

    Does Oil on Spark Plugs Affect Fuel Efficiency?

    Oil on spark plugs is like smudged glass, obstructing clear fuel combustion. When you let oil coat your plugs, you disrupt engine performance, causing incomplete burning and lowering your fuel efficiency.

    Keep plugs clean for ideal results.

    Conclusion

    Finding oil on your spark plugs is like spotting smoke before a fire—it’s a clear warning sign your engine needs attention. Worn piston rings, leaking valve cover gaskets, or damaged valve seals allow oil to seep into areas where it shouldn’t be, compromising combustion.

    Ignoring this symptom can lead to poor engine performance or even severe damage. Prompt diagnosis and repair are essential to maintain your engine’s health and efficiency.

    By addressing the issue of oil on your spark plugs early, you can prevent costly repairs and keep your vehicle running smoothly. Recognizing and fixing the cause of oil on your spark plugs turns a warning into a solution.

  • How to Fix Black Spark Plugs

    How to Fix Black Spark Plugs

    If your spark plugs are black, it usually means your engine’s running too rich or the ignition timing is off. Black spark plugs indicate carbon fouling, which can affect your engine’s performance and fuel efficiency.

    Start by cleaning them with a soft brush and a non-corrosive solvent. After cleaning, check the spark plug gap to ensure it meets the manufacturer’s specifications.

    If the fouling returns quickly or the plugs are worn or cracked, it’s best to replace them. Also, inspect your air filters and fuel injectors to address underlying issues and avoid future carbon buildup.

    Following these steps will help fix black spark plugs and prevent recurring problems. You’ll find more detailed steps to fix and prevent this problem.

    Key Takeaways

    • Clean black spark plugs using a soft wire brush and non-corrosive solvent to remove carbon deposits safely.
    • Check and correct the air-fuel mixture to prevent overly rich conditions causing carbon buildup.
    • Inspect and adjust ignition timing and fuel injectors to ensure efficient combustion.
    • Replace spark plugs if electrodes are worn, insulator is cracked, or fouling recurs quickly.
    • Prevent future fouling by using quality fuel, maintaining air filters, and avoiding prolonged idling.

    What Causes Black Fouling on Spark Plugs?

    Black fouling on spark plugs results from an overly rich air-fuel mixture, causing excessive carbon deposits to accumulate on the electrode and insulator.

    Black fouling on spark plugs indicates a rich air-fuel mixture causing carbon buildup on electrodes and insulators.

    When your engine runs rich, unburned fuel combusts inefficiently, creating soot that coats the plugs.

    Incorrect ignition timing can worsen this by delaying spark delivery, leading to incomplete combustion and increased carbon buildup.

    Additionally, a malfunctioning fuel injector or faulty sensors may deliver excess fuel, further contributing to fouling.

    You should also check for issues like a clogged air filter restricting airflow, which alters the fuel mixture balance.

    Addressing the root cause requires precise adjustment of the fuel mixture and ignition timing to guarantee ideal combustion, preventing carbon accumulation and maintaining spark plug performance.

    How to Diagnose Engine Issues From Black Spark Plugs

    When you notice spark plugs covered in carbon deposits, you can use their condition as a diagnostic tool to identify underlying engine problems. Different spark plug types respond uniquely to engine issues, so selecting the correct type is essential for accurate diagnosis.

    Black fouling typically indicates a rich air-fuel mixture, incomplete combustion, or weak ignition. Check if the deposits are dry or oily, as oily deposits suggest oil leakage into the combustion chamber. Excessive carbon buildup can reduce engine performance by causing misfires or poor fuel economy.

    Additionally, inspect ignition timing and fuel injectors to pinpoint faults. By analyzing black spark plugs precisely, you can detect problems like clogged air filters, faulty sensors, or incorrect fuel pressure, enabling you to restore ideal engine performance efficiently.

    How to Clean Black Spark Plugs Safely

    After identifying carbon fouling on your spark plugs, the next step is to clean them properly to restore peak performance.

    Begin by removing debris using a soft wire brush or specialized spark plug cleaning tool, avoiding abrasive materials that can damage the electrode.

    Next, apply a non-corrosive solvent designed for spark plug cleaning to dissolve carbon deposits. Soak the spark plugs briefly, then use compressed air to blow away loosened residue.

    Avoid harsh chemicals or sandblasting methods, as they can erode the electrode and ceramic insulator.

    After cleaning, inspect the spark plug gap with a feeler gauge and adjust if necessary to manufacturer specifications.

    Proper spark plug cleaning methods maintain electrode integrity and guarantee reliable ignition, improving engine efficiency and reducing emissions.

    Always wear safety goggles and gloves to protect yourself during the process.

    When to Replace Black Spark Plugs Instead of Cleaning

    Although cleaning can restore spark plugs in many cases, you should replace them if the electrodes show severe wear, the ceramic insulator is cracked, or persistent fouling returns quickly.

    These replacement indicators signal that the spark plug’s functionality has degraded beyond repair, compromising engine performance.

    Additionally, if your spark plug has reached or exceeded the manufacturer’s recommended spark plug longevity interval, replacement is crucial to maintain peak combustion efficiency.

    Relying solely on cleaning in these scenarios can lead to misfires, increased fuel consumption, and potential engine damage.

    By recognizing these critical replacement indicators, you guarantee the ignition system operates reliably, preventing further complications.

    Always consult your vehicle’s service manual to verify specific spark plug lifespan and replacement criteria for best results.

    How to Prevent Carbon Buildup on Spark Plugs

    Because carbon buildup can reduce spark plug efficiency and lead to engine issues, you should take proactive measures to minimize its formation.

    Maintaining peak combustion ensures your engine runs smoothly and extends spark plug life.

    Focus on these key practices:

    • Use high-quality fuel to reduce contaminants that cause deposits.
    • Follow the manufacturer’s recommended maintenance schedule rigorously.
    • Regularly inspect and replace air filters to guarantee proper air-fuel mixture.
    • Avoid prolonged idling and short trips that prevent complete combustion.
    • Utilize fuel additives designed to clean the combustion chamber periodically.

    Frequently Asked Questions

    Can Black Spark Plugs Cause Engine Misfires?

    Yes, black spark plugs can cause engine misfires by indicating spark plug failure or fouling. You’ll experience ignition issues because the deposits disrupt proper combustion.

    This leads to inefficient engine performance and potential damage if unaddressed.

    Are Black Spark Plugs Harmful to Fuel Efficiency?

    Yes, black spark plugs reduce fuel economy, hinder combustion efficiency, and increase emissions. You should prioritize spark plug maintenance to prevent carbon buildup.

    This will guarantee peak engine performance and maintain consistent fuel efficiency throughout your vehicle’s operation.

    How Often Should Spark Plugs Be Inspected for Fouling?

    You should perform spark plug maintenance by inspecting them every 30,000 miles or during routine tune-ups.

    Adhering to this inspection frequency helps detect fouling early, ensuring peak engine performance and fuel efficiency.

    Does Using Premium Fuel Prevent Black Spark Plugs?

    Imagine your engine running cleaner after switching to premium fuel. Premium fuel advantages include higher octane and fewer impurities, which improve combustion efficiency.

    This fuel quality impact can reduce black spark plugs, but it’s not a guaranteed fix.

    Can Oil Leaks Cause Black Spark Plug Fouling?

    Yes, oil leaks can increase oil consumption, leading to spark plug wear and fouling. Excess oil coats the plugs, causing black deposits that impair ignition.

    This reduces engine efficiency and requires timely diagnosis to prevent further damage.

    Conclusion

    Black spark plugs can be like warning lights on your engine’s dashboard, signaling underlying issues such as rich fuel mixtures or poor combustion. These issues cause carbon buildup that coats the spark plugs, affecting their performance.

    By accurately diagnosing the root cause, you can either clean or replace the black spark plugs to restore your engine’s maximum efficiency. Regular maintenance, including checking your fuel and air systems, will help prevent future carbon deposits.

    Treat your spark plugs with care to ensure your engine runs smoothly and efficiently. Properly addressing the causes of black spark plugs is essential for maintaining optimal engine performance.