To replace your carburetor, first verify symptoms like rough idling or black smoke, which often indicate carburetor issues. Park your vehicle on a flat surface, disconnect the battery, and gather the necessary tools along with a matching carburetor model.
Carefully detach the fuel lines, linkages, and mounting bolts to remove the old unit. Clean the intake manifold thoroughly to ensure a good seal and prevent contamination. Then, install the new carburetor with proper gasket alignment and secure the bolts evenly.
Reconnect all components, adjust the idle settings, and test performance to confirm the repair. Following this, you’ll uncover thorough tuning and maintenance insights to guarantee lasting efficiency.
Key Takeaways
- Park on a flat surface, disconnect the battery, and engage the parking brake with wheel chocks before starting the carburetor replacement.
- Carefully disconnect fuel lines and throttle linkages, then remove mounting bolts to detach the old carburetor from the intake manifold.
- Clean the intake manifold surface thoroughly, removing old gasket material and checking for warping before installing the new carburetor.
- Align and hand-tighten the new carburetor evenly on the manifold gasket, then reconnect fuel lines, linkages, and vacuum hoses securely.
- Adjust idle speed and mixture screws, check for leaks, and fine-tune the carburetor for smooth engine performance after installation.
How to Spot Carburetor Problems That Mean Replacement
Before you decide to replace the carburetor, you need to identify specific symptoms that indicate severe malfunction. Key carburetor symptoms include rough idling, frequent stalling, and poor acceleration.
If you notice black smoke from the exhaust, it signals a rich fuel mixture, often due to carburetor failure.
Additionally, hesitation or surging during acceleration points to inconsistent fuel delivery. Performance issues such as decreased fuel efficiency and engine flooding also confirm carburetor problems.
You should verify these symptoms by inspecting for visible leaks, damaged gaskets, or warped components.
If cleaning or minor adjustments don’t resolve the symptoms, replacement is necessary. Recognizing these precise carburetor symptoms guarantees you address performance issues effectively, preventing further engine damage and maintaining peak vehicle function.
Gathering Tools and Materials for Carburetor Replacement
To replace a carburetor efficiently, gather a specific set of tools and materials essential for the job. First, identify the carburetor type your vehicle uses, whether it’s a single-barrel, two-barrel, or four-barrel, since this affects the replacement part needed.
Start by identifying your vehicle’s carburetor type to ensure you select the correct replacement part.
You’ll require a socket set, screwdrivers, pliers, gasket scraper, and a torque wrench to guarantee proper assembly.
Also, have carburetor cleaner and replacement gaskets on hand to maintain seal integrity. Using the correct tools prevents damage and maximizes the replacement benefits, such as improved fuel efficiency and engine performance.
Finally, obtain the exact replacement carburetor model to match your engine specifications. Proper preparation minimizes errors and streamlines the installation process.
Get Your Vehicle Ready Safely Before You Start
First, park your vehicle on a flat, stable surface to guarantee safety and stability during the repair.
Next, disconnect the battery terminals to prevent electrical hazards while working on the carburetor.
Finally, confirm you have all required tools within reach before beginning the replacement process.
Park On Level Ground
Choose a flat, stable surface to park your vehicle, ensuring it won’t roll or shift during the carburetor replacement. Positioning your vehicle on level ground is critical for accurately evaluating and servicing carburetor types, as uneven terrain can disrupt fuel flow readings and adjustment procedures.
Stability prevents unintended movement, safeguarding both you and the engine components. This step directly impacts fuel efficiency, as proper carburetor installation requires a consistent baseline environment to calibrate fuel-air mixtures accurately.
Avoid slopes or soft surfaces that could compromise jack placement or tool stability. Engage the parking brake firmly and, if possible, use wheel chocks to eliminate any risk of movement.
Taking these precautions creates a safe working area and supports precise tuning of the carburetor, optimizing engine performance and fuel economy.
Disconnect Battery Safely
Before you begin working on your carburetor, disconnecting the battery is crucial to prevent electrical shorts and accidental startups.
Start by locating the battery terminals, typically marked positive (+) and negative (–).
For battery safety, always disconnect the negative terminal first to minimize the risk of electrical shorts. Use a wrench to loosen the terminal clamp and remove the cable carefully, making sure it doesn’t touch any metal surfaces.
Next, disconnect the positive terminal using the same method. Avoid touching both terminals simultaneously to prevent sparks.
Once both cables are detached, secure them away from the battery to maintain electrical precautions throughout your work.
This process guarantees your safety and protects your vehicle’s electrical system while you replace the carburetor.
Gather Necessary Tools
With the battery safely disconnected, you’re ready to gather the tools required for replacing the carburetor. Organize your tool storage area to guarantee quick access and prevent misplaced items.
Focus on assembling the appropriate tool types essential for this task:
- Wrenches and socket sets for loosening and tightening bolts.
- Screwdrivers, both flathead and Phillips, for hose clamps and screws.
- Pliers, needle-nose and regular, for handling clips and fuel lines.
Confirm each tool’s condition and size before starting. Using the correct tool types reduces the risk of damage and speeds up the process.
Store tools in an orderly manner, such as a toolbox or magnetic tray, to keep your workspace efficient and safe. This preparation sets a solid foundation for a smooth carburetor replacement.
How to Remove the Old Carburetor
Start by disconnecting the fuel line carefully to prevent spills.
Next, detach all linkage connections that control the throttle and choke.
Finally, unscrew the mounting bolts securing the carburetor to the intake manifold before lifting it off.
Disconnect Fuel Line
Loosen the clamp securing the fuel line to the carburetor using a screwdriver or pliers, then carefully pull the line off to prevent fuel spillage.
Before disconnecting, observe these safety precautions:
- Identify the fuel line type, rubber, braided, or metal, to use the correct removal technique and tools.
- Relieve fuel system pressure by turning off the fuel valve or disconnecting the battery to avoid ignition hazards.
- Have a container and absorbent cloth ready to catch residual fuel and prevent environmental contamination.
Disconnecting the fuel line precisely minimizes damage and leakage.
Avoid twisting or pulling forcefully, which can crack fittings or rupture hoses.
Always work in a ventilated area and wear safety goggles and gloves to protect against fuel exposure.
Following these steps guarantees a safe and efficient disconnection process.
Remove Linkage Connections
Carefully detach the throttle and choke linkages from the carburetor to prevent bending or breaking the rods and connectors.
Identify the linkage types, typically ball-and-socket or clip-on connectors, and use appropriate tools like pliers or a screwdriver to release them without damage.
Note the exact position and orientation of each linkage to guarantee proper reassembly. Pay attention to linkage adjustments, as improper settings can affect engine performance. If necessary, mark the current adjustment settings before removal.
Gently work each linkage free, avoiding excessive force that could distort the components.
Once all linkages are disconnected, inspect them for wear or corrosion, addressing any issues before installing the new carburetor.
Proper handling here guarantees smooth throttle and choke operation after replacement.
Unscrew Mounting Bolts
Locate the mounting bolts securing the carburetor to the intake manifold and use the appropriate wrench or socket to unscrew them. Proper selection of carburetor tools is essential to avoid damaging bolts or the manifold.
Follow these mounting techniques for efficient bolt removal:
- Apply penetrating oil to bolts if they appear rusted or stuck to ease unscrewing.
- Loosen bolts in a crisscross pattern to evenly relieve pressure and prevent warping the carburetor base.
- Keep track of all bolts and washers, as their order and condition affect reinstallation quality.
Use steady, controlled force with your tools to prevent stripping threads.
Once bolts are fully removed, carefully lift the carburetor off the intake manifold, preparing for the next replacement step.
Cleaning the Mounting Area Before Installing Your New Carburetor
Before installing your new carburetor, thoroughly clean the mounting area to guarantee a proper seal and peak performance.
Begin by removing any old gasket material with a plastic scraper to avoid damaging the surface.
Use a solvent or carburetor cleaner to dissolve residual fuel deposits and dirt. Confirm the surface is free of oil, grease, and debris, as contaminants can cause leaks or improper fit.
Inspect the mounting flange for warping or damage; if present, address it before proceeding.
After cleaning, dry the area completely using compressed air or a lint-free cloth.
Proper surface preparation during carburetor cleaning is critical to prevent air leaks and confirm efficient engine operation.
Taking these steps will help your new carburetor function at its best once installed.
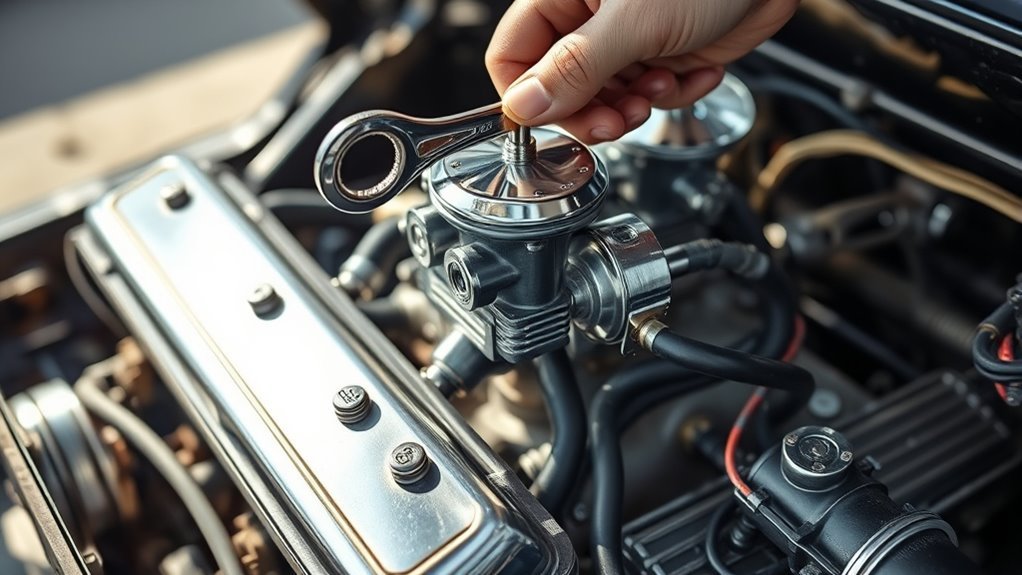
Installing Your New Carburetor
With the mounting area clean and inspected, you’re ready to position your new carburetor onto the intake manifold. First, identify the correct carburetor type for your engine to guarantee compatibility.
Ensure your carburetor matches your engine before placing it on the clean, inspected intake manifold.
Then, follow these installation tips for a secure fit:
- Align the carburetor base evenly with the manifold gasket to prevent air leaks.
- Insert and hand-tighten mounting bolts in a crisscross pattern to distribute pressure evenly.
- Reconnect fuel lines, linkages, and vacuum hoses, verifying each connection matches your carburetor type specifications.
Avoid overtightening bolts to prevent warping the carburetor base.
Double-check all connections for proper seating to guarantee system integrity. With these steps, you’ll have your new carburetor installed correctly and ready for tuning.
Adjusting and Tuning Your Carburetor for Optimal Performance
Although installing the carburetor is essential, tuning it correctly guarantees your engine runs efficiently and smoothly.
Begin carburetor tuning by adjusting the idle speed screw to achieve a stable idle between 600 and 900 RPM, depending on your engine specifications.
Next, fine-tune the idle mixture screw to verify the air-fuel ratio is balanced; turn it slowly until you reach the highest, steady RPM without roughness.
For performance enhancement, calibrate the main jet by testing acceleration response. If hesitation occurs, adjust the jet size accordingly.
Always use a tachometer and, if available, an exhaust gas analyzer to confirm adjustments.
Complete the process by rechecking all screws for secure positioning.
Proper tuning prevents fuel wastage and mechanical strain, ensuring your carburetor delivers peak engine performance consistently.
Troubleshooting Common Problems After Replacement
Once you’ve replaced and tuned your carburetor, you may encounter issues such as rough idling, poor acceleration, or fuel leaks.
To troubleshoot these common problems, follow these steps:
1. Check for carburetor leaks: Inspect all gaskets, fuel lines, and mounting bolts.
Tighten or replace any components causing leaks to prevent fuel loss and fire hazards.
2. Address idle issues: Adjust the idle screw precisely.
If the engine stalls or runs unevenly, verify the choke operation and clean the idle jets to confirm proper fuel flow.
3. Verify proper linkage and throttle operation: Confirm throttle linkage moves smoothly without binding, which can cause acceleration problems.
Essential Carburetor Maintenance Tips to Prevent Future Issues
After addressing common post-replacement issues like leaks and idle problems, maintaining your carburetor regularly will help you avoid these complications altogether. Focus on carburetor cleaning and monitoring fuel quality to guarantee peak performance. Use clean, high-quality fuel to reduce deposits and prevent clogging. Schedule carburetor cleaning every 3,000 miles or as recommended by your vehicle’s manual.
| Maintenance Task | Frequency | Notes |
|---|---|---|
| Carburetor Cleaning | Every 3,000 miles | Remove dirt and varnish |
| Fuel Filter Check | Every 5,000 miles | Prevent contaminants |
| Fuel Quality Check | Before each fill-up | Use fresh, clean fuel |
| Idle Adjustment | Annually | Maintain smooth operation |
| Linkage Lubrication | Every 6 months | Guarantee smooth throttle movement |
Following these tips keeps your carburetor efficient and extends its lifespan.
Frequently Asked Questions
What Types of Carburetors Are Compatible With My Vehicle Model?
You’ll find carburetor compatibility by checking your vehicle specifications, including engine size and model year. Use manufacturer guides or OEM part numbers to guarantee the carburetor fits precisely, preventing performance issues or damage.
How Does a Carburetor Differ From Fuel Injection Systems?
You’d think fuel delivery’s simple, but carburetors mix air-fuel mechanically, while fuel injection uses precise electronics. This causes noticeable performance differences: injections boost efficiency and responsiveness, whereas carbs offer straightforward, albeit less precise, fuel control.
Can I Replace a Carburetor Myself Without Prior Mechanical Experience?
Yes, you can replace a carburetor yourself by utilizing self-teaching resources and beginner tips. Follow detailed guides, watch instructional videos, and gather proper tools to guarantee precise, step-by-step completion without prior mechanical experience.
What Safety Precautions Should I Take When Handling Fuel?
Did you know fuel-related fires cause over 5,000 injuries yearly? When handling fuel, always work in a well-ventilated area, avoid sparks, wear gloves, and keep a fire extinguisher nearby to minimize fire hazards effectively.
How Often Should a Carburetor Be Replaced Under Normal Conditions?
You should follow the carburetor maintenance frequency recommended in your manual, usually every 20,000-30,000 miles. Replace it if you notice signs of carburetor failure like rough idling, poor acceleration, or fuel leaks.
Conclusion
Replacing your carburetor might seem intimidating, but with the right tools and careful steps, you’ll handle it confidently. Don’t worry about messing up—following each instruction precisely guarantees success.
Remember, taking the time to clean, install, and adjust properly prevents future issues and improves performance. Stick to the guide, and you’ll not only save money but also gain valuable mechanical skills.
Ready to get your engine running smoothly again? Properly replacing your carburetor is the key to restoring optimal engine function and performance.