To install a carburetor, first gather necessary tools such as a socket set, screwdrivers, and a torque wrench. Prepare your workspace with good lighting to ensure safety and precision. Selecting a carburetor that is compatible with your engine size and mounting pattern is essential for proper installation.
Begin by disconnecting the battery to prevent any electrical hazards. Carefully drain the fuel lines to avoid spills, and label all linkages for easier reassembly. Remove the old carburetor with caution to prevent damage to surrounding components.
Next, position the new carburetor onto the intake manifold and secure the bolts to the manufacturer’s recommended torque specifications. Reconnect the throttle and fuel lines, ensuring all connections are tight and correctly placed. Finally, tune the idle speed and mixture for smooth engine operation.
Following these detailed steps will help guarantee peak performance and help you avoid common mistakes during the installation process.
Key Takeaways
- Disconnect the battery and wear protective gear before starting to ensure safety during carburetor installation.
- Remove the old carburetor by draining fuel lines and labeling all linkages and hoses for easy reassembly.
- Clean the intake manifold surface with a gasket scraper to remove old sealant without causing damage.
- Position the new carburetor on the manifold, secure it with bolts tightened to manufacturer torque specifications.
- Attach throttle linkage and fuel lines carefully, then tune the carburetor for optimal idle and throttle response.
Gather Tools and Prepare Your Workspace
Before you begin installing the carburetor, gather all necessary tools and clear your workspace to guarantee efficiency and safety.
Start by organizing your workspace to make certain all essential tools are within reach and free from clutter.
Begin by arranging your workspace so all necessary tools are easily accessible and the area remains tidy.
Essential tools include a socket set, screwdrivers, wrenches, pliers, and a torque wrench. Additionally, prepare a clean cloth and a container for small parts to prevent loss.
Proper workspace organization minimizes errors and accelerates the installation process.
Make sure lighting is adequate to inspect components clearly. Confirm that you have replacement gaskets and fuel line clamps ready.
How to Pick the Right Carburetor for Your Engine
When selecting a carburetor for your engine, you need to evaluate factors like engine size, fuel delivery requirements, and compatibility with existing components. Understanding different carburetor types, such as single-barrel, two-barrel, and four-barrel, is essential to match your engine’s airflow and fuel demands.
Also, verify engine compatibility by checking mounting patterns and throttle linkage.
| Engine Size (CID) | Recommended Carburetor Type | Key Compatibility Feature |
|---|---|---|
| 100-200 | Single-barrel | Small mounting flange |
| 201-300 | Two-barrel | Standard throttle linkage |
| 301-400 | Four-barrel | High flow rate jetting |
| 401-500 | Four-barrel | Reinforced baseplate |
| 500+ | Performance 4-barrel | Custom mounting adapters |
Use this data to guarantee precise carburetor selection for peak performance.
Remove the Old Carburetor Safely
Start by disconnecting the battery to prevent any electrical hazards during the removal process. Next, confirm you understand the specific carburetor types involved, as designs vary and impact removal steps.
Follow these safety precautions carefully:
- Wear protective gloves and eyewear to guard against fuel exposure.
- Work in a well-ventilated area to avoid inhaling fumes.
- Use proper tools to avoid damaging mounting bolts or linkages.
Begin by draining the fuel lines connected to the carburetor to prevent spills. Label and disconnect all linkages and hoses systematically to simplify reinstallation.
Loosen mounting bolts evenly to prevent warping the intake manifold.
Install the New Carburetor Step by Step
Before you begin, gather all necessary tools to guarantee a smooth installation process.
Start by securely attaching the carburetor components according to the manufacturer’s specifications.
Follow each step carefully to prevent leaks and guarantee peak engine performance.
Prepare Installation Tools
Gather five essential tools to prepare for installing the new carburetor: a socket wrench set, screwdrivers (both flathead and Phillips), pliers, a gasket scraper, and a torque wrench.
Before starting, review your installation checklist to guarantee you have the correct tools for the specific carburetor types you’re working with. Proper tool selection prevents damage and streamlines the process.
Focus on these key points:
Use the gasket scraper to remove old sealant without damaging the mounting surface.
Select the appropriate screwdriver to avoid stripping screws during assembly.
Apply the torque wrench to tighten bolts to manufacturer specifications, assuring proper sealing and function.
Completing this preparatory step sets a solid foundation for a successful carburetor installation.
Attach Carburetor Components
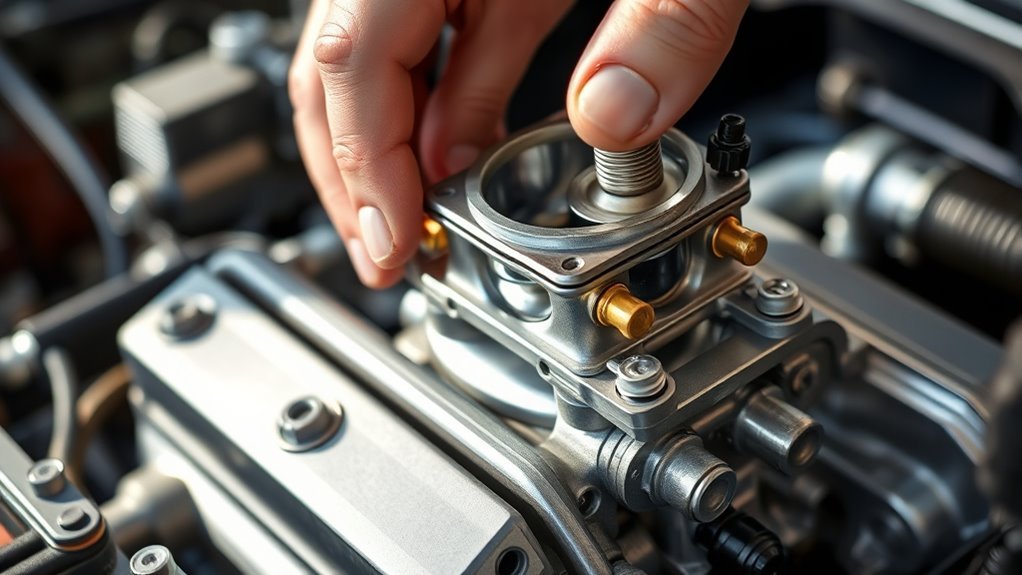
Position the new carburetor carefully onto the intake manifold, guaranteeing alignment with the mounting holes. Secure it using the appropriate bolts, tightening them evenly to prevent air leaks.
Next, attach the throttle linkage, making sure it moves freely without binding. Connect the fuel line, verifying component compatibility to avoid leaks or flow restrictions.
Reattach vacuum hoses to their correct ports, referencing the carburetor diagram to guarantee proper routing. Install the choke mechanism, adjusting it according to manufacturer specifications.
Once all components are connected, perform initial carburetor adjustments, such as idle speed and mixture settings, to optimize engine performance.
Double-check all connections for tightness and correct placement before proceeding to further tuning or engine start-up.
This precise installation guarantees reliable operation and longevity of your carburetor system.
Tune Your Carburetor for Smooth Running
Although installing the carburetor is essential, tuning it correctly guarantees your engine runs smoothly and efficiently.
Begin by making precise carburetor adjustments to enhance fuel-air mixture and idle speed. This fine-tuning directly impacts engine performance and fuel efficiency. Follow these steps:
Adjust the idle mixture screw slowly until the engine reaches a steady idle without stalling. Set the idle speed screw to the manufacturer’s recommended RPM for consistent engine operation.
Check for smooth throttle response by gradually opening the throttle and listening for hesitation or bogging.
Use a tachometer and a vacuum gauge if available to measure RPM and vacuum levels accurately. These tools help confirm your carburetor adjustments maintain peak engine performance under various conditions.
Proper tuning minimizes emissions and prolongs engine life.
Test Your Engine and Troubleshoot Carburetor Issues
After tuning your carburetor for ideal performance, the next step is to test your engine thoroughly and identify any potential issues.
Start the engine and observe its behavior under various loads and RPMs.
Pay close attention to common carburetor symptoms such as rough idling, stalling, hesitation, or excessive smoke.
Use a systematic engine diagnosis approach: check fuel delivery, air-fuel mixture, and throttle response.
If you notice poor acceleration or backfiring, adjust the mixture screws or inspect for vacuum leaks.
Employ a spark plug inspection to verify combustion quality.
Record any irregularities and refine the carburetor settings incrementally.
This methodical testing guarantees your carburetor operates efficiently and prolongs engine life by addressing issues before they escalate.
Frequently Asked Questions
What Are Common Signs of a Failing Carburetor?
You’ll notice carburetor troubleshooting reveals performance symptoms like rough idling, poor acceleration, black smoke, and stalling.
These signs indicate fuel-air mixture issues, signaling your carburetor may be failing and needs inspection or repair.
Can Fuel Additives Improve Carburetor Performance?
Think of fuel additives as tuning keys for your carburetor. They can improve fuel efficiency and provide performance enhancement by cleaning deposits, ensuring ideal fuel flow, and preventing clogging, ultimately maintaining smooth engine operation.
How Often Should a Carburetor Be Cleaned?
You should perform carburetor maintenance and cleaning frequency every 12,000 to 15,000 miles or annually, whichever comes first. Regular cleaning prevents buildup, guarantees ideal fuel flow, and maintains engine performance and efficiency.
What Are the Environmental Impacts of Carburetor Emissions?
You’ll find carburetor emissions contribute to air pollution, releasing hydrocarbons and carbon monoxide.
To minimize impact, you must follow environmental regulations that mandate proper tuning and maintenance, reducing harmful pollutants effectively.
Are Carburetors Compatible With Modern Fuel Types?
Carburetor compatibility with modern fuels varies; you’ll need to guarantee the carburetor materials resist ethanol and additives. Adjusting jet sizes and tuning may be necessary to optimize performance and prevent fuel-related damage with modern fuels.
Conclusion
Now that you’ve installed and tuned your carburetor, you’re set for maximum engine performance. Did you know that properly adjusted carburetors can improve fuel efficiency by up to 15%? This not only saves fuel but also reduces emissions.
Remember to regularly check your carburetor’s settings and clean it to maintain smooth operation. Following these technical steps guarantees your engine runs reliably and efficiently every time you start it.
Proper installation and maintenance are key. By following this guide on how to install a carburetor, you ensure your engine delivers optimal performance and longevity.