Author: hello@wash-o-rama.com

  • What Do Spark Plugs Do

    What Do Spark Plugs Do

    Spark plugs play a crucial role in your vehicle by igniting the compressed air-fuel mixture inside the engine’s cylinders. They deliver a precise, high-voltage spark that starts the combustion process.

    This ignition generates the power needed to move your vehicle. The exact timing and strength of the spark ensure peak fuel efficiency and optimal engine performance.

    Worn or faulty spark plugs can cause misfires, reduce power, and lower fuel economy. Understanding how spark plugs work and their impact on your engine helps you maintain ideal performance and extend engine life.

    Key Takeaways

    • Spark plugs generate a high-voltage spark to ignite the compressed air-fuel mixture in engine cylinders.
    • They ensure precise ignition timing, critical for efficient combustion and engine performance.
    • Spark plugs help maximize power output and fuel efficiency by enabling complete fuel combustion.
    • Worn or faulty spark plugs cause engine misfires, rough idling, and reduced fuel economy.
    • Different spark plug types (copper, platinum, iridium) offer varying durability and performance benefits.

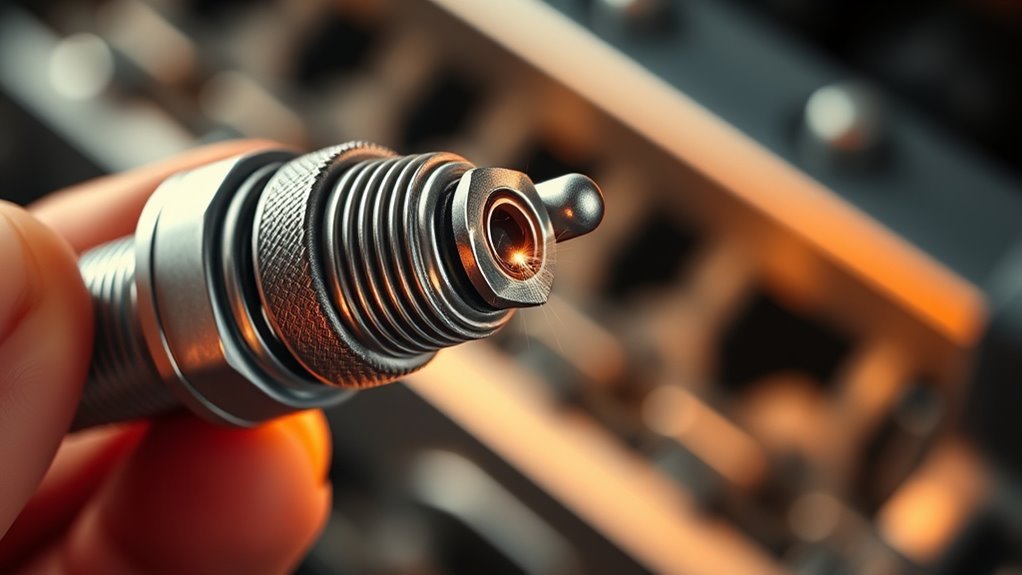
    What Are Spark Plugs and How Do They Work?

    Spark plugs are essential components in internal combustion engines that ignite the air-fuel mixture to power your vehicle.

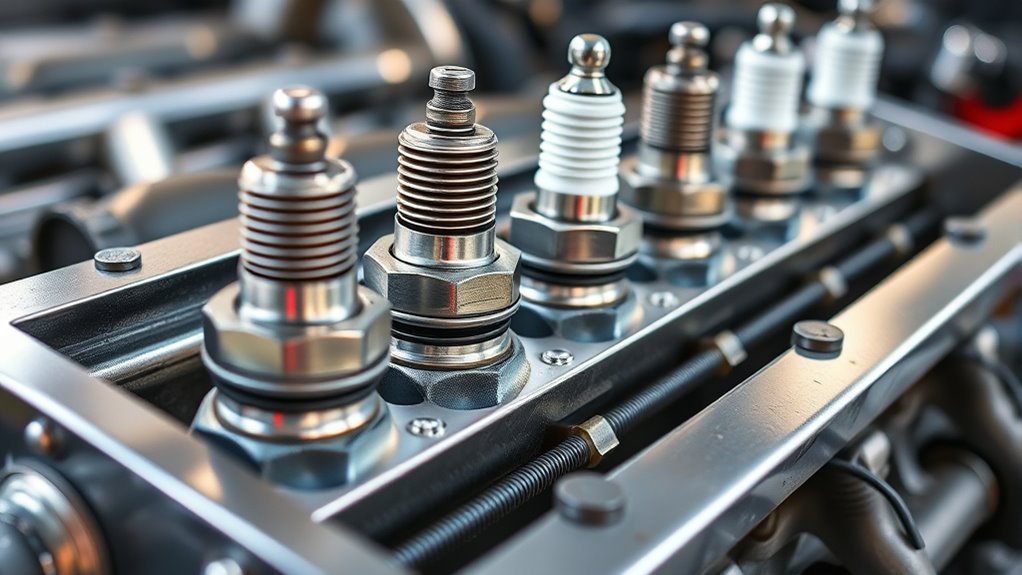
    Understanding spark plug anatomy helps you appreciate their role: each plug consists of a central electrode, an insulator, a metal shell, and a ground electrode.

    When the ignition system sends a high-voltage current to the central electrode, the voltage jumps the gap to the ground electrode, creating a spark.

    This spark initiates the ignition process by combusting the compressed air-fuel mixture inside the cylinder.

    The precise timing and strength of this spark are critical for effective combustion.

    Why Spark Plugs Matter for Engine Power and Efficiency

    You rely on precise ignition timing to guarantee your engine delivers peak power and fuel efficiency.

    Spark plugs play a critical role by igniting the air-fuel mixture at the exact moment needed for complete combustion.

    When this process is finely tuned, you maximize energy output and minimize wasted fuel.

    Ignition Timing Importance

    Although ignition timing might seem like a subtle engine parameter, it directly influences how efficiently your engine converts fuel into power.

    Precise ignition timing guarantees that the spark plug ignites the air-fuel mixture at the ideal moment, maximizing combustion pressure and enhancing engine performance. If your timing is off, you risk reduced power, increased fuel consumption, or engine knocking.

    You’ll notice the impact of ignition timing when you experience:

    Smoother acceleration and responsive throttle control

    Increased horsepower and torque output

    Improved fuel economy without sacrificing power

    Reduced engine vibrations and noise

    Fuel Combustion Efficiency

    Efficient fuel combustion depends heavily on the condition and performance of your spark plugs, which initiate the critical ignition process within the engine cylinders.

    When your spark plugs generate a strong, consistent spark, they ignite the air-fuel mixture precisely at the ideal moment, ensuring complete and efficient combustion.

    A properly combusted fuel mixture maximizes energy release, translating directly into improved engine power and fuel economy.

    Conversely, worn or fouled spark plugs produce weak or inconsistent sparks, leading to incomplete combustion, unburned fuel, and reduced engine efficiency.

    By maintaining your spark plugs in peak condition, you enhance the combustion process, reduce emissions, and improve overall engine performance.

    Understanding the role spark plugs play in fuel combustion efficiency helps you appreciate why regular inspection and replacement are essential for reliable, powerful engine operation.

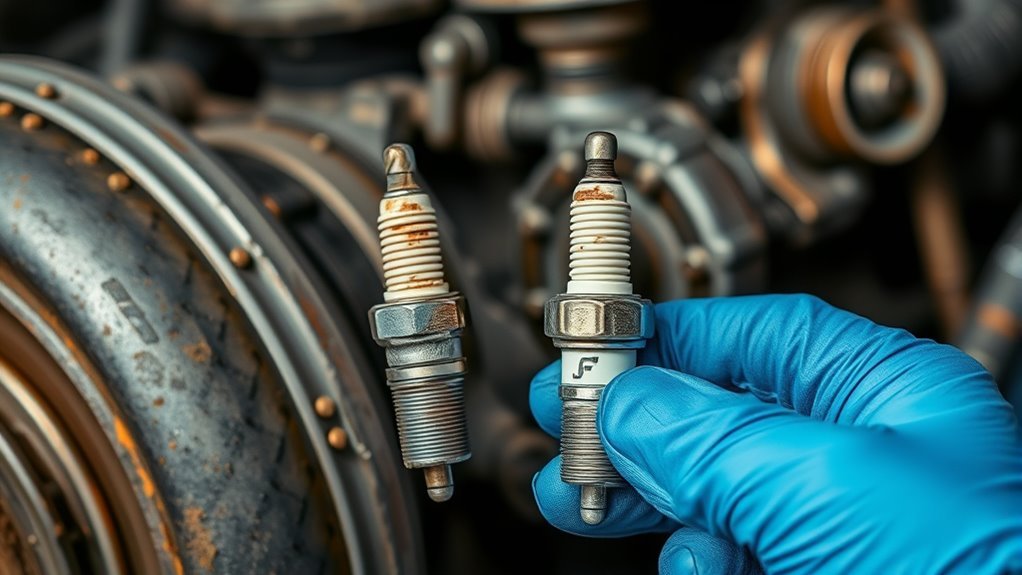
    Signs Your Spark Plugs Need Replacing

    How can you determine when your spark plugs require replacement? Spark plug wear directly impacts engine performance, so recognizing early signs is vital. Worn spark plugs cause incomplete combustion, leading to engine misfire, rough idling, and reduced fuel efficiency.

    You might notice difficulty starting your vehicle or a noticeable decrease in acceleration. Additionally, increased exhaust emissions can indicate deteriorated spark plugs.

    Watch for these signs:

    • Persistent engine misfire despite proper fuel supply
    • Noticeable drop in fuel economy and power output
    • Rough idling or unusual vibrations during acceleration
    • Hard starts or extended cranking time

    Addressing spark plug wear promptly guarantees peak combustion efficiency and prevents further engine damage.

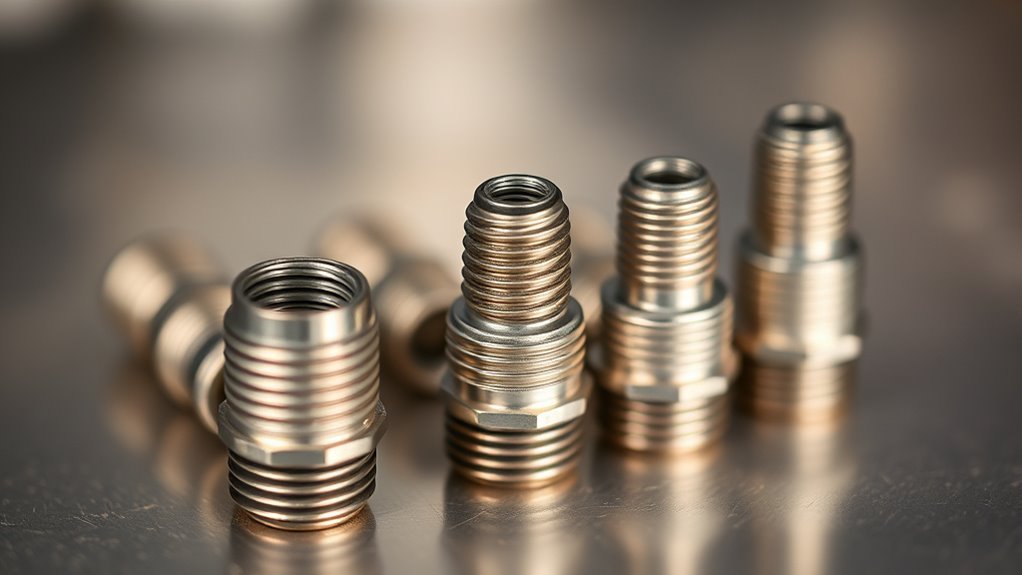
    Different Types of Spark Plugs and Their Uses

    You’ll encounter several common spark plug types, including copper, platinum, and iridium, each designed for specific engine requirements.

    Understanding their distinct applications helps you optimize performance and longevity based on your vehicle’s needs.

    Let’s examine how these materials influence efficiency, durability, and ignition quality.

    Common Spark Plug Types

    Although spark plugs may seem similar at first glance, their variations in design and material greatly affect engine performance and durability.

    You’ll commonly encounter copper plugs, known for excellent conductivity but shorter lifespan.

    Platinum plugs offer improved durability and resist electrode erosion, making them ideal for longer intervals.

    Iridium plugs provide superior wear resistance and consistent spark quality, enhancing ignition reliability.

    Finally, double platinum plugs combine durability with efficient spark delivery on both electrodes, optimizing combustion in modern engines.

    Feel the difference in engine smoothness with the right plug.

    Experience fewer misfires and better fuel efficiency.

    Trust in plugs designed for your specific vehicle demands.

    Enjoy longer intervals between replacements without sacrificing performance.

    Choosing the correct spark plug type guarantees your engine runs efficiently and reliably.

    Applications and Benefits

    Understanding the unique characteristics of copper, platinum, iridium, and double platinum spark plugs helps you select the best option for your engine’s specific demands.

    Copper plugs offer excellent conductivity, ideal for older engines requiring high heat dissipation.

    Platinum plugs provide longer life and consistent performance in modern vehicles, while iridium plugs deliver superior durability and enhanced ignition efficiency, making them suitable for high-performance engines.

    Double platinum plugs feature electrodes on both sides, improving ignition reliability in distributor-less ignition systems.

    These spark plug applications maximize engine power, fuel efficiency, and emission control.

    By choosing the right type, you gain spark plug benefits such as reduced misfires, longer service intervals, and optimized combustion.

    Ultimately, understanding these differences guarantees you enhance your engine’s reliability and performance precisely.

    Maintaining Spark Plugs to Improve Engine Efficiency

    Because spark plugs play a critical role in igniting the air-fuel mixture inside the engine cylinders, maintaining them directly impacts engine efficiency and performance.

    Neglecting spark plug maintenance can cause misfires, reduced fuel economy, and increased emissions. You should regularly inspect and replace worn or fouled spark plugs to guarantee consistent ignition quality.

    Proper gap settings are essential; incorrect gaps disrupt spark intensity and combustion completeness, diminishing engine performance.

    To optimize your engine’s operation, focus on:

    • Checking for electrode wear and carbon buildup
    • Measuring and adjusting spark plug gaps precisely
    • Replacing plugs according to manufacturer specifications
    • Using the correct spark plug type for your engine

    Consistent spark plug care maximizes combustion efficiency, leading to smoother acceleration and prolonged engine life.

    What Happens Inside Your Engine When a Spark Plug Fires?

    When a spark plug fires, it generates a high-voltage electrical spark that ignites the compressed air-fuel mixture inside the engine cylinder. This spark ignition initiates rapid combustion, causing the mixture to burn and expand swiftly.

    As you observe, the expanding gases exert pressure on the piston, forcing it downward and converting chemical energy into mechanical motion. This precise timing of spark ignition is critical; it guarantees peak engine combustion, maximizing power output and minimizing emissions.

    The spark plug’s electrode gap and insulation must withstand extreme conditions to maintain consistent firing. When the spark jumps across the gap, it breaks down the air-fuel mixture’s resistance, triggering a controlled explosion.

    This process repeats thousands of times per minute, driving your engine efficiently and reliably.

    Frequently Asked Questions

    How Do Spark Plugs Affect Fuel Economy?

    You’ll improve fuel economy by performing regular spark plug maintenance, ensuring ideal engine performance. Clean, properly gapped plugs promote efficient combustion, reducing fuel waste and helping your engine run smoothly with maximum power and minimal fuel consumption.

    Can Bad Spark Plugs Cause Engine Misfires?

    Yes, bad spark plugs can cause engine misfires by disrupting combustion timing, reducing engine performance. You’ll notice rough idling or poor acceleration.

    Timely spark plug replacement restores efficient ignition and smooth engine operation.

    What Is the Typical Lifespan of a Spark Plug?

    You’d think spark plugs last forever, but typically, they endure 30,000 to 100,000 miles depending on spark plug materials like iridium or platinum.

    Regular spark plug maintenance guarantees peak engine performance and prevents costly misfires.

    Are Spark Plugs the Same for All Car Models?

    No, spark plug compatibility varies by vehicle specifications. You need to match the exact type, size, heat range, and gap recommended for your car to guarantee peak performance.

    This ensures you avoid engine damage or misfires.

    How Do Cold Weather Conditions Impact Spark Plug Performance?

    Cold weather effects can delay ignition timing by thickening fuel and air mixtures, making spark plugs work harder to ignite. You’ll notice harder starts and potential misfires without proper plug heat range and maintenance in freezing conditions.

    Conclusion

    Understanding spark plugs is essential since they ignite the air-fuel mixture, directly affecting engine power and efficiency. Did you know that a single misfiring spark plug can reduce your engine’s fuel efficiency by up to 30%?

    By regularly inspecting and maintaining your spark plugs, you guarantee peak combustion, smoother performance, and lower emissions. Don’t underestimate their role—keeping your spark plugs in top condition means maximizing your engine’s longevity and reliability.

    In conclusion, knowing what spark plugs do helps you appreciate their critical function in maintaining your vehicle’s performance and efficiency.

  • Can You Use Carburetor Cleaner as Starter Fluid

    Can You Use Carburetor Cleaner as Starter Fluid

    You shouldn’t use carburetor cleaner as starter fluid because it’s formulated to clean deposits, not ignite quickly. Carburetor cleaner’s main purpose is to dissolve and remove buildup inside the carburetor, making it unsuitable for starting engines. Its solvents can cause incomplete combustion and damage engine seals or gaskets.

    Starter fluid, on the other hand, contains volatile compounds specifically designed for rapid ignition, ensuring smooth cold starts. This quick ignition property is essential when starting engines in cold weather or after long periods of inactivity. Using carburetor cleaner increases fire risks and can harm your engine’s performance and safety.

    If you want to understand the differences and safer options, here’s what you need to know. Always use products intended for starting engines to prevent damage and ensure reliable operation.

    Key Takeaways

    • Carburetor cleaner is not designed for ignition and lacks the volatile compounds needed for effective starting like starter fluid.
    • Using carburetor cleaner as starter fluid can cause engine damage by degrading seals and gaskets due to harsh solvents.
    • Carburetor cleaner poses safety risks including fire hazards and toxic exposure when used as a starting aid.
    • Starter fluid contains ether or similar compounds specifically formulated to ignite quickly and assist cold engine starts.
    • Safe alternatives to starter fluid include isopropyl alcohol sprays or fuel mixtures designed for starting engines, avoiding carburetor cleaner use.

    Can You Use Carburetor Cleaner as Starter Fluid?

    Why consider using carburetor cleaner as starter fluid? You might think carburetor cleaner could serve as a quick fix to start an engine, given its flammable properties and role in maintaining engine performance.

    However, carburetor cleaner is specifically formulated to dissolve deposits affecting fuel delivery and combustion efficiency.

    Carburetor cleaner targets deposits that hinder fuel flow and combustion efficiency.

    Using it as a starter fluid risks damaging engine components due to its chemical composition and lack of proper ignition properties.

    Starter fluid contains highly volatile compounds designed to ignite quickly and assist cold starts without harming the engine.

    While carburetor cleaner can improve engine performance when applied correctly, it doesn’t provide the necessary rapid ignition required for starting.

    Consequently, relying on carburetor cleaner as a starter fluid is impractical and potentially harmful to your engine’s overall function.

    Differences Between Carburetor Cleaner and Starter Fluid

    Understanding the fundamental differences between carburetor cleaner and starter fluid helps clarify why they serve distinct purposes in engine maintenance and operation.

    Starter fluid is formulated primarily to assist in igniting the engine by providing a highly volatile, combustible spray that ignites easily, aiding cold starts.

    In contrast, carburetor cleaner’s composition is designed to dissolve varnish, gum, and deposits that impair the carburetor function, ensuring proper fuel-air mixture delivery.

    The cleaner contains solvents and detergents, not optimized for combustion, whereas starter fluid includes ether or similar compounds to facilitate ignition.

    Using carburetor cleaner as starter fluid risks incomplete combustion and potential engine damage due to its unsuitable chemical makeup.

    Consequently, understanding these differences helps you select the right product for either cleaning or starting purposes, maintaining engine performance and longevity.

    How Starter Fluid Helps Engines Start

    Starter fluid delivers a highly volatile mixture that ignites quickly, helping your engine start more reliably in cold or challenging conditions. When you spray starter fluid into the intake, it vaporizes rapidly, creating an easily combustible air-fuel mixture.

    This quick ignition jumpstarts combustion, improving engine performance and guaranteeing smoother startups. Using starter fluid appropriately can also support fuel efficiency by reducing repeated cranking and unburned fuel waste.

    Benefit Explanation
    Rapid Ignition Highly volatile compounds ignite instantly
    Cold Weather Starting Assists combustion when fuel vaporizes poorly
    Engine Performance Stabilizes combustion for smoother starts
    Fuel Efficiency Minimizes fuel waste during startup

    This process guarantees your engine reaches peak running conditions swiftly and reliably.

    Risks of Substituting Carburetor Cleaner for Starter Fluid

    While starter fluid is formulated specifically to ignite quickly and assist engine startup, using carburetor cleaner as a substitute introduces significant risks. The risks involved primarily stem from differences in chemical composition and volatility.

    Starter fluid is designed for quick ignition; substituting carburetor cleaner poses serious safety and engine risks.

    Here are the potential hazards you need to take into account:

    1. Engine Damage: Carburetor cleaner contains harsh solvents that can degrade seals, gaskets, and sensitive components, leading to costly repairs.
    2. Fire Hazard: Its unpredictable ignition properties increase the risk of backfire or uncontrolled combustion, endangering you and your engine.
    3. Health Risks: Inhalation or skin contact with carburetor cleaner’s toxic chemicals can cause respiratory issues or chemical burns.

    Using carburetor cleaner instead of starter fluid compromises engine safety and performance, so it’s critical to avoid this substitution despite apparent convenience.

    When Carburetor Cleaner Might Help Your Engine Start

    Even though carburetor cleaner isn’t designed as a starter fluid, it can sometimes assist your engine in starting under specific conditions. When performing engine troubleshooting, if you suspect a clogged fuel system causing poor fuel atomization, a quick spray of carburetor cleaner may temporarily improve combustion. However, this is only advisable for brief tests, not as a permanent solution.

    Condition Effect of Carburetor Cleaner Recommended Action
    Fuel system deposits present Cleaner helps dissolve residues Use sparingly for troubleshooting
    Cold engine start difficulty Cleaner aids ignition momentarily Use only if starter fluid unavailable
    Fuel delivery issues May improve fuel vaporization Inspect and repair fuel system
    Engine stalls frequently Cleaner may stabilize combustion Conduct full fuel system check
    Carburetor adjustment needed Cleaner assists during tuning Adjust carburetor properly

    Safe Alternatives When You Have No Starter Fluid

    If you don’t have starter fluid on hand, there are several safe alternatives that can help ignite your engine without risking damage.

    Consider these non toxic options and DIY solutions to get your engine running:

    1. Isopropyl Alcohol Spray

    Use a 70% or higher isopropyl alcohol solution sprayed lightly into the intake. It evaporates quickly and ignites easily without harmful residues.

    2. Hand Sanitizer Gel

    Applied sparingly, this gel contains alcohol and can serve as a combustible aid in colder conditions. Maintain minimal quantity to avoid buildup.

    3. Compressed Air with Fuel Mixture

    If available, a balanced air-fuel mix from a carburetor cleaner substitute designed for starting engines is safer than standard carburetor cleaners.

    These methods provide practical, non toxic alternatives when starter fluid is unavailable.

    How to Use Starter Fluid Correctly to Avoid Damage

    To use starter fluid correctly, you need to apply it sparingly and directly into the intake system while following all safety guidelines.

    Avoid over-spraying, as excessive use can cause engine damage or fire hazards.

    Always guarantee proper ventilation and never use it on a hot engine to prevent accidents.

    Proper Application Techniques

    Starter fluid requires careful handling to prevent engine damage and guarantee effective ignition. To use it properly, you need precise application techniques and a clear understanding of cleaning methods before and after use.

    Follow these steps:

    1. Apply starter fluid sparingly, directly into the air intake or carburetor, avoiding over-saturation that can cause residue buildup or damage.
    2. Ascertain the engine is clean; remove any dirt or deposits using appropriate cleaning methods to prevent contamination and improve ignition efficiency.
    3. After starting, allow the engine to run briefly without additional fluid, letting it clear any remaining residue and stabilize combustion.

    Safety Precautions to Follow

    Although using starter fluid can simplify engine ignition, you must follow strict safety precautions to prevent damage or hazards.

    Always wear appropriate safety gear, including gloves and eye protection, to shield yourself from harmful chemicals and potential sprays.

    Ascertain you work in a well-ventilated area, meeting ventilation requirements to avoid inhaling toxic fumes, which can cause respiratory issues or pose fire risks.

    Never use starter fluid near open flames or sparks, as it’s highly flammable.

    Apply the fluid sparingly, following manufacturer guidelines, to prevent excessive buildup and pressure.

    Finally, store starter fluid safely, away from heat sources and out of children’s reach.

    Avoiding Engine Damage

    When you use starter fluid, you need to apply it with care to prevent engine damage. Incorrect use can compromise engine performance and reduce fuel efficiency. To avoid this, follow these practical steps:

    1. Use starter fluid sparingly. Excessive application can cause pre-ignition or damage engine components.
    2. Apply the fluid only to the air intake, not directly inside the carburetor or cylinder, to guarantee proper vaporization and combustion.
    3. Avoid repeated attempts in quick succession. Allow the engine to rest between sprays to prevent overheating and maintain ideal engine conditions.

    Frequently Asked Questions

    What Ingredients Are Commonly Found in Starter Fluid?

    Starter fluid ingredients typically include ether, a highly volatile compound, along with hydrocarbons and sometimes lubricants. Its chemical composition guarantees quick ignition, helping you start engines efficiently in cold or challenging conditions.

    Can Starter Fluid Damage Fuel-Injected Engines?

    Like walking a tightrope, using starter fluid on fuel-injected engines carries carburetor cleaner risks. Its harsh chemicals may harm seals and sensors, so you shouldn’t compromise fuel injection compatibility by applying it improperly or too frequently.

    How Long Does Starter Fluid Stay Effective After Spraying?

    Starter fluid lifespan is brief; its effective duration after spraying lasts only seconds to a minute. You should start the engine immediately to maximize ignition assistance, as the volatile compounds evaporate rapidly, reducing effectiveness.

    Is Starter Fluid Safe to Use in Cold Weather?

    You can use starter fluid in cold weather to boost engine performance, but it’s essential to apply it sparingly. Overuse risks damage; always follow manufacturer guidelines to guarantee safe, effective cold starts without harming your engine.

    What Are the Environmental Impacts of Using Starter Fluid?

    You should know starter fluid releases volatile compounds that degrade air quality and may violate environmental regulations. Using it excessively harms the environment, so always follow guidelines and use it sparingly to minimize impact.

    Conclusion

    While carburetor cleaner might seem like a tempting shortcut, think of it as using a screwdriver to hammer a nail—it’s not designed for starting engines and can cause damage.

    Starter fluid is engineered to ignite quickly and safely, giving your engine the boost it needs.

    When in doubt, stick to proper fluids or safe alternatives to avoid costly repairs.

    Remember, precision matters—don’t gamble with your engine’s health. In conclusion, using carburetor cleaner as starter fluid is not recommended.

  • How Many Spark Plugs in a v6

    How Many Spark Plugs in a v6

    You typically have six spark plugs in a standard V6 engine—one per cylinder. Some V6 models use dual spark plugs per cylinder, doubling that number to twelve for enhanced combustion efficiency. This dual ignition setup improves performance, fuel efficiency, and reduces emissions.

    Faulty or missing spark plugs can cause misfires, rough idling, and power loss. Understanding spark plug count and maintenance helps you keep your engine running smoothly. Keep exploring to learn how this impacts your V6’s performance and longevity.

    Key Takeaways

    • A standard V6 engine typically has six spark plugs, one per cylinder.
    • Some V6 engines use dual spark plugs per cylinder, totaling twelve spark plugs.
    • Spark plug count depends on the engine design and manufacturer specifications.
    • Dual spark plugs improve combustion efficiency and engine performance in some V6 models.
    • Proper spark plug maintenance is crucial to avoid misfires and ensure optimal engine function.

    How Many Spark Plugs Does a Standard V6 Engine Have?

    How many spark plugs does a standard V6 engine have? Typically, a V6 engine contains six spark plugs, one per cylinder. However, some engines may use dual spark plugs per cylinder, totaling twelve.

    Understanding spark plug types such as copper, platinum, or iridium is vital because each material influences performance and longevity differently.

    Choosing the right spark plug material—copper, platinum, or iridium—affects your engine’s performance and lifespan.

    For peak engine function, you need regular spark plug maintenance, including inspection and timely replacement. Worn or fouled spark plugs can cause misfires, reduced fuel efficiency, and increased emissions.

    When servicing your V6, select the correct spark plug type per manufacturer specifications to guarantee compatibility and durability. Proper maintenance guarantees reliable ignition, smooth operation, and extends engine life.

    Always follow precise torque settings during installation to avoid damage and guarantee peak performance.

    How Do You Identify Spark Plug Numbers in Your V6?

    To accurately identify spark plug numbers in your V6, you need to understand the cylinder numbering system specific to your engine model. Most V6 engines number cylinders sequentially, either from front to back or in a V-bank order. Check your vehicle’s service manual to confirm the exact layout.

    The ignition system typically fires spark plugs according to this numbering, matching the firing order and spark plug types used.

    Cylinder Bank Spark Plug Number
    Left Bank 1, 3, 5
    Right Bank 2, 4, 6

    Knowing this helps you locate each spark plug precisely for inspection or replacement, ensuring you use the correct spark plug types and maintain peak ignition system performance.

    Why Do Some V6 Engines Have More Than Six Spark Plugs?

    You might notice some V6 engines use more than six spark plugs because they employ a dual spark plug design.

    This setup improves combustion efficiency and boosts engine performance by igniting the air-fuel mixture more effectively.

    Additionally, it helps reduce emissions by ensuring more complete burning of fuel within the cylinders.

    Dual Spark Plug Design

    Several V6 engines incorporate a dual spark plug design, meaning they’ve twelve spark plugs instead of six. This configuration places two spark plugs in each cylinder, enhancing combustion control.

    The use of advanced spark plug materials, such as iridium or platinum, improves durability and guarantees consistent ignition performance under varying conditions.

    With dual plugs, you can achieve more precise ignition timing, as each spark plug can ignite different areas of the combustion chamber simultaneously or sequentially. This setup reduces the likelihood of misfires and promotes more complete fuel burning.

    When you consider maintenance or replacement, it’s important to recognize that dual spark plugs demand careful attention to guarantee both plugs operate correctly, given their critical role in optimizing ignition timing and overall engine reliability.

    Performance And Efficiency

    Multiple spark plugs per cylinder enhance combustion efficiency and overall engine performance in some V6 engines. By igniting the air-fuel mixture at multiple points simultaneously, these engines improve combustion quality, leading to more complete and faster burning.

    This optimized combustion reduces the likelihood of knocking and allows for higher compression ratios, which in turn boosts power output. Additionally, better combustion quality directly influences fuel efficiency, as the engine extracts more energy from the same amount of fuel.

    When you drive a V6 with multiple spark plugs per cylinder, you benefit from smoother acceleration and improved responsiveness.

    This design also helps maintain consistent engine performance under varying loads and speeds, making it a practical choice for manufacturers aiming to balance power and economy without compromising reliability.

    Emission Control Benefits

    Although having more than six spark plugs in a V6 engine may seem unusual, this configuration plays a crucial role in reducing harmful emissions. By using multiple spark plugs per cylinder, the engine achieves more complete and efficient combustion. This precise ignition reduces unburned fuel residues, directly contributing to emission reduction.

    When combustion is thorough, fewer pollutants like hydrocarbons and carbon monoxide escape into the atmosphere. You’ll notice that this setup markedly lowers the environmental impact of your vehicle, meeting stringent emission standards more effectively.

    Additionally, improved combustion stability minimizes the formation of nitrogen oxides.

    How Dual Ignition Affects Spark Plugs in V6 Engines?

    When a V6 engine uses dual ignition, it doubles the number of spark plugs per cylinder, increasing the total spark plug count.

    You’ll find that this design improves combustion efficiency by igniting the air-fuel mixture more evenly and quickly.

    Understanding how this affects spark plug quantity and engine performance is key to grasping the benefits of dual ignition systems.

    Dual Ignition Design

    Because dual ignition systems use two spark plugs per cylinder, they double the number of spark plugs required in a V6 engine compared to a single ignition design. This means you’ll install 12 spark plugs instead of 6.

    Dual ignition improves combustion efficiency by igniting the air-fuel mixture from two points simultaneously, enhancing power and reducing emissions.

    When selecting spark plug types for dual ignition, you must consider compatibility with the engine’s ignition system and heat range to guarantee peak performance.

    Precise ignition timing becomes even more critical, as both spark plugs must fire at the correct moments to maximize combustion.

    Understanding these factors helps you maintain engine efficiency and reliability in dual ignition V6 configurations.

    Spark Plug Quantity Variation

    Understanding how dual ignition influences the number of spark plugs in a V6 engine clarifies why you might see variations in spark plug quantity across different engine designs.

    Typically, a V6 engine has six spark plugs, one per cylinder. However, dual ignition systems double this count by incorporating two spark plugs per cylinder, resulting in twelve spark plugs total. This design improves combustion efficiency but also means you need to take into account different spark plug types compatible with your engine’s setup.

    When selecting spark plug brands, prioritize those offering proven reliability and ideal heat range for dual ignition systems. Brands specializing in performance or OEM replacements often provide spark plugs suited for these configurations.

    Knowing this variation helps you maintain your V6 engine properly, ensuring you choose the right spark plug types and brands for your specific dual ignition design.

    Performance Impact Analysis

    Although dual ignition systems increase the number of spark plugs in a V6 engine, they greatly enhance combustion efficiency and engine performance. By employing two spark plugs per cylinder, the combustion chamber achieves more uniform flame propagation, reducing burn time and improving power output.

    This setup demands precise ignition timing synchronization to optimize the flame front and prevent misfires. Additionally, the choice of spark plug materials becomes critical; advanced materials like iridium or platinum offer superior durability and consistent spark quality under the increased thermal and electrical loads imposed by dual ignition.

    As a result, you benefit from improved fuel economy, lower emissions, and smoother engine operation. Understanding how dual ignition influences spark plug wear and ignition timing helps you maintain peak V6 engine performance effectively.

    What Happens When V6 Spark Plugs Are Faulty or Missing?

    Even a single faulty or missing spark plug in your V6 engine can cause significant performance issues.

    Spark plug failure disrupts the ignition process, leading to incomplete combustion and an engine misfire. This not only reduces power output but also compromises fuel efficiency and increases emissions.

    When a spark plug malfunctions or is absent, you may experience:

    • Rough idling and noticeable vibrations
    • Loss of acceleration and engine hesitation
    • Increased fuel consumption and potential catalytic converter damage

    Each cylinder in your V6 depends on its spark plug to ignite the air-fuel mixture precisely.

    Missing or damaged spark plugs cause imbalance in cylinder firing, impairing smooth engine operation.

    Addressing spark plug issues promptly guarantees ideal combustion, maintaining engine reliability and preventing further mechanical damage.

    Signs Your V6 Spark Plugs Need Replacing

    Several clear indicators can signal that your V6 spark plugs need replacing. Over time, the spark plug lifespan decreases, leading to performance issues such as engine misfires, rough idling, and reduced fuel efficiency.

    You might also notice difficulty starting the engine or a loss of acceleration power. Monitoring these signs helps maintain engine health and prevents further damage.

    Symptom Cause Impact on Performance
    Engine misfires Worn electrode Reduced power, jerky ride
    Rough idle Carbon build-up Engine vibration
    Hard starting Weak spark Delayed ignition
    Poor fuel economy Incomplete combustion Increased fuel use
    Loss of acceleration Inefficient spark Sluggish response

    Addressing these signs promptly guarantees ideal V6 engine operation.

    When Should You Replace Spark Plugs in a V6 Engine?

    Recognizing the signs of worn spark plugs is only part of maintaining your V6 engine’s performance; knowing the ideal replacement interval is equally important.

    Spark plug longevity varies by type and driving conditions, but most modern V6 engines recommend replacement every 30,000 to 100,000 miles.

    To optimize your engine’s efficiency and prevent misfires, adhere to the manufacturer’s specified replacement interval.

    Consider these factors when deciding the timing:

    • Driving habits and conditions, like frequent short trips or heavy loads, can reduce spark plug life.
    • Use of high-quality spark plugs can extend longevity.
    • Regular engine tune-ups help monitor spark plug condition precisely.

    Following these guidelines guarantees consistent combustion performance and prevents costly engine issues.

    How to Choose Spark Plugs for Your V6

    How do you select the right spark plugs for your V6 engine? Start by considering the spark plug types suitable for your engine: copper, platinum, or iridium. Each differs in durability and performance.

    Next, check compatibility with your V6’s specifications. Spark plug brands vary in quality and price, so choose reputable manufacturers that meet OEM standards.

    Use this table to compare key features:

    Spark Plug Type Durability Typical Brands
    Copper Short (~20,000 miles) NGK, Denso
    Platinum Medium (~60,000 miles) Bosch, Champion
    Iridium Long (~100,000 miles) NGK, Denso
    Double Platinum Long (~100,000 miles) AC Delco, Bosch

    Frequently Asked Questions

    Can Spark Plug Gaps Affect Engine Performance in a V6?

    Yes, incorrect spark plug gaps can disrupt ignition timing and reduce engine efficiency. You’ll need precise spark plug maintenance to guarantee proper gap settings, optimizing combustion and maintaining your V6 engine’s performance and fuel economy.

    How Do Spark Plug Materials Differ for V6 Engines?

    You’ll find spark plug materials differ mainly by ceramic insulators and platinum tips. Ceramic insulators resist heat and electrical wear, while platinum tips enhance durability and performance. Both are essential for maintaining efficient combustion in your V6 engine.

    What Tools Are Needed to Replace V6 Spark Plugs?

    You’ll need spark plug replacement tools that feel like they could fix the entire universe: a spark plug socket, ratchet wrench, torque wrench, extension bar, and a gap gauge. These guarantee precise, safe V6 spark plug replacement.

    Are Spark Plugs Universal Across All V6 Engine Models?

    You shouldn’t assume spark plug compatibility across all V6 engine variations. Different engines require specific spark plugs based on size, heat range, and design. Always check manufacturer specs to guarantee proper fit and performance.

    How Does Spark Plug Heat Range Impact a V6 Engine?

    You’ll find that choosing the right spark plug types directly affects heat dissipation in your V6 engine, ensuring ideal combustion and preventing overheating or fouling. It manages temperature extremes efficiently for consistent performance.

    Conclusion

    Understanding how many spark plugs your V6 engine needs is essential for maintaining peak performance. Most V6 engines typically have six spark plugs, one for each cylinder. However, some V6 engines with dual ignition systems may have twelve spark plugs in total.

    Keeping those spark plugs in top shape guarantees smooth operation and optimal engine efficiency. Don’t let a faulty spark plug throw a wrench in the works—regular inspection and timely replacement are key.

    Stay proactive with your maintenance, and you’ll avoid costly repairs down the road. Knowing how many spark plugs are in a V6 engine helps ensure your vehicle runs reliably and efficiently.

  • Are Spark Plugs Expensive

    Are Spark Plugs Expensive

    Are spark plugs expensive? Typically, you’ll pay between $2 and $15 per spark plug, depending on materials like copper, platinum, or iridium.

    Copper plugs cost less but wear out faster, while premium plugs last longer and withstand extreme conditions, making them pricier. Your vehicle’s engine type and driving habits also influence the best choice.

    If you want to balance cost with performance and lifespan, understanding these factors helps you make an informed decision before your next replacement.

    Key Takeaways

    • Spark plug prices typically range from $2 to $15 each, depending on material and brand.
    • Copper spark plugs are the least expensive but have a shorter lifespan.
    • Premium iridium and platinum plugs cost more but offer longer durability and performance.
    • Labor costs for replacement can add to overall expenses unless done DIY.
    • Investing in higher-quality plugs can reduce long-term maintenance costs and improve fuel efficiency.

    How Much Do Spark Plugs Usually Cost?

    How much do spark plugs usually cost? Typically, prices range from $2 to $15 per plug, depending on spark plug brands and specifications.

    Standard copper plugs are often less expensive, while iridium or platinum plugs command higher prices due to durability and performance benefits.

    Copper plugs cost less, while iridium and platinum offer greater durability and performance at a higher price.

    When considering spark plug brands, well-known manufacturers like NGK, Bosch, and Denso offer a broad spectrum of options tailored to various engine requirements.

    Replacement intervals also influence your cost considerations; conventional spark plugs generally require replacement every 20,000 to 30,000 miles, while premium types can last up to 100,000 miles.

    Understanding these factors helps you budget effectively for maintenance, ensuring peak engine performance without overspending.

    What Makes Spark Plugs Cost More or Less?

    Prices of spark plugs vary considerably due to several key factors that impact their design, materials, and manufacturing processes.

    When you choose a spark plug, understanding these elements helps explain the price differences. The spark plug materials directly affect durability and performance impact, influencing how often you need replacements and your engine’s efficiency.

    Additionally, manufacturing precision and design complexity play significant roles.

    Key factors include:

    • Type and quality of spark plug materials (e.g., copper, platinum, iridium)
    • Electrode design and gap precision
    • Heat range suitability for specific engines
    • Manufacturing tolerances and quality control standards
    • Brand reputation and included warranties

    Cost Differences Among Common Spark Plug Types

    Three primary types of spark plugs, copper, platinum, and iridium, offer distinct cost differences based on their material properties and performance characteristics.

    Copper spark plugs are generally the most affordable due to their basic design and a copper core that provides excellent conductivity but shorter lifespan.

    Platinum spark plugs cost more because they feature a platinum alloy on the electrode, enhancing durability and performance.

    Iridium spark plugs command the highest price, thanks to iridium’s superior hardness and melting point, which guarantee exceptional longevity and consistent ignition.

    Ceramic spark plugs, often integrated with these metal types, provide excellent heat resistance and insulation but don’t greatly affect cost alone.

    Understanding these differences helps you choose a spark plug that balances cost with engine requirements efficiently.

    When Should You Spend More on Spark Plugs?

    Determining when to invest in higher-quality spark plugs depends largely on your vehicle’s performance needs and operating conditions.

    You should consider spending more when performance benefits and longevity factors justify the cost. Premium spark plugs often enhance combustion efficiency, reduce misfires, and extend service intervals.

    Evaluate these situations:

    • Your engine demands high power output or runs under heavy loads.
    • You drive frequently in extreme temperatures or dusty environments.
    • Your vehicle has a turbocharged or high-compression engine.
    • You aim to maximize fuel efficiency and reduce emissions.
    • You prefer fewer maintenance visits due to longer-lasting plugs.

    Smart Ways to Save on Spark Plug Replacement

    Although spark plug replacement is a routine maintenance task, you can adopt several strategies to minimize costs without compromising quality.

    First, consider DIY maintenance if you have basic mechanical skills and the right tools; this eliminates labor fees and lets you control timing. Follow manufacturer specifications closely to avoid premature wear or damage.

    Second, leverage bulk purchasing by buying spark plugs in sets or multipacks, which often reduces the per-unit cost. This is especially useful if you maintain multiple vehicles or plan replacements over time.

    Always verify compatibility with your engine model to guarantee peak performance.

    Frequently Asked Questions

    How Often Should Spark Plugs Be Replaced?

    You should replace spark plugs every 30,000 to 100,000 miles, depending on their lifespan and vehicle specifications. Following manufacturer-recommended replacement intervals guarantees peak engine performance and prevents potential misfires or fuel inefficiency.

    Can Bad Spark Plugs Cause Engine Problems?

    Bad spark plugs are like worn-out conductors in an orchestra, causing engine misfires and rough idling. If you ignore your spark plug lifespan, expect reduced fuel efficiency and potential engine damage that disrupts smooth performance.

    Are Spark Plugs Universal or Vehicle-Specific?

    You’ll find spark plug types vary considerably, so they’re not universal. Compatibility factors like thread size, heat range, and electrode design determine fit.

    Always check your vehicle’s specifications to verify proper spark plug selection and best performance.

    How Do I Know if My Spark Plugs Need Cleaning?

    If your engine’s performance feels a bit under the weather, it’s time to check spark plug maintenance. Look for carbon buildup or worn electrodes, then apply proper cleaning techniques to restore efficient ignition and smooth running.

    Can I Replace Spark Plugs Myself Safely?

    Yes, you can safely perform a DIY replacement of spark plugs by following safety precautions like disconnecting the battery, using proper tools, verifying engine coolness, and carefully gapping new plugs to avoid damage and guarantee peak performance.

    Conclusion

    So, are spark plugs expensive? Well, if you’re ready to fork over cash for a tiny piece of metal that’s literally igniting your engine, go ahead and splurge on those premium iridium beauties.

    But if you prefer your wallet to stay a bit plumper, basic copper plugs do the job just fine—unless you want your car to perform rocket science.

    Either way, knowing when and what to buy keeps your engine purring without burning holes in your budget. Spark plugs can vary in price, but understanding your options helps you avoid overspending.

  • What Size Socket for Spark Plugs

    What Size Socket for Spark Plugs

    What Size Socket for Spark Plugs is an important consideration when performing maintenance. You’ll typically need a 5/8 inch or 13/16 inch socket to fit most spark plugs securely. The 5/8 inch size is common for standard plugs, while 13/16 inch sockets accommodate larger plugs.

    Using the correct size guarantees proper torque application and prevents slippage. It also protects the spark plug’s ceramic insulator and threads from damage.

    Choose sockets with rubber inserts or magnetic features for a better grip. Selecting the right tools and techniques is key to efficient spark plug service and engine longevity. Discover how to optimize your setup effectively for the best results.

    Key Takeaways

    • Most standard spark plugs require a 5/8 inch socket, while larger or heavy-duty plugs need a 13/16 inch socket.
    • Choosing the correct socket size prevents slippage, damage, and ensures proper torque application during installation.
    • Confirm the socket size matches your specific spark plug brand and type for a secure and accurate fit.
    • Use sockets with rubber inserts or magnets to hold the plug securely and avoid dropping or damaging it.
    • Employ a torque wrench with the correct socket size to apply manufacturer-recommended torque and avoid over-tightening.

    Common Spark Plug Socket Sizes

    When working with spark plugs, you’ll most commonly encounter socket sizes of 5/8 inch and 13/16 inch. These sizes correspond to the hexagonal shape of the spark plug’s base, guaranteeing proper socket compatibility.

    Most spark plug brands design their plugs with one of these two common hex sizes, which simplifies tool selection. The 5/8 inch socket fits the majority of standard spark plugs, while the 13/16 inch socket is often needed for larger or heavy-duty plugs.

    To guarantee a secure fit and avoid damage, confirm the socket size matches the specific spark plug brand’s dimensions. Using the correct socket size improves installation and removal efficiency, reducing the risk of stripping or breaking the plug during maintenance.

    Why Spark Plug Socket Size Matters

    You need the correct spark plug socket size to guarantee a proper fit that prevents slippage and damage to both the socket and the plug.

    Using the right size helps you apply effective torque, securing the plug without stripping its threads.

    Choosing an incorrect socket can compromise your engine’s performance and lead to costly repairs.

    Proper Fit Importance

    Although selecting the correct spark plug socket size might seem minor, it directly affects installation accuracy and engine performance. A proper fit guarantees ideal spark plug compatibility, preventing damage to the electrode or ceramic insulator.

    Socket design features like rubber inserts or magnetic tips secure the plug, reducing slippage during removal or installation. Using an ill-fitting socket can lead to cross-threading or incomplete seating, compromising engine efficiency.

    Spark Plug Size Socket Diameter (mm) Key Socket Design Features
    Standard (14mm) 14 Rubber insert, thin wall
    Wide Hex (16mm) 16 Magnetic tip, deep well
    Iridium (18mm) 18 Flexible socket, anti-slip grip
    Fine Thread 14 Soft inner lining
    Double Seal 16 Extra depth, durable rubber

    Choose the right socket to maintain spark plug integrity and engine reliability.

    Avoiding Socket Damage

    Since spark plug sockets must fit snugly to function properly, using the wrong size increases the risk of damaging both the socket and the spark plug. A loose socket can strip the spark plug’s hex, while an overly tight socket may cause excessive stress and cracking.

    To avoid this, always select the exact socket size specified for your spark plug. Additionally, proper lubrication of the socket’s interior rubber insert or magnet helps reduce friction and prevents seizing during removal.

    Regular socket maintenance, including cleaning debris and inspecting for wear, guarantees consistent performance and prolongs tool life.

    Ensuring Effective Torque

    When applying torque to spark plugs, using the correct socket size guarantees you achieve the specified tightness without slipping or over-torquing.

    Proper adherence to torque specifications is critical during spark plug installation to prevent damage to the plug or cylinder head.

    If the socket is too large or too small, it can slip, causing inaccurate torque application and potentially rounding the plug’s hex. This compromises the seal and engine performance.

    Using the exact socket size assures a secure grip, allowing you to apply the recommended torque precisely.

    This precision maintains the integrity of the spark plug’s gasket and prevents thread damage.

    Ultimately, selecting the correct socket size is essential for effective spark plug installation and reliable engine operation.

    Choosing the Right Spark Plug Socket

    You’ll want to select a spark plug socket that matches the common sizes, typically 5/8-inch or 13/16-inch, depending on your spark plug.

    Consider the socket material: chrome vanadium offers durability, while chrome molybdenum provides extra strength for tougher jobs.

    Also, choose the appropriate socket depth to guarantee it fits the spark plug’s length without damaging the porcelain insulator.

    Common Spark Plug Sizes

    Three common spark plug socket sizes cover the majority of automotive applications: 5/8 inch, 13/16 inch, and 9/16 inch. These sizes correspond to the hex dimensions on various spark plug types, guaranteeing proper fit and torque application.

    For standard spark plugs, the 5/8 inch socket is most prevalent, while performance or larger diameter plugs often require the 13/16 inch socket. Smaller, specialized plugs typically use the 9/16 inch size.

    When selecting your socket, confirm socket compatibility with your specific spark plug type to avoid stripping or damaging the plug hex. Using the correct socket size improves installation accuracy and prevents mechanical issues.

    Always verify the spark plug’s hex size indicated by the manufacturer before proceeding to verify ideal fit and function.

    Socket Material Options

    Selecting the right socket material greatly impacts the durability and performance of your spark plug installation tools. When choosing between chrome vs. steel, consider the following:

    1. Chrome sockets offer excellent corrosion resistance and a smooth finish, ideal for standard spark plug changes but may crack under heavy torque.
    2. Steel sockets, especially those made from alloy steel, provide superior strength and toughness, making them suitable for frequent use and tougher applications.
    3. Impact sockets are specifically designed to handle high torque from impact wrenches. They’re typically made from thicker, more durable steel and lack chrome plating to prevent flaking.

    For spark plugs, using impact sockets guarantees you avoid damage during removal or installation, especially in stubborn or seized plugs.

    Choose material based on your tool type and frequency of use for best results.

    Choosing Socket Depth

    Although choosing the correct socket material is important, determining the right socket depth is essential for efficient spark plug removal and installation. You need a socket deep enough to fully engage the spark plug without damaging its ceramic insulator or hex.

    A shallow socket may not accommodate longer plugs or those recessed within the engine, limiting spark plug accessibility and risking improper torque application. Conversely, an excessively deep socket can reduce your control and increase the chance of slipping.

    When selecting socket depth, consider your engine’s spark plug placement and whether extensions or swivel adapters are necessary. Opt for a socket that balances depth with accessibility, allowing you to reach and remove plugs cleanly while maintaining a secure fit for both installation and removal.

    This precision guarantees peak performance and prevents damage.

    Measuring Your Spark Plug for the Right Socket

    Determining the correct socket size starts with measuring the spark plug’s hexagonal section, which typically ranges between 5/8 inch and 13/16 inch.

    To ascertain proper socket compatibility, follow these steps:

    Follow these steps to ensure you select the correct socket size for your spark plug.

    1. Use a caliper or ruler to measure the flat-to-flat distance of the spark plug hexagon.
    2. Compare this measurement to standard socket sizes, focusing on common spark plug dimensions like 13/16″, 5/8″, and 3/4″.
    3. Select a socket that matches the measured size precisely, avoiding sockets that are too loose or tight to prevent damage.

    Accurate measurement guarantees a snug fit, enabling efficient installation and removal.

    Keeping socket compatibility in mind helps maintain the integrity of both the spark plug and your tools.

    Standard vs. Deep Spark Plug Sockets: What’s the Difference?

    How do standard and deep spark plug sockets differ, and why does it matter for your work?

    Standard sockets are shorter, designed to fit spark plug types with exposed hex sections, allowing snug engagement without extra depth.

    Deep sockets extend further, accommodating spark plugs with long threaded insulators or recessed hex shapes. This distinction guarantees socket compatibility with varying spark plug designs.

    Using a standard socket on a deep-seated plug risks incomplete engagement, increasing the chance of rounding the hex.

    Conversely, a deep socket provides clearance for longer plugs but may be cumbersome in tight spaces.

    Selecting the correct socket type based on your spark plug’s geometry optimizes torque application and prevents damage.

    Understanding this difference guarantees precision during installation or removal, safeguarding both tools and spark plugs.

    Best Tools to Use With Spark Plug Sockets

    When working with spark plug sockets, choosing the right tools guarantees efficient installation and removal while protecting both the plugs and your equipment.

    You’ll want to select tools that complement the specific spark plug and socket types, ensuring a secure fit and preventing damage. Consider these top tools:

    1. Ratchet wrench offers controlled torque and easy maneuvering in tight engine bays.
    2. Torque wrench is essential for applying the manufacturer’s recommended torque, avoiding over-tightening.
    3. Extension bar provides access to recessed spark plugs without straining the socket or plug.

    Using these tools with the correct spark plug socket type, whether standard or deep, ensures a precise fit and reduces the risk of stripping or breaking the plug during service.

    Tips to Use Spark Plug Sockets Without Damaging Plugs

    Although spark plug sockets are designed to protect plugs during removal and installation, improper use can still cause damage. To guarantee effective socket handling, always select the correct socket size to avoid stripping or cracking the spark plug’s ceramic insulator.

    Use a socket with a rubber insert or magnetic feature to secure the plug firmly, preventing it from dropping. When loosening or tightening, apply steady, controlled torque. Avoid excessive force that can fracture the plug or damage threads.

    Keep the socket and spark plug clean to maintain proper grip and prevent debris from entering the engine. Regular spark plug maintenance includes inspecting the socket for wear and replacing it if necessary to maintain precise fit and avoid mishandling.

    Following these tips preserves plug integrity and extends engine performance.

    Specialty Spark Plug Sockets for Hard-To-Reach Locations

    Selecting the right spark plug socket plays an essential role in protecting plugs, especially in tight or awkward engine spaces. When standard sockets won’t fit, specialty tools designed for hard-to-reach locations come into play.

    These sockets often feature flexible shafts, swivel joints, or extended designs to navigate confined areas without damaging the plug or surrounding components.

    To optimize your use of these specialty tools, consider these installation tips:

    1. Choose a socket with a magnetic or rubber insert to securely hold the plug during removal and installation.
    2. Use a flexible extension or universal joint to access deep or angled spark plugs.
    3. Apply steady, even torque to avoid cross-threading or breaking the plug.

    Employing the right specialty spark plug socket and following these tips guarantees efficient, damage-free installation in challenging engine layouts.

    Frequently Asked Questions

    How Often Should Spark Plugs Be Replaced?

    You should replace spark plugs every 30,000 to 100,000 miles, depending on their type and spark plug lifespan. Regularly checking guarantees ideal replacement frequency and maintains engine performance effectively.

    Can I Use a Regular Socket for Spark Plugs?

    You can’t just grab any socket; think of spark plug types as puzzle pieces, demanding exact socket compatibility. Using a regular socket risks damage. Always choose the correct spark plug socket to guarantee a perfect fit and safe removal.

    What Materials Are Spark Plug Sockets Made From?

    Spark plug sockets are usually made from chrome vanadium or chrome molybdenum steel for enhanced socket durability. These spark plug materials resist wear and corrosion, ensuring precise torque application and a secure grip on the spark plugs during installation or removal.

    How to Clean Spark Plug Sockets After Use?

    You should wipe your spark plug sockets with a clean cloth after use, removing debris and oil for effective spark plug maintenance.

    Store them in a dry, organized socket storage to prevent corrosion and damage.

    Are Magnetic Spark Plug Sockets Better?

    Yes, magnetic spark plug sockets offer magnetic advantages by securely holding plugs, improving socket performance during installation and removal. This reduces dropped plugs and enhances precision, making your work more efficient and reliable.

    Conclusion

    Think of choosing the right spark plug socket like selecting the perfect key for a lock—too big or small, and it won’t turn smoothly, risking damage. By matching your socket size precisely to the spark plug, you guarantee a secure fit and efficient removal or installation.

    Just as a locksmith relies on exact tools, you need the right socket to keep your engine’s performance flawless and avoid costly repairs. Precision matters every time.

    In conclusion, knowing the correct size socket for spark plugs ensures you work efficiently and safely, protecting both your tools and your engine.

  • What Size Does a 2011 Chevy Traverse Take Oil Filter

    What Size Does a 2011 Chevy Traverse Take Oil Filter

    Your 2011 Chevy Traverse takes the AC Delco PF47E oil filter, designed specifically for optimal oil flow and contaminant trapping. This spin-on filter ensures a proper seal, which is critical for engine longevity.

    It matches your engine specifications precisely, helping maintain performance and reliability. Changing the oil filter every 5,000 to 7,500 miles keeps your engine running smoothly and efficiently.

    If you want to confirm the fit or explore top brand options and installation tips, you’ll find detailed guidance available. Proper maintenance helps keep your Traverse in excellent condition.

    Key Takeaways

    • The 2011 Chevy Traverse typically uses the AC Delco PF47E oil filter size.
    • The PF47E filter ensures optimal oil flow and contaminant trapping for this vehicle.
    • Proper filter sealing is crucial for engine protection and longevity.
    • Confirm filter size by checking the owner’s manual or engine compartment label.
    • Cross-reference OEM part numbers to find compatible aftermarket filters.

    What Oil Filter Size Fits a 2011 Chevy Traverse?

    Although several oil filter models are compatible with the 2011 Chevy Traverse, the most commonly recommended size is the AC Delco PF47E. This filter guarantees peak oil flow, efficient contaminant trapping, and proper sealing, which are vital for engine longevity.

    When selecting an oil filter, prioritize oil filter compatibility with your vehicle’s engine specifications to avoid performance issues. You should also consider the filter’s micron rating and construction quality.

    For filter replacement tips, always drain the engine oil completely before removing the old filter to prevent spills.

    Apply a thin layer of clean oil to the new filter’s gasket to guarantee proper sealing. Tighten the filter by hand until the gasket contacts the mounting surface, then give it an additional three-quarter turn.

    These practices help maintain engine integrity and prolong filter life.

    How to Confirm the Correct Oil Filter Size for Your 2011 Traverse

    To guarantee you use the correct oil filter size for your 2011 Chevy Traverse, start by checking the vehicle’s owner manual or the engine compartment for specifications.

    These sources provide exact dimensions and part numbers, confirming oil filter compatibility.

    Next, identify the oil filter types suitable for your engine, such as spin-on or cartridge style, since the Traverse may use specific designs.

    Determine whether your Traverse requires a spin-on or cartridge oil filter for proper fit and performance.

    Cross-reference OEM part numbers with aftermarket options to confirm fitment.

    Online databases and manufacturer catalogs can help verify compatibility by matching size, threading, and sealing dimensions.

    Avoid guessing based on appearance alone; incorrect oil filter size risks leaks or engine damage.

    When and How Often Should You Change Your 2011 Traverse Oil Filter?

    Regularly changing your 2011 Chevy Traverse oil filter every 5,000 to 7,500 miles guarantees maximum engine performance and longevity. This oil change frequency aligns with manufacturer recommendations and helps prevent contaminants from circulating in the engine oil.

    For best results, replace the oil filter each time you perform an oil change to maintain proper filtration efficiency. Neglecting timely oil filter changes can lead to reduced oil flow, increased engine wear, and potential damage.

    As a key maintenance tip, monitor usage conditions. Severe driving or extreme temperatures may necessitate shorter intervals. Always consult your owner’s manual to tailor the oil change frequency to your driving habits.

    Following these maintenance tips guarantees your Traverse runs smoothly and prolongs engine life.

    Best Oil Filter Brands for Your 2011 Chevy Traverse

    Choosing the right oil filter brand for your 2011 Chevy Traverse guarantees maximum engine protection and performance. When conducting an oil filter comparison, focus on filter performance, media quality, and durability. Leading brands provide superior particle retention and flow rates, essential for your engine’s longevity.

    Brand Key Feature
    ACDelco OEM specification fit
    Bosch High-efficiency media
    Mobil 1 Synthetic blend tech
    Fram Strong anti-drainback

    Each brand excels differently; ACDelco matches OEM specs precisely, Bosch offers excellent contaminant capture, Mobil 1 enhances flow with synthetic media, and Fram provides solid value with anti-drainback valves. Choosing one depends on your priorities: OEM fidelity, filtration efficiency, or cost-effectiveness.

    How to Install the Oil Filter on a 2011 Chevy Traverse

    Although installing the oil filter on your 2011 Chevy Traverse requires careful attention, you can complete it efficiently with the right tools and steps.

    Start by draining the old oil during your oil change, then locate and remove the old oil filter using an oil filter wrench.

    Clean the mounting surface to guarantee a proper seal. Before installing the new filter, apply a thin layer of fresh oil to the rubber gasket to prevent leaks.

    Screw the new filter into place by hand, tightening it securely but avoiding over-tightening.

    After installation, refill the engine with the recommended oil and check for leaks. Proper oil filter installation is essential for effective engine maintenance and to maintain peak engine performance.

    Frequently Asked Questions

    Can I Use a Synthetic Oil Filter in My 2011 Chevy Traverse?

    You can use a synthetic oil filter in your 2011 Chevy Traverse if it matches oil filter compatibility requirements. Synthetic advantages include enhanced filtration and durability, so verify the filter fits precisely to maintain peak engine performance.

    What Are the Symptoms of a Clogged Oil Filter in a Traverse?

    You’ll notice flickering oil pressure and unusual engine noise coinciding with sluggish performance. These symptoms indicate a clogged oil filter restricting flow, causing inadequate lubrication and potential engine damage.

    Act promptly to avoid costly repairs.

    Does the Oil Filter Size Vary With Different Engine Options?

    Yes, oil filter size varies with engine options in your 2011 Chevy Traverse. You’ll need to check specific oil filter specifications for each engine type to verify proper fit and ideal filtration performance.

    Can a Used Oil Filter Be Cleaned and Reused?

    Though a used oil filter looks clean after rinsing, you shouldn’t reuse it; oil filter maintenance demands replacing filters to guarantee peak performance.

    Cleaning methods can’t restore internal media effectiveness or remove trapped contaminants fully.

    How Does Oil Filter Quality Affect Engine Performance?

    You’ll notice oil filter types directly impact engine longevity; high-quality filters trap contaminants effectively, preventing wear. Using inferior filters reduces filtration efficiency, accelerating engine damage and decreasing overall performance and lifespan.

    Choose wisely for best results.

    Conclusion

    Choosing the correct oil filter size for your 2011 Chevy Traverse is like fitting the perfect key into a lock—it guarantees ideal engine protection and performance. Always confirm the filter size using your owner’s manual or parts guide before purchase.

    Regularly changing the oil filter, following recommended intervals, maintains engine health. Using quality brands and installing the filter properly keeps your Traverse running smoothly. This prevents costly damage and extends its lifespan efficiently.

    To ensure optimal care for your vehicle, always verify the oil filter size for the 2011 Chevy Traverse before replacing it. This attention to detail helps maintain engine performance and durability.

  • Does My Car Have Shocks or Struts

    Does My Car Have Shocks or Struts

    You can tell if your car has shocks or struts by inspecting the suspension near each wheel. If you see a simple cylinder mounted between the frame and axle or control arm, those are shocks—they absorb impacts but don’t support weight.

    If the component combines a shock absorber with a coil spring and attaches directly to the steering knuckle, you have struts. Struts also handle structural support and steering.

    Understanding these differences helps maintain your vehicle properly and improves ride quality, stability, and tire wear. Exploring further reveals signs of wear and replacement essentials.

    Key Takeaways

    • Shocks are separate components mounted between the frame and axle or control arm near each wheel.
    • Struts combine the shock absorber and coil spring into one assembly supporting vehicle weight.
    • Struts connect directly to the steering knuckle and extend upward into the engine bay or wheel well.
    • If your suspension part supports steering and has a coil spring integrated, your car has struts.
    • If the suspension part is a standalone damper without spring support, your car has shocks.

    How to Tell If Your Car Has Shocks or Struts

    How can you determine whether your car is equipped with shocks or struts? First, locate the suspension components near each wheel.

    Shock absorbers are typically separate from the suspension’s structural elements, mounted between the frame and the axle or control arm.

    Shock absorbers are usually separate, positioned between the frame and the axle or control arm.

    In contrast, a strut assembly integrates a shock absorber with a coil spring and serves as a key structural part of the suspension system.

    Check if the component supports the vehicle’s weight and connects directly to the steering knuckle; that indicates a strut assembly.

    Additionally, struts usually extend upward into the engine bay or wheel well, whereas shock absorbers remain lower and isolated.

    How Shocks or Struts Differ and Affect Your Ride

    Although shocks and struts both control your vehicle’s suspension movement, they perform distinct functions that impact handling and ride comfort.

    Shocks primarily absorb and dampen the impact from road irregularities, reducing vibrations and enhancing ride comfort by controlling rebound motion.

    Struts, meanwhile, combine this damping function with structural support, bearing some of your vehicle’s weight and affecting alignment settings. This integration means struts directly influence handling performance by contributing to steering precision and vehicle stability.

    When struts wear, you may notice changes in both ride comfort and handling, as they play a critical role in maintaining suspension geometry.

    Understanding this distinction helps you appreciate how each component affects your driving experience and why proper maintenance is essential for ideal ride comfort and handling performance.

    Signs Your Shocks or Struts Need Replacement

    When your shocks or struts begin to fail, you’ll notice specific symptoms that indicate it’s time for replacement. A bumpy ride and excessive bouncing after hitting a bump are clear signs your suspension isn’t absorbing impacts properly.

    Poor handling, such as difficulty steering or instability during turns, also suggests worn shocks or struts. Check your tires; uneven tire wear can result from inadequate suspension damping.

    Difficulty steering or uneven tire wear often signals worn shocks or struts affecting suspension performance

    Inspect the shocks or struts for fluid leaks, which indicate internal seal failure compromising performance. Additionally, noise issues like clunking or rattling during driving point to damaged components.

    Addressing these symptoms promptly guarantees vehicle safety and ride quality, preventing further damage to your suspension system and tires.

    What Happens When You Replace Shocks or Struts

    Replacing your shocks or struts restores your vehicle’s suspension system to ideal performance by improving ride comfort, handling stability, and tire longevity.

    When you replace these components, you directly impact performance by reestablishing proper damping force, which controls the up-and-down movement of the wheels. This stabilizes the vehicle during acceleration, braking, and cornering.

    The ride quality greatly improves as new shocks or struts absorb road irregularities more effectively, reducing vibrations and harshness felt inside the cabin.

    Additionally, proper suspension function guarantees even tire contact with the road, minimizing uneven tire wear and extending tire life.

    How Much Replacing Shocks or Struts Typically Costs

    Restoring your vehicle’s suspension with new shocks or struts greatly improves ride quality and safety, but understanding the cost involved is important for informed maintenance decisions.

    The replacement cost for shocks typically ranges from $150 to $300 per pair, depending on the make and model.

    Expect to pay between $150 and $300 for a pair of shock replacements, varying by vehicle type.

    Struts are generally more expensive due to their complex design, with average pricing between $300 and $700 per pair. Labor costs vary, usually adding $100 to $200 per axle.

    Keep in mind, premium or performance parts may elevate the price further.

    It’s wise to replace shocks or struts in pairs to maintain balanced handling and even wear.

    Accurate cost estimates depend on your vehicle’s specifications and local labor rates, so consult a trusted mechanic for a precise quote.

    Frequently Asked Questions

    Can Shocks or Struts Affect My Car’s Braking Distance?

    Yes, shocks or struts directly impact your car’s braking performance by stabilizing the suspension system. Worn components reduce tire contact, increasing braking distance and compromising control.

    Maintaining them guarantees ideal stopping power and safety.

    Are Shocks and Struts Covered Under Car Warranties?

    Warranty coverage for shocks and struts varies by manufacturer; some include them under limited warranties. Follow maintenance tips like regular inspections to detect wear early and guarantee your warranty remains valid and effective for repairs.

    Do All Vehicles Have Either Shocks or Struts, Not Both?

    Picture your vehicle’s suspension systems as a tailored suit; depending on vehicle types, you’ll have either shocks or struts, not both. This design optimizes performance and safety, ensuring they complement rather than duplicate function.

    Can I Replace Shocks or Struts Myself Without Professional Help?

    You can tackle DIY repairs for shocks or struts if you have the right tools, like a spring compressor and wrenches.

    Make certain you follow safety protocols precisely to avoid injury or improper installation during the process.

    How Do Weather Conditions Impact the Lifespan of Shocks or Struts?

    Weather effects hit your shocks and struts like a relentless storm, accelerating wear. You’ll want to inspect for leaks, corrosion, and damage regularly.

    Proper maintenance tips include cleaning and timely replacement to extend their lifespan effectively.

    Conclusion

    Understanding whether your car has shocks or struts is like identifying the pillars holding up a bridge—they silently bear the load and guarantee smooth passage. These components play a crucial role in your vehicle’s suspension system, absorbing impacts and ensuring a comfortable ride.

    When shocks or struts wear out, your car’s stability and comfort falter, signaling it’s time for replacement. Recognizing the signs early can help you maintain control and safety on the road.

    By acting promptly, you restore balance and control, maintaining the vehicle’s engineered harmony. Investing in these essential parts safeguards your drive’s safety and performance, much like reinforcing a significant support beam. Knowing if your car has shocks or struts is key to keeping your suspension system in top shape.

  • What to Do With Old Oil Filter

    What to Do With Old Oil Filter

    You shouldn’t throw old oil filters in the trash because they contain hazardous oil and metals that can harm the environment. Proper handling of old oil filters is essential to prevent pollution and recover valuable materials.

    Instead, drain them by puncturing the dome end and letting oil drip into a pan for at least 12 hours. Store drained filters in a sealed container and take them to a certified recycling center or auto shop that accepts used filters.

    Proper disposal protects ecosystems and recovers valuable materials. Keep going to find out more about recycling options and storage tips.

    Key Takeaways

    • Drain oil filters upside down over a pan for at least 12 hours to remove residual oil safely before disposal.
    • Store drained filters in sealed, leak-proof containers labeled appropriately to prevent leaks and contamination.
    • Take fully drained oil filters to certified recycling centers or hazardous waste facilities for proper processing.
    • Avoid disposing of oil filters in regular trash to prevent soil and water pollution from toxic substances.
    • Check with local auto shops or scrap yards for oil filter recycling programs and accepted preparation methods.

    Why You Should Never Throw Old Oil Filters in the Trash

    Although it might seem convenient, you should never throw old oil filters in the trash because they contain hazardous materials that can contaminate soil and water.

    Oil filters retain residual motor oil, which contains heavy metals and toxic substances harmful to the environment. Disposing of these filters improperly leads to leaching of pollutants, negatively impacting ecosystems and groundwater quality.

    To minimize environmental impact, you must prioritize safe disposal methods. Recycling programs and designated collection centers handle used oil filters, ensuring proper treatment and recovery of valuable materials.

    By following recommended disposal protocols, you reduce hazardous waste exposure and promote sustainable resource management. Avoiding landfill disposal prevents contamination and supports environmental protection efforts.

    Your responsible actions directly contribute to safeguarding natural resources and public health.

    How to Safely Drain Oil From Your Used Oil Filter

    Before you start, gather a drain pan, gloves, and safety glasses to protect yourself and catch the oil.

    Position the used oil filter upside down over the pan to allow efficient draining of residual oil.

    Once drained, transfer the collected oil to a sealed container for proper recycling or disposal.

    Prepare Necessary Tools

    Since handling used oil filters involves exposure to hazardous fluids, you’ll need specific tools to drain them safely and efficiently.

    Start by assembling a tools checklist that includes oil filter wrenches, a drain pan with adequate capacity, and a funnel for controlled oil transfer.

    Equip yourself with proper safety gear: nitrile gloves to protect your skin, safety goggles to guard your eyes, and protective clothing to prevent contamination.

    A sturdy work surface and absorbent rags are essential for spill management.

    Verify your tools are clean and in good condition to prevent accidents.

    Having this organized setup will streamline the process and minimize exposure risks.

    Drain Oil Efficiently

    Start by securely positioning the used oil filter over your drain pan to catch all residual oil.

    To drain oil efficiently, puncture the filter’s dome end with a sharp tool, allowing oil to flow freely.

    Let it drain for at least 12 hours to guarantee minimal waste and safer handling. This process is essential in oil filter maintenance to prevent contamination and spills.

    Avoid squeezing the filter, as this can cause splatter and injury.

    If you’re considering oil filter alternatives, such as reusable or cartridge-style filters, these often simplify draining and reduce waste.

    Regardless of the filter type, proper draining minimizes environmental impact and prepares the filter for responsible disposal or recycling.

    Efficient draining is the first step in managing used oil filters safely and effectively.

    Dispose Oil Responsibly

    When you dispose of used oil filters, you must confirm that all residual oil is thoroughly drained to prevent environmental contamination.

    Start by puncturing the filter’s dome end with a specialized tool to release trapped oil quickly.

    Allow the filter to drain over a designated container for at least 12 hours to capture all remaining oil. This careful process minimizes environmental impact by preventing oil leaks during transportation or disposal.

    Once fully drained, store the filter in a sealed, leak-proof container to confirm safe disposal.

    Take the drained filters to a certified recycling or hazardous waste facility that complies with local regulations.

    Following these steps confirms you handle used oil filters responsibly, reducing pollution risks and supporting effective environmental management practices.

    Where to Recycle Old Oil Filters Near You

    You can recycle old oil filters at local recycling centers that handle automotive waste.

    Many auto shops also accept used filters for proper disposal and recycling.

    Check with nearby facilities to confirm their acceptance policies and drop-off procedures.

    Local Recycling Centers

    Local recycling centers provide a straightforward solution for disposing of old oil filters responsibly.

    These facilities are equipped to handle hazardous waste, ensuring oil residues are properly processed and metal components recycled.

    To find nearby recycling locations, check your municipality’s website or contact local waste management services.

    Many centers participate in community programs promoting safe disposal practices, often offering drop-off events or designated collection points.

    Before you visit, confirm the center’s hours and any specific preparation requirements, such as draining filters to reduce contamination.

    Utilizing local recycling centers helps prevent environmental damage and recovers valuable materials efficiently.

    Auto Shops Accepting Filters

    How can you conveniently recycle old oil filters while getting your vehicle serviced? Many auto shop locations accept used oil filters for recycling, streamlining the disposal process.

    Before dropping off your filter, verify each shop’s filter disposal policies, as requirements can vary. Some shops may require filters to be drained of residual oil, while others handle this on-site.

    Contacting the auto shop directly or checking their website can provide specific instructions and confirm acceptance. Utilizing these services not only guarantees compliance with environmental regulations but also supports proper hazardous waste management.

    By integrating oil filter recycling into your routine vehicle maintenance, you reduce environmental impact and avoid improper disposal risks.

    Seek out certified auto shops near you that participate in responsible filter recycling programs for efficient handling.

    Can You Recycle Oil Filters at Scrap Yards?

    Where can old oil filters be recycled effectively? Many scrap yards accept used oil filters, but you need to check their specific scrap yard policies first.

    These policies vary; some require filters to be drained of oil, while others accept them as-is.

    By recycling oil filters at scrap yards, you contribute to recovering valuable metals like steel, reducing landfill waste, and minimizing environmental contamination.

    To participate, make certain you store and transport filters safely to prevent oil leaks.

    Confirm if the scrap yard requires pre-treatment, such as puncturing or draining filters.

    Recycling benefits extend beyond metal recovery; they also help conserve natural resources and reduce pollution.

    Always follow the scrap yard’s guidelines to guarantee your filters are processed safely and efficiently.

    How Auto Shops Dispose of Used Oil Filters Safely

    Auto shops follow strict protocols to dispose of used oil filters safely, protecting both the environment and public health. When you bring your vehicle in, the shop adheres to specific auto shop procedures that begin with draining residual oil from the filters. This process minimizes hazardous waste.

    Next, technicians use approved filter disposal methods, such as puncturing and crushing the filters to extract trapped oil, which is then collected for recycling or proper hazardous waste handling.

    After oil extraction, the metal components are separated and sent to certified recycling facilities. These steps guarantee contaminants don’t leak into soil or water systems.

    How to Use Oil Filter Recycling Kits at Home

    Although handling used oil filters at home may seem challenging, oil filter recycling kits provide a straightforward and safe solution.

    Handling used oil filters at home can be easy and safe with the right recycling kit.

    These kits help you manage home maintenance efficiently while minimizing environmental impact.

    To use one effectively:

    1. Secure the used oil filter in the kit’s containment unit to prevent leaks.
    2. Drain residual oil completely by puncturing the filter’s dome using the kit’s specialized tool.
    3. Seal the drained filter in the provided container or bag to avoid contamination.
    4. Transport the sealed filter to a designated recycling center as instructed by the kit.

    What Happens to Oil Filters After Recycling

    Once you’ve properly prepared and delivered your used oil filter for recycling, it undergoes a specialized process to extract valuable materials. The recycling process starts by draining residual oil, then shredding the filter to separate metal from filter media.

    Steel and aluminum components are recovered for reuse, while the filter media is handled according to environmental guidelines.

    Oil Filter Materials Recycling Process Step
    Steel and Aluminum Shredding and magnetic sorting
    Filter Media Safe disposal or repurposing
    Residual Oil Draining and refining

    Why Recycling Old Oil Filters Helps the Planet

    Because oil filters contain hazardous materials and valuable metals, recycling them reduces environmental contamination and conserves natural resources.

    Recycling oil filters prevents contamination and saves precious natural resources.

    When you recycle old oil filters, you directly improve waste management efficiency and minimize their environmental impact.

    Here’s why recycling helps the planet:

    1. Prevents toxic oil and metal leakage into soil and water.
    2. Recovers steel and aluminum, reducing the need for virgin mining.
    3. Lowers greenhouse gas emissions by cutting down energy-intensive metal production.
    4. Supports circular economy practices by turning used filters into raw materials.

    Tips for Storing Old Oil Filters Before Recycling

    Properly storing old oil filters before recycling is essential to prevent leaks and guarantee safe handling. Start by draining the filters thoroughly; place them upside down over a drip pan for at least 12 hours to remove residual oil.

    Use a sealed, leak-proof container specifically designated for oil filter storage to avoid spills during transport. Label the container clearly to confirm proper identification and handling.

    Store the container in a cool, dry area away from heat sources and direct sunlight to maintain structural integrity. Avoid stacking heavy objects on top to prevent damage and potential leaks.

    Following these oil filter storage practices guarantees compliance with environmental regulations and promotes safe handling throughout the recycling process, minimizing contamination risks and facilitating efficient recycling operations.

    Frequently Asked Questions

    Can I Reuse an Old Oil Filter for a Different Vehicle?

    You can’t reuse an old oil filter for a different vehicle unless filter compatibility is confirmed. Using incompatible filters risks engine damage.

    Always prioritize proper vehicle maintenance by installing a new, correct filter each time.

    How Often Should I Change My Oil Filter?

    Imagine your engine seizing unexpectedly; that’s why you should follow the oil change frequency and filter replacement schedule precisely.

    Typically, change your oil filter every 3,000 to 5,000 miles to guarantee peak engine performance and longevity.

    Are All Oil Filters Compatible With All Types of Oil?

    No, not all oil filter types match every oil compatibility. You need to check your vehicle’s specifications to guarantee the filter suits the oil type you use, preventing performance issues or potential engine damage.

    What Tools Do I Need to Remove an Oil Filter?

    You’ll need an oil filter wrench to grip and turn the filter effectively. Master removal techniques like twisting counterclockwise and using penetrating oil if it’s stuck.

    Gloves and a drain pan also help during the process.

    Can Old Oil Filters Be Used for DIY Projects?

    You can turn old oil filters into creative oil filter crafts, transforming scrap into treasure.

    Conclusion

    Don’t toss old oil filters in the trash—they contain hazardous oil that harms the environment. You might think recycling is complicated or time-consuming, but it’s actually straightforward with proper draining and local drop-off points.

    Using oil filter recycling kits or visiting scrap yards guarantees safe disposal and resource recovery. By recycling, you’re preventing pollution and conserving metals.

    Store filters properly until recycling to keep leaks contained and make the process easier. Proper handling is key when deciding what to do with old oil filter to ensure environmental safety.

  • How Often to Replace Spark Plugs for Heavy Duty Cycle

    How Often to Replace Spark Plugs for Heavy Duty Cycle

    You should replace spark plugs for heavy duty cycle every 60,000 to 100,000 miles, depending on the plug material and how hard your engine works. Iridium and platinum plugs last longer than copper but still wear faster under severe conditions or constant high heat.

    Watch for misfires, rough idling, or decreased fuel efficiency as signs for replacement. Proper inspection and maintenance help avoid premature failure.

    Keep going to understand how types, engine load, and care impact spark plug longevity.

    Key Takeaways

    • Heavy duty spark plugs typically require replacement every 60,000 to 100,000 miles depending on material and usage conditions.
    • Frequent replacement is advised under severe driving or performance tuning to maintain optimal engine performance.
    • Inspect spark plugs regularly for wear, deposits, or damage to determine the need for earlier replacement.
    • Signs like engine misfires, rough idling, and reduced fuel efficiency indicate spark plugs may need replacement sooner.
    • Use iridium or platinum plugs for longer service intervals and reduced maintenance in heavy duty cycles.

    How Often Should You Replace Heavy Duty Spark Plugs?

    When should you replace heavy duty spark plugs to maintain peak engine performance? The replacement interval depends largely on the spark plug materials and your vehicle’s operational demands.

    Heavy duty spark plugs typically use durable materials like iridium or platinum, which extend service life to 60,000–100,000 miles compared to conventional copper plugs.

    However, if you’re engaged in performance tuning or operate under severe conditions, more frequent replacement is advisable to preserve maximum combustion efficiency.

    Keep in mind that degradation in spark plug electrodes impacts ignition timing and fuel economy.

    Regularly inspect plugs based on manufacturer recommendations and your specific engine load.

    What Are the Signs Your Heavy Duty Spark Plugs Need Replacing?

    How can you tell if your heavy duty spark plugs need replacing? Key spark plug symptoms include engine misfires, reduced fuel efficiency, and difficulty starting.

    Symptoms like engine misfires, poor fuel efficiency, and hard starts indicate it’s time to replace heavy duty spark plugs.

    You might also notice rough idling or a loss of power under load. These replacement indicators signal that the plugs are no longer firing effectively, causing incomplete combustion.

    Visually inspecting the plugs reveals further clues: excessive carbon deposits, worn electrodes, or corrosion are clear signs of wear.

    If you detect any of these symptoms or indicators, it’s important to replace the spark plugs promptly to maintain engine performance and prevent further damage.

    Monitoring these technical signs guarantees your heavy duty engine runs smoothly and efficiently throughout its service life.

    Why Do Heavy Duty Spark Plugs Wear Out Faster?

    You’ll notice heavy duty spark plugs wear out faster because they endure increased heat exposure from demanding engine conditions.

    Frequent engine strain pushes them beyond typical operational limits, accelerating electrode erosion.

    Understanding these factors helps you anticipate when to replace your spark plugs before performance degrades.

    Increased Heat Exposure

    Heavy duty spark plugs endure considerably higher temperatures than standard plugs, which accelerates wear and degradation. You face significant heat dissipation challenges as these plugs operate under intense thermal cycling effects, causing material fatigue and electrode erosion. Managing this heat is essential; otherwise, you’ll notice reduced spark efficiency and eventual misfires.

    Factor Impact on Spark Plug Resulting Issue
    Elevated Temperatures Accelerates electrode wear Shortened service life
    Heat Dissipation Limits Increases core temperature Material breakdown
    Thermal Cycling Effects Causes expansion/contraction Cracks and insulation failure
    Constant Heat Exposure Degrades ceramic insulator Misfires and poor ignition

    Understanding these factors helps you plan timely replacements and maintain ideal engine performance.

    Frequent Engine Strain

    Since engines often operate under demanding conditions, frequent strain greatly accelerates spark plug wear. When your engine undergoes heavy duty cycles, spark plugs face increased stress, resulting in faster degradation. Understanding this helps you schedule frequent maintenance to maintain peak engine performance.

    Here’s why heavy strain shortens spark plug life:

    1. Constant high RPMs increase electrode erosion.
    2. Frequent load changes cause inconsistent combustion, accelerating wear.
    3. Elevated cylinder pressure raises spark plug temperature beyond design limits.

    How Do Spark Plug Types Affect Replacement Frequency?

    You’ll find that copper spark plugs wear out faster due to their lower durability compared to iridium types, which last considerably longer.

    Platinum plugs offer a middle ground with extended lifespan, while double platinum variants enhance longevity further by protecting both electrodes.

    Understanding these differences helps you determine the ideal replacement intervals for your vehicle.

    Copper Vs. Iridium Durability

    Although both copper and iridium spark plugs serve the same fundamental purpose, their material properties considerably influence how often you need to replace them.

    Copper advantages include excellent conductivity and lower cost but shorter lifespan due to faster electrode wear. Iridium longevity stems from its higher melting point and hardness, resisting erosion and maintaining spark efficiency longer.

    Consider these factors when choosing:

    1. Copper plugs typically require replacement every 20,000 to 30,000 miles due to quicker degradation.
    2. Iridium plugs can last 60,000 to 100,000 miles, cutting maintenance frequency.
    3. Heavy duty cycles accelerate copper plug wear more than iridium, which better tolerates harsh conditions.

    You’ll save time and money by selecting plugs with durability aligned to your engine’s demands.

    Platinum Spark Plug Lifespan

    Platinum spark plugs offer a balanced combination of durability and performance that affects how frequently you need to replace them. Thanks to platinum durability, these plugs typically last longer than standard copper plugs, often reaching 60,000 to 100,000 miles under heavy-duty cycles.

    This extended lifespan results from platinum’s high melting point and resistance to electrode wear, which maintains peak spark gap and combustion efficiency. You’ll notice improved spark plug efficiency, as platinum plugs sustain consistent ignition performance over time, reducing misfires and fuel consumption.

    However, despite their durability, environmental factors and engine conditions can accelerate wear, so regular inspection remains essential.

    Choosing platinum plugs helps balance maintenance intervals and engine reliability, making them a practical option for heavy-duty applications where moderate replacement frequency aligns with performance needs.

    Impact of Double Platinum

    When evaluating spark plug types, double platinum plugs stand out for their enhanced durability and extended replacement intervals.

    Their design provides notable double platinum benefits compared to single platinum or copper plugs.

    You’ll notice a clear performance enhancement due to their ability to maintain a stable spark over longer periods.

    Here’s why they affect replacement frequency:

    1. Durability: Double platinum electrodes resist wear better, extending lifespan up to 60,000–100,000 miles.
    2. Consistency: They provide stable, efficient combustion, reducing fouling and misfires.
    3. Cost-effectiveness: Although pricier upfront, longer intervals between replacements lower overall maintenance costs.

    How Engine Load and Conditions Affect Spark Plug Life

    Because engine load and operating conditions directly influence combustion temperature and pressure, they play a critical role in determining spark plug wear.

    When your engine runs under heavy loads or extreme conditions, combustion temperatures rise, accelerating electrode erosion and degrading spark plug materials faster than in light-duty use.

    High combustion pressure stresses spark plug insulators and electrodes, reducing their lifespan.

    Additionally, varying conditions such as frequent idling, stop-and-go driving, or exposure to contaminants can impair combustion efficiency, causing fouling or misfires that further damage plugs.

    Understanding these factors helps you select spark plugs with appropriate materials like iridium or platinum that resist wear and maintain peak combustion efficiency.

    Monitoring engine load and conditions guarantees timely replacement, preventing performance loss and potential engine damage.

    Different engine types demand specific spark plug replacement intervals to maintain peak performance and prevent damage.

    The choice of spark plug materials also influences these intervals, affecting engine performance and longevity. Here’s a quick guide tailored to engine types:

    1. Gasoline Engines: Replace spark plugs every 30,000 to 50,000 miles, using iridium or platinum plugs for enhanced durability and stable engine performance.
    2. Diesel Engines with Glow Plugs: Though not traditional spark plugs, glow plugs should be inspected every 20,000 miles and replaced as needed to guarantee efficient combustion.
    3. Heavy Duty Engines: Due to high thermal and mechanical stress, replace spark plugs every 20,000 to 30,000 miles, often using specialized materials like double platinum for peak performance.

    Following these intervals helps you maintain peak engine efficiency and prevents premature wear.

    How to Inspect and Test Heavy Duty Spark Plugs

    To guarantee peak performance, start by visually inspecting your heavy duty spark plugs for signs of wear or deposits.

    Next, measure the electrode gap to verify it meets manufacturer specifications.

    Finally, conduct spark plug tests to confirm proper ignition functionality before deciding on replacement.

    Visual Spark Plug Inspection

    Although heavy duty spark plugs are built to endure tough conditions, regular visual inspection is essential to guarantee peak performance and prevent engine issues.

    When you inspect the spark plug condition, focus on these critical areas:

    1. Electrode Wear: Check the electrode for rounded edges or thinning, which indicates wear affecting spark efficiency.
    2. Deposits: Look for carbon, oil, or ash buildup on the insulator or electrode, signaling combustion problems or contamination.
    3. Cracks and Damage: Examine the porcelain insulator for cracks or chips that can cause misfires or short circuits.

    Measuring Electrode Wear

    A precise measurement of electrode wear is essential for evaluating the condition of heavy duty spark plugs and ensuring ideal engine performance. You need to measure electrode erosion accurately to decide if replacement is necessary. Use a caliper or specialized gauge to measure the gap and electrode dimensions, comparing them to manufacturer specifications.

    Parameter Acceptable Range
    Center Electrode Diameter ≥ 2.0 mm
    Ground Electrode Thickness ≥ 1.0 mm
    Electrode Gap Manufacturer Specified
    Electrode Length No significant shortening
    Signs of Erosion Minimal or none

    Consistent wear measurement helps detect excessive electrode erosion, preventing misfires and maintaining combustion efficiency.

    Conducting Spark Plug Tests

    When inspecting heavy duty spark plugs, you’ll need to perform a series of tests that assess their mechanical condition and electrical performance.

    Start by checking for electrode degradation, which affects spark efficiency.

    Next, measure spark plug conductivity using a multimeter set to resistance mode. Values outside manufacturer specs indicate a faulty plug.

    Finally, conduct a visual inspection for cracks, carbon build-up, or physical damage that can impair function.

    Here’s a quick test sequence:

    1. Examine electrode tips for wear or erosion.
    2. Measure resistance to verify spark plug conductivity.
    3. Inspect insulator and shell for damage or deposits.

    These steps help you determine if the spark plug is still reliable or needs replacement, ensuring peak engine performance under heavy duty cycles.

    How to Replace Heavy Duty Spark Plugs Safely and Effectively

    Since heavy duty spark plugs endure higher stress and temperatures, replacing them requires careful attention to safety and technique.

    First, disconnect the battery to prevent accidental electrical shocks. Wear protective gloves and eye protection as a safety precaution.

    Use a spark plug socket and ratchet to carefully remove the old plugs, avoiding damage to the cylinder head threads.

    Before installation, check the gap on the new spark plugs to match manufacturer specifications.

    Apply a small amount of anti-seize compound to the threads to guarantee proper spark plug installation and easy future removal.

    Screw in the new plugs by hand initially to prevent cross-threading, then tighten to the specified torque using a torque wrench.

    Finally, reconnect the battery and start the engine to verify proper operation.

    Tips to Extend the Life of Heavy Duty Spark Plugs

    Proper installation of heavy duty spark plugs sets the foundation for their longevity, but maintaining their performance involves additional measures.

    To maximize spark plug life and guarantee consistent performance optimization, focus on these key aspects of spark plug maintenance:

    1. Regularly inspect the plugs for wear, carbon buildup, or fouling to identify issues early and prevent engine inefficiencies.
    2. Use the correct heat range and gap settings specified by the manufacturer to avoid overheating or misfiring, which degrade spark plug durability.
    3. Maintain the ignition system components, including wires and coils, to guarantee proper voltage delivery and consistent spark quality.

    Common Mistakes That Cause Premature Spark Plug Failure

    Although spark plugs are designed for durability, several common mistakes can cause them to fail prematurely. One frequent error is neglecting proper spark plug maintenance, such as skipping regular inspections and cleaning. Deposits and wear can accumulate, reducing spark efficiency and impairing engine performance.

    Another mistake is incorrect spark plug gap settings; an improper gap causes misfires, leading to overheating and electrode damage. Using the wrong spark plug type for your engine or heavy duty cycle also accelerates failure due to incompatible heat ranges.

    Additionally, over-tightening during installation can crack the porcelain insulator, while under-tightening results in poor heat dissipation. By avoiding these errors and adhering to manufacturer guidelines, you’ll maintain peak engine performance and extend the life of your spark plugs effectively.

    Frequently Asked Questions

    Can Using the Wrong Spark Plug Gap Affect Engine Performance?

    Yes, using the wrong spark plug gap causes spark plug misfires, disrupting engine tuning. This reduces combustion efficiency, lowers power, and increases emissions.

    You should always set the gap precisely for ideal engine performance and reliability.

    How Do Spark Plug Materials Impact Ignition Efficiency?

    You’ll find that spark plug types like iridium or platinum optimize ignition timing by providing stable sparks and longer lifespan. This enhances ignition efficiency compared to copper plugs, which wear faster and may disrupt precise ignition timing.

    What Tools Are Essential for Heavy Duty Spark Plug Replacement?

    Before you grab your quill, remember essential tools for heavy duty spark plug removal: a socket wrench with a spark plug socket, a torque wrench to meet torque specifications precisely, and a gap gauge for accurate spark plug installation.

    Are Aftermarket Spark Plugs Reliable for Heavy Duty Engines?

    You can trust reputable aftermarket brands for heavy duty engines, but always check performance comparison data. Some match OEM quality, while others lag.

    Choose plugs tested for durability, heat resistance, and ignition efficiency under heavy loads.

    How Does Fuel Type Influence Spark Plug Wear and Tear?

    Think of fuel composition like different soils affecting plant roots. You’ll find that fuel type directly impacts spark plug wear by altering combustion efficiency, causing varying residue buildup and electrode erosion rates. Monitor accordingly for ideal performance.

    Conclusion

    Don’t let worn spark plugs slow your heavy-duty engine down—think of them as the heartbeat of your machine. Regular inspection and testing are key to keeping your engine running smoothly. Replace spark plugs based on your specific load and operating conditions to ensure optimal performance.

    Choosing the right type of spark plug and following proper maintenance routines can significantly extend their lifespan. This proactive approach helps you avoid costly downtime and keeps your machine reliable.

    Remember, for heavy duty cycle engines, how often to replace spark plugs depends on usage intensity and environment. Keeping your spark plugs sharp ensures your engine delivers power and reliability every mile of the way.

  • Why Do Carburetor Jets Vary in Thread Size

    Why Do Carburetor Jets Vary in Thread Size

    Carburetor jets vary in thread size because they need to fit specific carburetor models and engine requirements precisely. The thread size impacts fuel flow by ensuring proper seating and alignment, which is critical for maintaining the correct air-fuel mixture. Different engines demand distinct thread sizes to optimize performance, durability, and compatibility.

    Using the wrong thread can cause leaks or poor fuel delivery, which negatively affects engine operation. Understanding how thread size variations affect your engine helps you make informed maintenance and upgrade choices. Proper thread sizing ensures reliable fuel flow and overall engine efficiency.

    Key Takeaways

    • Carburetor jets vary in thread size to match specific carburetor models and ensure proper fit and fuel flow regulation.
    • Different engine types require distinct thread sizes to optimize fuel delivery and accommodate engine design constraints.
    • Thread size differences prevent leaks and cross-threading by providing precise seating and alignment in the carburetor body.
    • Manufacturers use various thread standards to tailor jets for performance needs and compatibility with diverse carburetor designs.
    • Variations in thread size affect internal fuel passage dimensions, influencing the air-fuel mixture and overall engine efficiency.

    What Are Carburetor Jets and Why Thread Size Matters

    Carburetor jets control the flow of fuel into the engine by regulating the mixture of air and fuel. Understanding their role is critical, as different carburetor types require specific jet configurations to optimize performance.

    Carburetor jets precisely regulate fuel flow, tailoring air-fuel mixtures to suit specific carburetor types for optimal engine performance.

    When you examine jets, you’ll notice they come in various thread sizes, which guarantee compatibility with particular carburetor models and affect sealing integrity. Jet materials, commonly brass or stainless steel, influence durability and corrosion resistance, impacting long-term fuel flow consistency.

    Selecting the correct thread size ensures a precise fit, preventing leaks and maintaining the designed fuel metering.

    As you work with jets, recognizing how thread size interfaces with carburetor types and jet materials helps you maintain engine efficiency and reliability during tuning or replacement.

    How Thread Size Affects Fuel Flow and Engine Performance

    You’ll find that the thread size directly influences the fuel delivery rate by controlling how securely the jet seats and how fuel passages align.

    A mismatched or improper thread size can restrict flow, causing inefficient combustion and reduced engine performance.

    Understanding this relationship helps you optimize engine efficiency by selecting the correct jet size for your carburetor.

    Thread Size And Fuel Delivery

    Although thread size might seem like a minor detail, it directly influences fuel delivery by determining the jet’s sealing integrity and flow capacity.

    When you select a jet with the correct thread size, you guarantee ideal thread compatibility, which prevents leaks and maintains consistent fuel mixture ratios.

    A mismatch in thread size compromises the seal, causing fluctuations in fuel flow that disrupt the precise air-fuel balance needed for efficient combustion.

    Additionally, variations in thread diameter affect the internal passage dimensions, subtly altering the volume of fuel that passes through.

    By understanding how thread size impacts these factors, you can better control fuel delivery, assuring reliable engine response and consistent performance.

    Precision in thread sizing is therefore essential for maintaining the intended fuel mixture and overall carburetor function.

    Impact On Engine Efficiency

    When thread size doesn’t match the specifications, it disrupts fuel flow rates, directly affecting engine efficiency by altering combustion dynamics.

    Incorrect thread size leads to improper jet calibration, causing inconsistent fuel atomization. This inconsistency hinders the precise mixture of air and fuel, reducing combustion quality and power output.

    You’ll notice that even minor deviations in thread dimensions can cause leaks or improper seating, which disturbs fuel delivery and alters the air-fuel ratio.

    Maintaining the correct thread size guarantees the jet fits securely, preserving ideal fuel atomization and consistent jet calibration.

    Ultimately, this precision supports efficient combustion, maximizing power and minimizing fuel consumption.

    How Engine Types Influence Carburetor Jet Thread Sizes

    You’ll find that different engine designs demand specific carburetor jet thread sizes to match their unique fuel delivery needs.

    High-performance engines often require larger or more precise threads to handle increased fuel flow rates without leakage.

    Understanding these variations helps you select the right jet for ideal engine efficiency and reliability.

    Engine Design Variations

    Because various engine designs demand specific fuel delivery characteristics, the thread size of carburetor jets often varies accordingly.

    When you examine different engine configurations, such as inline, V-type, or flat engines, you’ll notice distinct design adaptations influencing jet thread dimensions.

    For example, compact engine layouts may require smaller jets with finer threads to fit constrained carburetor bodies, while larger or multi-cylinder configurations often use coarser threads for durability and ease of maintenance.

    These adaptations guarantee ideal fuel metering aligned with the engine’s air-fuel flow dynamics.

    Additionally, variations in port orientation and carburetor mounting angles necessitate tailored jet threading to maintain sealing integrity and prevent fuel leaks.

    Understanding these engineering nuances clarifies why carburetor jets aren’t standardized but customized to match specific engine design parameters.

    Performance Requirements Differences

    Variations in engine design directly impact the performance demands placed on carburetor jets, shaping their thread sizes accordingly.

    When you consider high-performance engines, their fuel delivery requirements necessitate precise jet calibration to optimize air-fuel mixture under varying loads and speeds.

    Larger or more complex engines often require jets with robust thread sizes to withstand repeated adjustments during performance tuning without compromising seal integrity.

    Conversely, smaller or less powerful engines use finer threads, enabling delicate control over fuel flow for efficient combustion.

    Your choice of jet thread size must account for the engine’s operational parameters and tuning goals, ensuring reliable installation and consistent fuel metering.

    Ultimately, understanding how engine types influence jet calibration lets you select thread sizes that support accurate, stable performance tuning tailored to specific performance needs.

    Common Carburetor Jet Thread Sizes and Their Applications

    Carburetor jets come in several standardized thread sizes that determine their compatibility with different engine models and fuel delivery requirements.

    Understanding these sizes is essential for effective jet sizing and performance tuning.

    Here are the common thread sizes and their typical applications:

    1. M5x0.8: Widely used in small engines and motorcycles, offering fine control over fuel flow.
    2. M6x1.0: Common in automotive carburetors, balancing durability and precise fuel metering.
    3. 10-32 UNF: Found in older or specialized engines, preferred for retrofit and custom setups.
    4. M7x1.0: Utilized in high-performance engines requiring robust jets for aggressive tuning.

    Selecting the correct thread size guarantees secure installation and peak fuel delivery, directly impacting engine efficiency and responsiveness during performance tuning.

    Why Manufacturers Use Different Carburetor Jet Thread Standards

    Although standardization might seem ideal, manufacturers adopt different carburetor jet thread standards to address diverse engine designs, performance requirements, and manufacturing constraints.

    When you consider jet standardization challenges, you’ll find factors like varying thread pitch, diameter, and material compatibility complicate uniformity.

    Manufacturers must tailor thread specifications to optimize fuel flow and maintain engine efficiency across different models.

    Additionally, manufacturing inconsistencies, such as tooling variations or production tolerances, can lead to slight deviations in thread dimensions, reinforcing the need for distinct standards.

    By employing varied thread standards, manufacturers guarantee precise fitment and reliable function within their specific carburetor systems, even if it complicates cross-compatibility.

    This diversity reflects a balance between engineering precision and practical manufacturing realities rather than oversight or arbitrary choice.

    How Thread Size Affects Compatibility and Replacement Options

    When selecting replacement jets, you’ll find that thread size directly determines compatibility with your carburetor. Ignoring jet specifications can lead to compatibility issues, causing improper fit or fuel flow problems.

    Here’s how thread size impacts your options:

    1. Guarantees precise fit. Matching thread diameter and pitch prevents leaks or stripping.
    2. Limits interchangeability. Jets with different thread sizes aren’t universally compatible.
    3. Affects sourcing. Correct thread size narrows down replacement suppliers and parts.
    4. Influences performance. Improper thread size can disrupt fuel delivery and engine efficiency.

    Understanding these factors helps you avoid compatibility issues and select replacement jets that maintain peak carburetor function.

    Always verify thread specifications alongside other jet parameters for seamless integration and reliable performance.

    Key Tips for Choosing the Correct Carburetor Jet Thread Size

    Since thread size directly affects fit and function, you need to accurately identify the specifications before selecting a replacement jet.

    Begin by measuring the thread diameter and pitch using precise tools like calipers and thread gauges to avoid thread compatibility challenges.

    Cross-reference these measurements with manufacturer data or trusted jet selection techniques databases to guarantee an exact match.

    Avoid assumptions based on visual similarities, as even minor deviations can cause improper sealing or damage.

    Consider the carburetor model and year, since thread standards vary across manufacturers and production periods.

    Finally, confirm that the jet’s material and coating align with your engine’s operating environment to maintain longevity.

    Following these steps guarantees peak performance and prevents costly installation errors.

    Troubleshooting Carburetor Jet Thread Size Problems

    Accurately identifying and matching the carburetor jet thread size doesn’t eliminate all risks of fitment issues. During jet installation, you might still face challenges caused by thread compatibility.

    To troubleshoot effectively, focus on these key steps:

    To troubleshoot effectively, concentrate on visual inspection, thread pitch verification, gentle test fitting, and thorough cleaning.

    1. Inspect Threads Visually

    Look for cross-threading or damage that hinders proper engagement.

    2. Verify Thread Pitch

    Use a thread pitch gauge to confirm the jet and carburetor threads align precisely.

    3. Test Fit Without Force

    Gently insert the jet; resistance or looseness signals incompatibility or damage.

    4. Clean Threads Thoroughly

    Remove debris or corrosion that can affect thread engagement and sealing.

    How to Safely Change or Upgrade Carburetor Jets

    Changing or upgrading carburetor jets involves several critical steps to assure peak engine performance and prevent damage.

    First, ascertain you identify the correct jet thread size to avoid cross-threading or stripping. Use appropriate jet replacement techniques, such as employing proper wrenches and applying steady torque.

    Before removal, clean the area to prevent debris from entering the carburetor.

    When selecting new jets, focus on jet sizing considerations. Verify the size matches your engine’s fuel and air requirements to optimize combustion.

    After installation, inspect the seating and sealing surfaces to prevent leaks.

    Finally, test engine performance under various conditions to confirm the upgrade’s effectiveness.

    Following this methodical approach minimizes risks and enhances reliability during carburetor jet changes or upgrades.

    Frequently Asked Questions

    Can Carburetor Jet Thread Size Affect Fuel Efficiency?

    Yes, carburetor jet thread size affects fuel delivery precision, which directly impacts fuel efficiency. You’ll need proper thread sizing for accurate performance tuning, ensuring ideal air-fuel mixture and preventing inefficient combustion or fuel wastage.

    Do Thread Sizes Differ Between Two-Stroke and Four-Stroke Engines?

    You’d think thread sizes are universal, but no. They differ between two-stroke and four-stroke engines. Ensuring thread compatibility is essential for best engine performance, as mismatched jets can disrupt fuel flow and harm efficiency.

    Are There Universal Tools for Measuring Carburetor Jet Thread Size?

    You won’t find truly universal jet tools since thread sizes vary widely. Instead, use precise jet measurement techniques like thread pitch gauges and calipers to identify sizes accurately before selecting compatible tools or replacements.

    How Often Should Carburetor Jets Be Inspected for Thread Wear?

    Like clockwork in a Swiss watch, you should perform jet maintenance and thread inspection every 10-15 hours of engine use. This guarantees precise fuel flow and prevents thread wear from compromising your carburetor’s performance.

    Can Incorrect Jet Thread Size Cause Engine Flooding or Lean Conditions?

    Yes, incorrect jet thread size causes jet alignment issues and thread compatibility concerns, leading to improper fuel flow. This misalignment can result in engine flooding or lean conditions, impacting performance and risking engine damage if not promptly corrected.

    Conclusion

    When you handle carburetor jets, picture the intricate dance of fuel threading precisely through minute channels. Each thread size shapes flow and engine pulse. Choosing the right thread isn’t just about fit—it’s about tuning performance and ensuring reliability under pressure.

    By understanding thread variations and their impact, you’ll confidently select or replace jets. This knowledge helps avoid mismatches that choke power or cause leaks. Precision in thread size keeps your engine humming smoothly, like a well-oiled machine.

    Ultimately, knowing why carburetor jets vary in thread size is key to maintaining optimal engine function and achieving the best performance.