
You calibrate a carburetor by first warming the engine and ensuring the air filter and ignition are in good condition. Proper calibration is essential for optimal engine performance and fuel efficiency. Use a tachometer and vacuum gauge to monitor idle speed and air-fuel mixture.
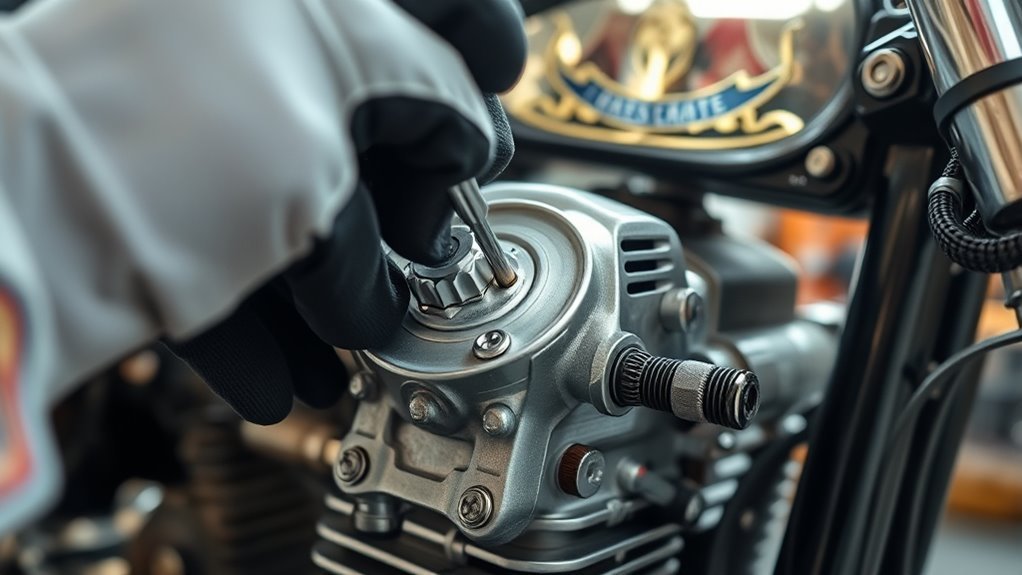
Adjust the idle speed screw for smooth RPMs, then fine-tune the mixture screws for balanced combustion. Check the throttle linkage and float level to avoid fuel imbalance. Proceed slowly, verifying each change’s effect for ideal engine performance.
Learn proper methods to prevent common mistakes and enhance tuning precision. Taking time with each step ensures reliable and efficient carburetor function.
Key Takeaways
- Warm up the engine to normal operating temperature before starting carburetor calibration for accurate adjustments.
- Use a tachometer and vacuum gauge to monitor RPM and air-fuel mixture during tuning.
- Adjust idle speed and mixture screws incrementally, checking engine response after each change.
- Inspect and ensure throttle linkage moves freely and the float level is properly set to avoid rich or lean mixtures.
- Observe engine symptoms like rough idling, black smoke, or hesitation to guide fine-tuning and prevent calibration errors.
How to Identify When Your Carburetor Needs Calibration
How can you tell when your carburetor needs calibration? Monitor key carburetor symptoms such as rough idling, engine stalling, and poor acceleration. These performance indicators suggest the air-fuel mixture is off balance.
Another sign is black smoke from the exhaust, indicating a rich mixture, or backfiring, which points to a lean mixture. Additionally, check for increased fuel consumption or difficulty starting the engine.
Use a tachometer to observe unstable RPMs during idle or acceleration. If your engine hesitates or surges under load, these are clear performance indicators that calibration is necessary.
What Tools You Need for Carburetor Calibration
Proper tools are essential for accurately calibrating your carburetor and achieving ideal engine performance. You’ll need specific carburetor tools and calibration equipment designed for precise adjustments.
Accurate carburetor calibration requires proper tools and specialized equipment for precise engine tuning.
Start with a screwdriver set, including flathead and Phillips types, to adjust screws without damaging them. A vacuum gauge helps measure manifold vacuum, critical for tuning the air-fuel mixture.
Use a tachometer to monitor engine RPM during calibration, ensuring accurate idle settings. Needle-nose pliers assist in adjusting linkage and springs safely.
Additionally, a clean cloth and carburetor cleaner are necessary to maintain parts during calibration.
Having these carburetor tools and calibration equipment ready enables you to perform systematic, accurate adjustments, preventing guesswork and ensuring your carburetor functions efficiently.
Preparing Your Engine for Carburetor Calibration
With your tools and equipment ready, you can focus on preparing the engine itself for calibration. Proper engine preparation guarantees accurate carburetor adjustments and peak performance.
Start by verifying fuel quality. Use fresh, clean gasoline to prevent clogging and inconsistent fuel delivery.
Next, warm up the engine to normal operating temperature to stabilize fuel atomization and combustion.
Then, inspect the spark plugs and ignition system. Faulty ignition can skew calibration results.
Finally, make sure the air filter is clean to maintain proper airflow.
- Use fresh fuel to guarantee consistent combustion
- Warm engine to operating temperature
- Check spark plugs and ignition components
- Clean or replace air filter as needed
These steps secure a stable baseline for precise carburetor calibration.
How to Adjust Idle Speed, Mixture Screws, Float Level, Throttle Linkage, and Choke
Start by adjusting the idle speed to guarantee the engine runs smoothly at low RPMs without stalling.
Next, fine-tune the mixture screws to achieve the ideal air-fuel ratio for efficient combustion.
These adjustments are critical for stable performance and fuel economy.
Adjusting Idle Speed
Adjusting the idle speed requires fine-tuning several components to ascertain smooth engine performance at low RPMs.
Begin your idle speed adjustment by warming up the engine to operating temperature. Use a tachometer to monitor RPMs while you perform idle speed testing.
Focus on these key areas:
Throttle linkage: Verify it moves freely without binding or excessive play.
Idle speed screw: Turn gently to increase or decrease RPM as needed.
Float level: Confirm it maintains proper fuel level to prevent rich or lean idling.
Choke mechanism: Make sure it fully disengages once warmed for stable idle.
Make incremental adjustments, checking RPM after each change.
Proper idle speed adjustment prevents stalling and rough idling, optimizing overall engine function.
Setting Mixture Screws
Although you’ve already set the idle speed, fine-tuning the mixture screws is essential to achieving the correct air-fuel ratio at idle.
Start by locating the mixture screw on the carburetor; it controls the amount of fuel entering the engine at low RPM.
Turn the screw slowly clockwise until the engine begins to falter, indicating a lean mixture, then back it out counterclockwise until the engine runs smoothly.
Use a tachometer to monitor RPM changes and aim for the highest stable idle speed.
Adjusting the mixture screw optimizes the air fuel ratio, improving combustion efficiency and reducing emissions.
Avoid over-adjusting, as a too-rich or too-lean mixture can cause poor performance or engine damage.
Once set, recheck the idle speed and make minor tweaks if necessary.
How to Avoid Common Carburetor Calibration Mistakes
When calibrating a carburetor, you’ll want to steer clear of common pitfalls that can compromise engine performance. Avoiding calibration pitfalls requires disciplined adjustment techniques and attention to detail.
First, never rush the process; precise tuning demands patience.
Second, don’t overlook the baseline settings before fine adjustments—they guarantee stability.
Third, avoid over-tightening screws, which can damage components and skew calibration.
Finally, resist the temptation to adjust without proper tools or diagnostic equipment, as this leads to inaccurate results.
Focus on these key points:
Use manufacturer-recommended tools for adjustments
Set baseline parameters before fine-tuning
Adjust screws incrementally, noting each change
Verify performance after each adjustment
Essential Carburetor Maintenance Tips for Long-Term Performance
To assure your carburetor delivers consistent performance over time, you must perform regular maintenance tasks that prevent buildup and wear. Prioritize carburetor cleaning using approved solvents to remove varnish and deposits.
Always use high fuel quality to minimize contaminants that clog jets and passages. Inspect gaskets and seals for leaks and replace them promptly.
Lubricate moving parts as specified in your carburetor manual to reduce friction and wear.
| Maintenance Task | Frequency | Key Benefit |
|---|---|---|
| Carburetor cleaning | Every 6 months | Prevents clogging and buildup |
| Fuel quality check | Before each fill | Assures clean combustion |
| Gasket/seal inspection | Annually | Prevents fuel and air leaks |
| Lubrication | Every 3 months | Extends component life |
| Air filter replacement | Every 12 months | Maintains proper airflow |
How to Test Your Carburetor Calibration on the Road
Maintaining your carburetor’s cleanliness and component integrity sets the stage for accurate calibration.
To test your carburetor calibration on the road effectively, focus on collecting precise carburetor feedback via real-world performance.
Start by monitoring these critical aspects:
- Engine idle stability during stops
- Acceleration response when increasing throttle
- Fuel efficiency under varying speeds
- Engine temperature consistency during extended runs
Drive on different terrains to evaluate road performance thoroughly.
Note any hesitation, stalling, or uneven throttle response, which indicate calibration adjustments.
Use a diagnostic tool if available to track real-time air-fuel ratio changes.
This hands-on testing confirms if your carburetor delivers ideal fuel mixture, ensuring reliable engine operation and efficient combustion.
Adjust calibration settings based on observed feedback for peak performance.
Troubleshooting Common Carburetor Calibration Issues
If your engine runs rough or stalls, you likely have an air-fuel imbalance that needs correction.
Start by checking the mixture screws and adjusting them carefully to stabilize the ratio.
Next, address any idle speed fluctuations by inspecting the idle circuit and making precise adjustments to the idle screw.
Identifying Air-Fuel Imbalance
Although a properly calibrated carburetor guarantees peak engine performance, you’ll often encounter issues caused by an air-fuel imbalance. This imbalance disrupts the ideal air fuel ratio, leading to specific calibration symptoms you need to identify quickly.
Watch for:
- Rough idling or engine stalling
- Black smoke from the exhaust indicating a rich mixture
- Hesitation or poor acceleration signaling a lean mixture
- Increased fuel consumption or overheating
Use these symptoms as diagnostic clues. Check the carburetor jets and adjust the mixture screws to restore the correct air fuel ratio.
Precise identification of these signs enables timely corrections, ensuring efficient combustion and engine longevity.
Keep a log of symptoms and adjustments for reference during fine-tuning.
Resolving Idle Speed Fluctuations
Recognizing air-fuel imbalance symptoms is only the first step; correcting idle speed fluctuations often requires careful troubleshooting of the carburetor’s components.
Begin by inspecting for vacuum leaks, which can cause erratic idle speed by allowing unmetered air into the intake manifold.
Use a carburetor cleaner or a propane torch around intake gaskets, vacuum lines, and carburetor base while the engine is running; changes in idle speed indicate leaks.
Next, check the idle speed screw and idle mixture screw settings, adjusting them incrementally to stabilize idle speed.
Confirm the throttle linkage moves freely without sticking.
Finally, verify that the accelerator pump and choke mechanism operate correctly, as malfunctions here can also disrupt idle consistency.
Performing these precise adjustments will help maintain steady idle speed and peak engine performance.
How to Fine-Tune Your Carburetor for Optimal Performance
To fine-tune your carburetor for peak performance, start by adjusting the idle mixture screws to achieve a smooth and stable engine idle. Precise carburetor tuning is essential for performance enhancement and fuel efficiency.
After idle adjustment, proceed with these steps:
Warm up the engine to operating temperature to guarantee accurate settings.
Adjust the throttle linkage to maximize throttle response.
Check and set the float level for proper fuel delivery.
Inspect and tune the accelerator pump for immediate throttle response.
Each adjustment affects air-fuel mixture and engine behavior. Use a tachometer and vacuum gauge to monitor changes during tuning.
Fine-tuning guarantees your carburetor delivers ideal fuel atomization, enhancing power output and reducing emissions.
Maintain systematic tuning for consistent, reliable engine performance.
Frequently Asked Questions
Can I Calibrate a Carburetor Without Removing It From the Engine?
Yes, you can perform carburetor tuning without removing it by adjusting screws on the engine. This method fine-tunes fuel-air mixture and idle speed, improving engine performance efficiently without disassembly or specialized tools.
How Often Should Carburetor Calibration Be Performed on a New Engine?
Don’t worry calibration isn’t constant; perform initial calibration frequency during the engine break-in period, typically every 10-20 hours. This guarantees peak performance as parts settle, preventing long-term issues and maintaining efficient fuel-air mixture ratios.
What Are the Signs of a Carburetor Being Over-Calibrated?
You’ll notice poor carburetor performance, such as rough idling and black smoke, indicating over-calibration. Use precise calibration tools to adjust fuel mixture and air flow, restoring ideal engine function and preventing damage.
Can Weather Conditions Affect Carburetor Calibration Settings?
Can you ignore humidity effects and altitude adjustments when calibrating? You can’t. Both greatly impact air-fuel mixture density, so you must adjust settings precisely to guarantee peak engine performance under varying weather conditions.
Is Professional Calibration Necessary for Vintage Carburetors?
You don’t always need professional calibration for vintage carburetors, but mastering precise calibration techniques guarantees ideal vintage performance.
If you’re unfamiliar with adjustments, seeking expert help prevents damage and maintains engine efficiency.
Conclusion
By carefully calibrating your carburetor, you’ll transform a hesitant engine into a smooth-running machine, like tuning a delicate instrument. As you adjust idle speed, mixture screws, and float levels, picture the precise dance of fuel and air igniting perfectly.
Avoid common mistakes, maintain regularly, and test thoroughly to guarantee reliability. With each fine-tune, you’re not just fixing a part—you’re optimizing performance.
Assuring every journey starts with confident power and flawless efficiency is the ultimate goal of how to calibrate a carburetor.