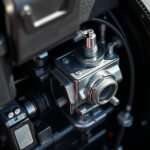
You’ll want to start by safely removing the carburetor—disconnect the battery, shut off fuel, and label all connections. Rebuilding a carburetor begins with careful disassembly, inspecting each part for wear, cracks, or clogs.
Use a quality rebuild kit to replace gaskets, jets, and needles. Clean components thoroughly with carburetor cleaner and compressed air.
Once reassembled, fine-tune settings like idle mixture, choke, and idle speed for peak performance. Understanding each step guarantees your carburetor runs smoothly and efficiently.
Key Takeaways
- Disconnect battery and fuel supply, label connections, then carefully remove the carburetor from the engine.
- Disassemble carburetor components, inspect for wear or damage, and replace faulty gaskets, jets, and needles.
- Clean all passages and parts thoroughly using carburetor cleaner and compressed air to remove debris.
- Reassemble parts precisely, ensuring proper placement of linkages, springs, and seals for accurate function.
- Adjust idle mixture, idle speed, vacuum lines, and choke for optimal carburetor performance and fuel efficiency.
How to Know When Your Carburetor Needs Rebuilding
How can you tell when your carburetor needs rebuilding? Start by identifying clear symptoms of failure. Common signs include rough idling, engine stalling, and difficulty starting.
Signs your carburetor needs rebuilding include rough idling, stalling, and trouble starting the engine.
You might notice decreased fuel efficiency or black smoke from the exhaust, indicating improper air-fuel mixture. Performance issues such as hesitation during acceleration or inconsistent engine speed also signal carburetor problems.
Inspect for fuel leaks and check if the throttle response feels sluggish or sticky. If your engine floods frequently, it’s another red flag.
These symptoms of failure point to worn gaskets, clogged jets, or deteriorated internal components. By carefully diagnosing these indicators, you can determine when a rebuild is necessary, preventing further engine damage and restoring peak performance.
Don’t ignore these warning signs to maintain reliable operation.
Essential Tools and Rebuild Kits You’ll Need
Recognizing when your carburetor needs rebuilding sets the stage for gathering the right tools and parts to complete the job effectively.
To guarantee a smooth rebuild, you’ll want to invest in quality rebuild kit options specific to your carburetor model.
Alongside these, having the essential tools at hand is vital for precision and efficiency.
Here’s what you’ll need:
- A detailed rebuild kit containing gaskets, seals, needles, and jets tailored to your carburetor.
- Basic hand tools like screwdrivers, wrenches, and pliers designed for small, delicate components.
- Precision measuring instruments such as a caliper and a small wire gauge to verify component dimensions.
With these tools and kits, you’ll be well-prepared to perform an accurate and thorough carburetor rebuild.
Safely Removing the Carburetor From Your Engine
Before you start, disconnect the battery and shut off the fuel supply to prevent any hazards.
Carefully label each connection to guarantee proper reassembly later.
Then, methodically remove all linkages, hoses, and bolts securing the carburetor to the engine.
Disconnect Fuel And Battery
Two critical steps guarantee safety when removing the carburetor: disconnecting the fuel line and disconnecting the battery.
Start by relieving fuel system pressure to prevent spills or fire hazards. Then follow these steps:
- Locate the fuel line attached to the carburetor and use a wrench to loosen the fitting. Carefully detach the fuel line, catching any residual fuel with a rag or container.
- Identify the battery terminal connected to the negative cable. Use a wrench to loosen the nut on the terminal clamp.
- Remove the negative battery terminal first to break the electrical circuit safely, preventing accidental shorts or sparks during work.
Completing these steps assures the engine is safe to work on and minimizes risks before you proceed to remove the carburetor.
Label And Remove Connections
With the fuel line disconnected and the battery safely isolated, you can now focus on labeling and removing the various connections attached to the carburetor.
Begin by identifying each connection type: vacuum hoses, throttle linkages, choke cables, and electrical connectors.
Use clear labeling techniques such as numbered tags or color-coded tape to mark each connection precisely. This guarantees easy reassembly and prevents confusion.
Carefully detach each connection, noting its orientation and attachment point.
Use appropriate tools to avoid damage, especially on delicate vacuum ports and electrical terminals.
Keep all fasteners organized and paired with their respective components.
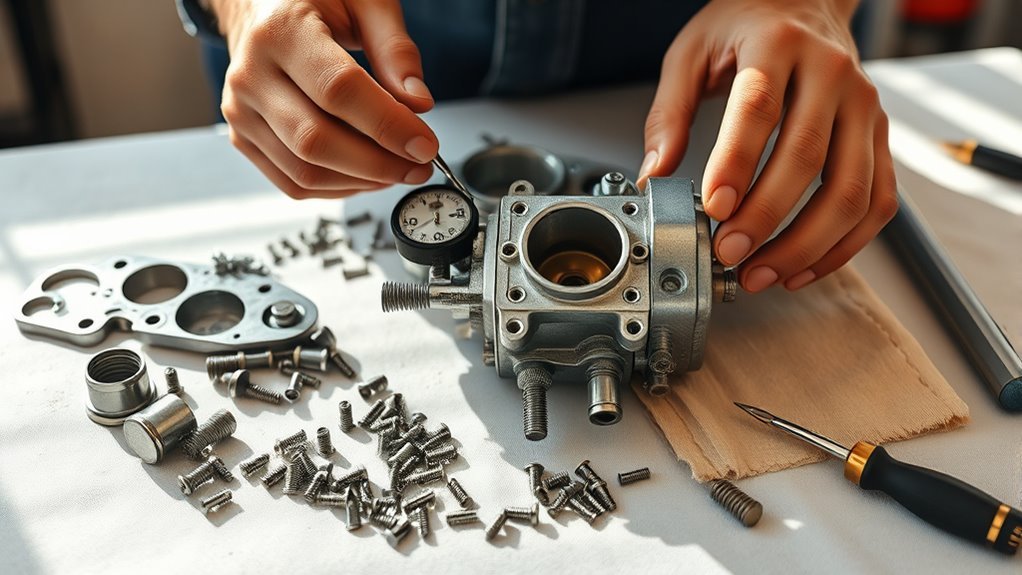
Disassembling and Inspecting Carburetor Parts
Start by carefully removing all external components, such as screws, linkages, and gaskets, to avoid damage.
Then, inspect each part for signs of wear, cracks, or deformation that could affect performance.
Finally, examine the passages closely to identify any clogs or debris that need thorough cleaning before reassembly.
Removing External Components
Before you begin disassembling the carburetor, verify the engine is cool and the fuel supply is shut off to prevent hazards.
Removing external components requires care, especially since carburetor types vary in design.
Follow these maintenance tips for efficient removal:
- Detach linkages and springs carefully, noting their positions to guarantee correct reassembly.
- Unscrew the float bowl and remove it, exposing the jets and needle valves.
- Use appropriate tools to remove the choke and throttle assemblies without damaging seals or gaskets.
Label and organize all parts systematically.
This precision prevents confusion and damage during rebuilding.
Checking For Wear
Three critical steps guide you as you disassemble and inspect carburetor parts for wear: carefully separate components, examine each for damage or deterioration, and identify areas needing replacement or cleaning. Focus on wear indicators like grooves, cracks, or corrosion that signal compromised performance.
Common damages include warped throttle plates, eroded needle valves, and cracked gaskets. Use the table below to stay alert to symptoms and emotional cues that emphasize the importance of thorough inspection.
| Symptom | Emotion Triggered |
|---|---|
| Cracked gasket | Frustration |
| Warped throttle | Urgency |
| Corroded components | Concern |
| Needle valve wear | Caution |
| Loose parts | Vigilance |
Identifying Clogged Passages
How do you pinpoint clogged passages within your carburetor during disassembly? Start by recognizing common carburetor symptoms like rough idling, hesitation, or poor acceleration, which often indicate passage blockages.
Then, carefully inspect each component for buildup or debris.
Follow these steps to identify clogged passages:
- Visually examine jets, ports, and passages for varnish, dirt, or corrosion.
- Use compressed air to blow through each passage; resistance or no airflow confirms blockage.
- Employ a thin wire or specialized carburetor cleaning tool to gently clear obstructions without damaging passages.
Cleaning and Replacing Worn Carburetor Components
Although cleaning the carburetor is essential, replacing worn components guarantees peak performance and prevents future issues.
Begin by inspecting gaskets, O-rings, and diaphragms for cracks, brittleness, or deformation. Replace these with exact-match parts to maintain carburetor integrity.
Examine throttle shafts and bushings for excessive wear or play; worn shafts cause air leaks that disrupt fuel mixture.
Swap damaged jets and needles to secure consistent fuel flow.
Use carburetor cleaner and compressed air to remove debris from all passages before assembly.
Prioritize carburetor maintenance to improve parts longevity and engine efficiency.
This process minimizes the risk of malfunctions and extends the carburetor’s service life, securing your engine runs smoothly and reliably.
Reassembling the Carburetor and Fine-Tuning Settings
Begin by carefully aligning each cleaned and replaced component within the carburetor body, guaranteeing all gaskets and seals sit flush to prevent air or fuel leaks.
Follow these reassembling tips to maintain proper function:
- Tighten screws and bolts incrementally in a crisscross pattern to avoid warping the carburetor body.
- Reinstall the float and needle valve, guaranteeing the float height matches the manufacturer’s specifications.
- Attach linkages and springs, verifying smooth, unrestricted movement.
After reassembly, apply fine tuning techniques to optimize performance.
Adjust the idle mixture screw to achieve a steady idle, then set the idle speed screw to the recommended RPM.
Finally, check for vacuum leaks and adjust the choke for smooth cold starts. These steps guarantee precise carburetor operation and fuel efficiency.
Frequently Asked Questions
Can I Rebuild a Carburetor Without Prior Mechanical Experience?
You can rebuild a carburetor without prior experience if you follow clear step instructions carefully and use basic tools.
Patience and attention to detail are essential to guarantee each component is cleaned and reassembled correctly.
How Often Should I Rebuild My Carburetor for Optimal Performance?
You should rebuild your carburetor every 12,000 miles or annually to avoid performance drops that feel like your engine’s caught in a hurricane. Regular carburetor maintenance guarantees precise performance tuning and peak engine efficiency.
What Are the Common Causes of Carburetor Failure?
You’ll commonly face carburetor failure due to fuel leaks, clogged jets, worn gaskets, or stuck floats. Regularly inspect and clean these components to maintain peak fuel flow and prevent engine performance issues.
Is It Better to Rebuild or Replace a Carburetor?
You’ll usually find rebuild benefits outweigh replacement costs, especially if your carburetor’s core components are intact. Rebuilding saves money, restores performance, and allows precise tuning, whereas replacement can be pricier and less customizable.
How Can Fuel Quality Affect Carburetor Function?
Like tuning a Victorian steam engine, you must guarantee fuel quality; low octane rating or poor fuel additives cause deposits, clog jets, and disrupt carburetor function.
Use high-octane fuel with proper additives to maintain peak performance.
Conclusion
Rebuilding your carburetor can restore engine efficiency, especially since studies show that up to 80% of small engine failures stem from carburetor issues. By following precise steps—removing, cleaning, inspecting, and reassembling—you’ll extend your engine’s life and improve performance.
Remember to use the right tools and replace worn parts carefully to guarantee the ideal fuel-air mixture. With attention to detail, you’ll have your carburetor running smoothly and reliably in no time.
In conclusion, mastering how to rebuild a carburetor is essential for maintaining optimal engine function and longevity.